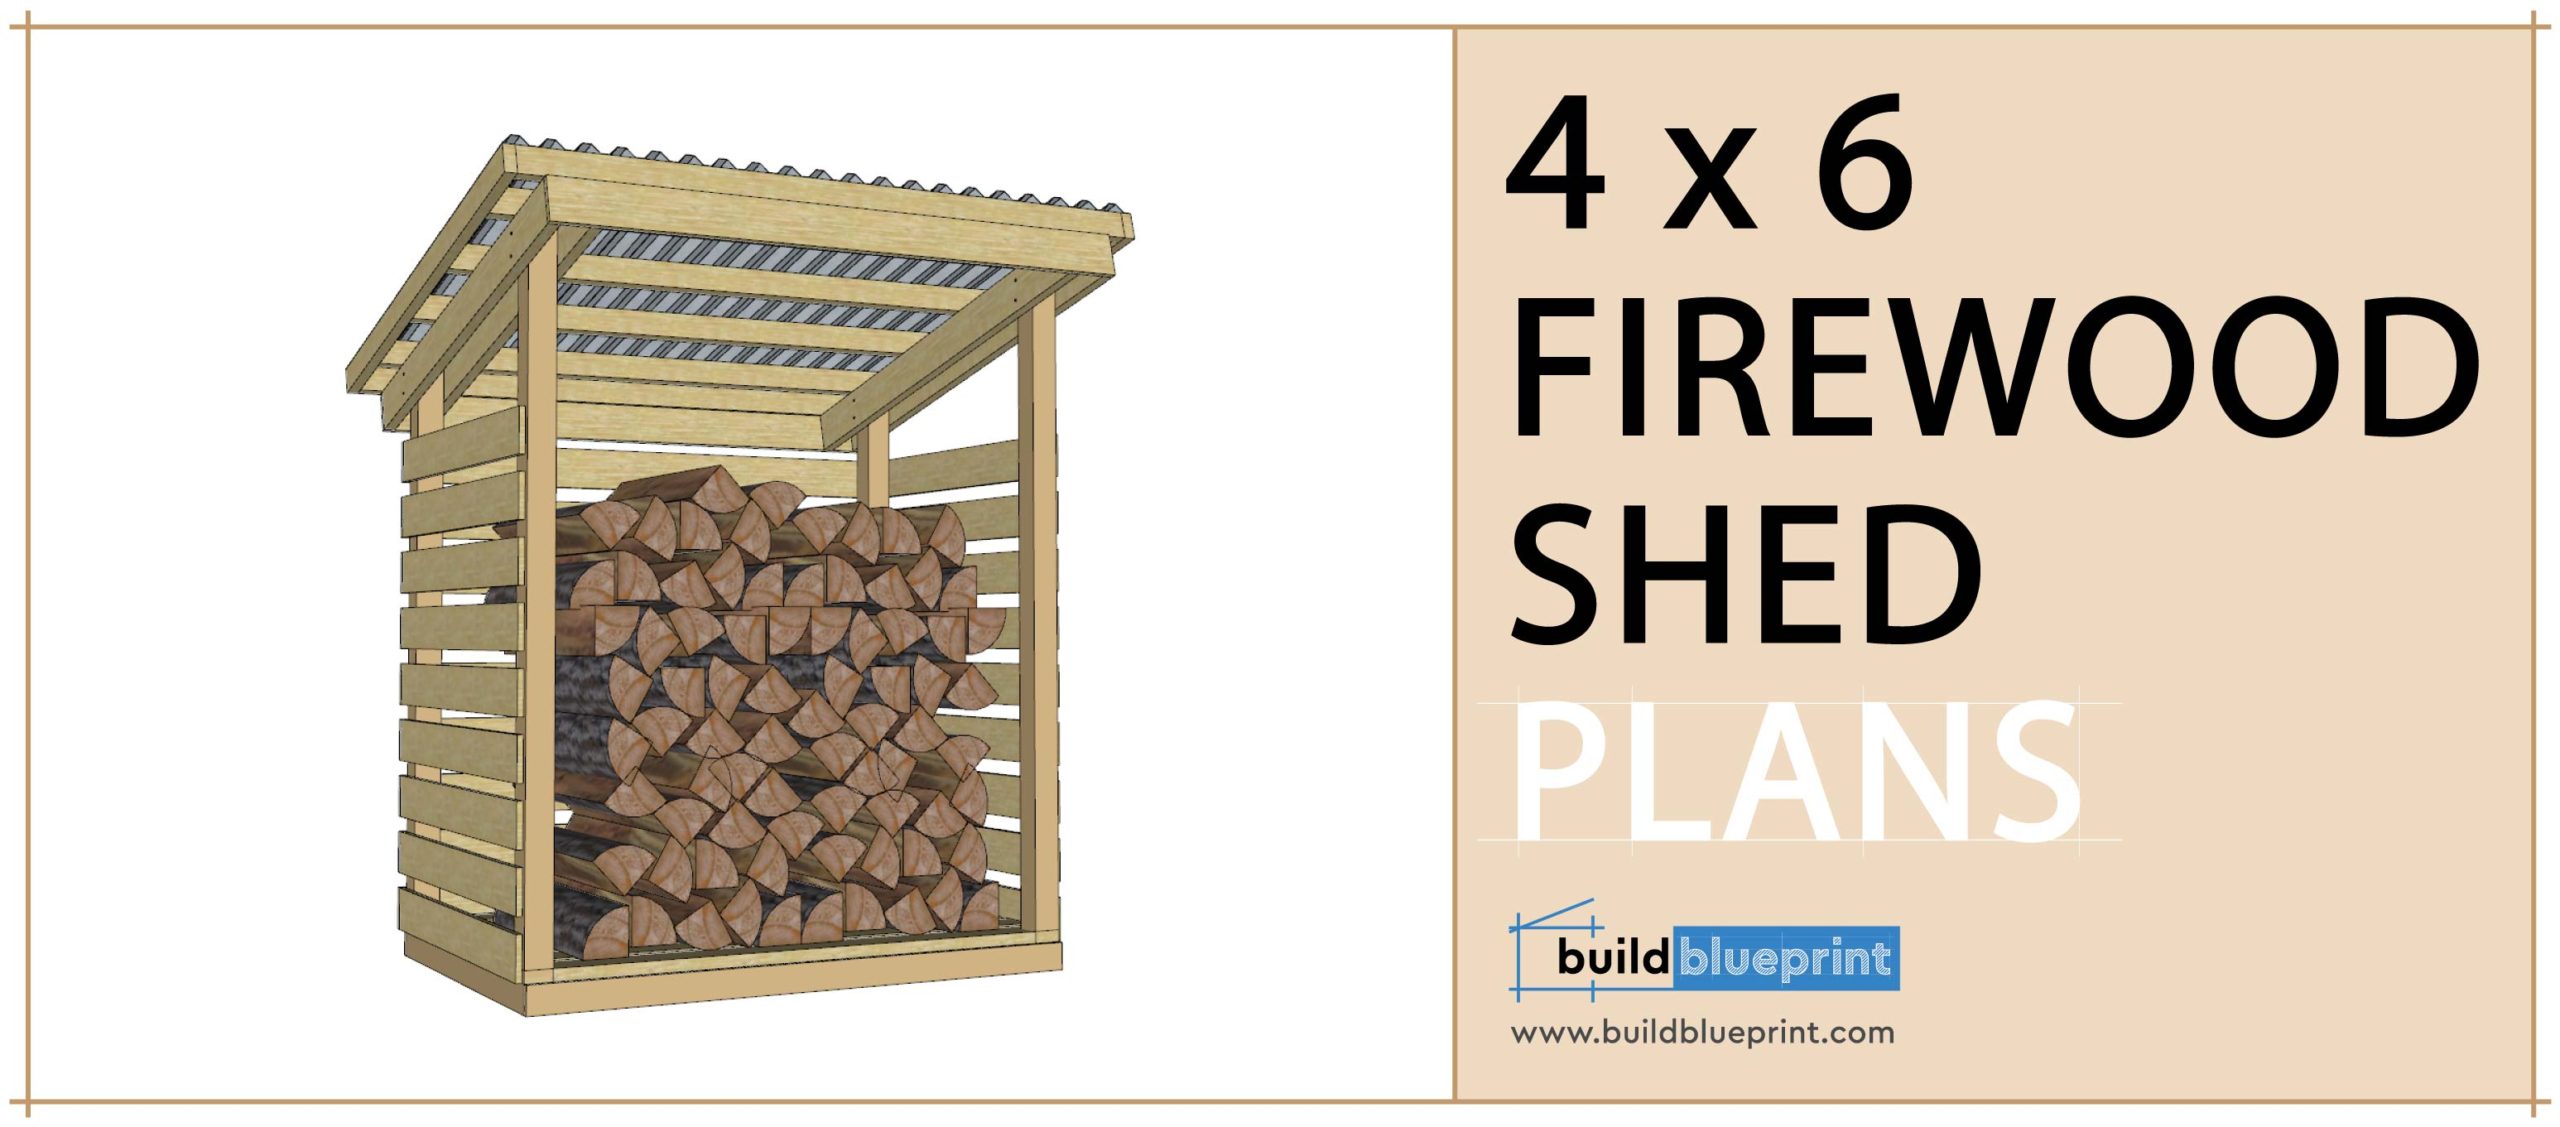
4×6 Firewood Shed Plans | 1 Cord Firewood Shed DIY
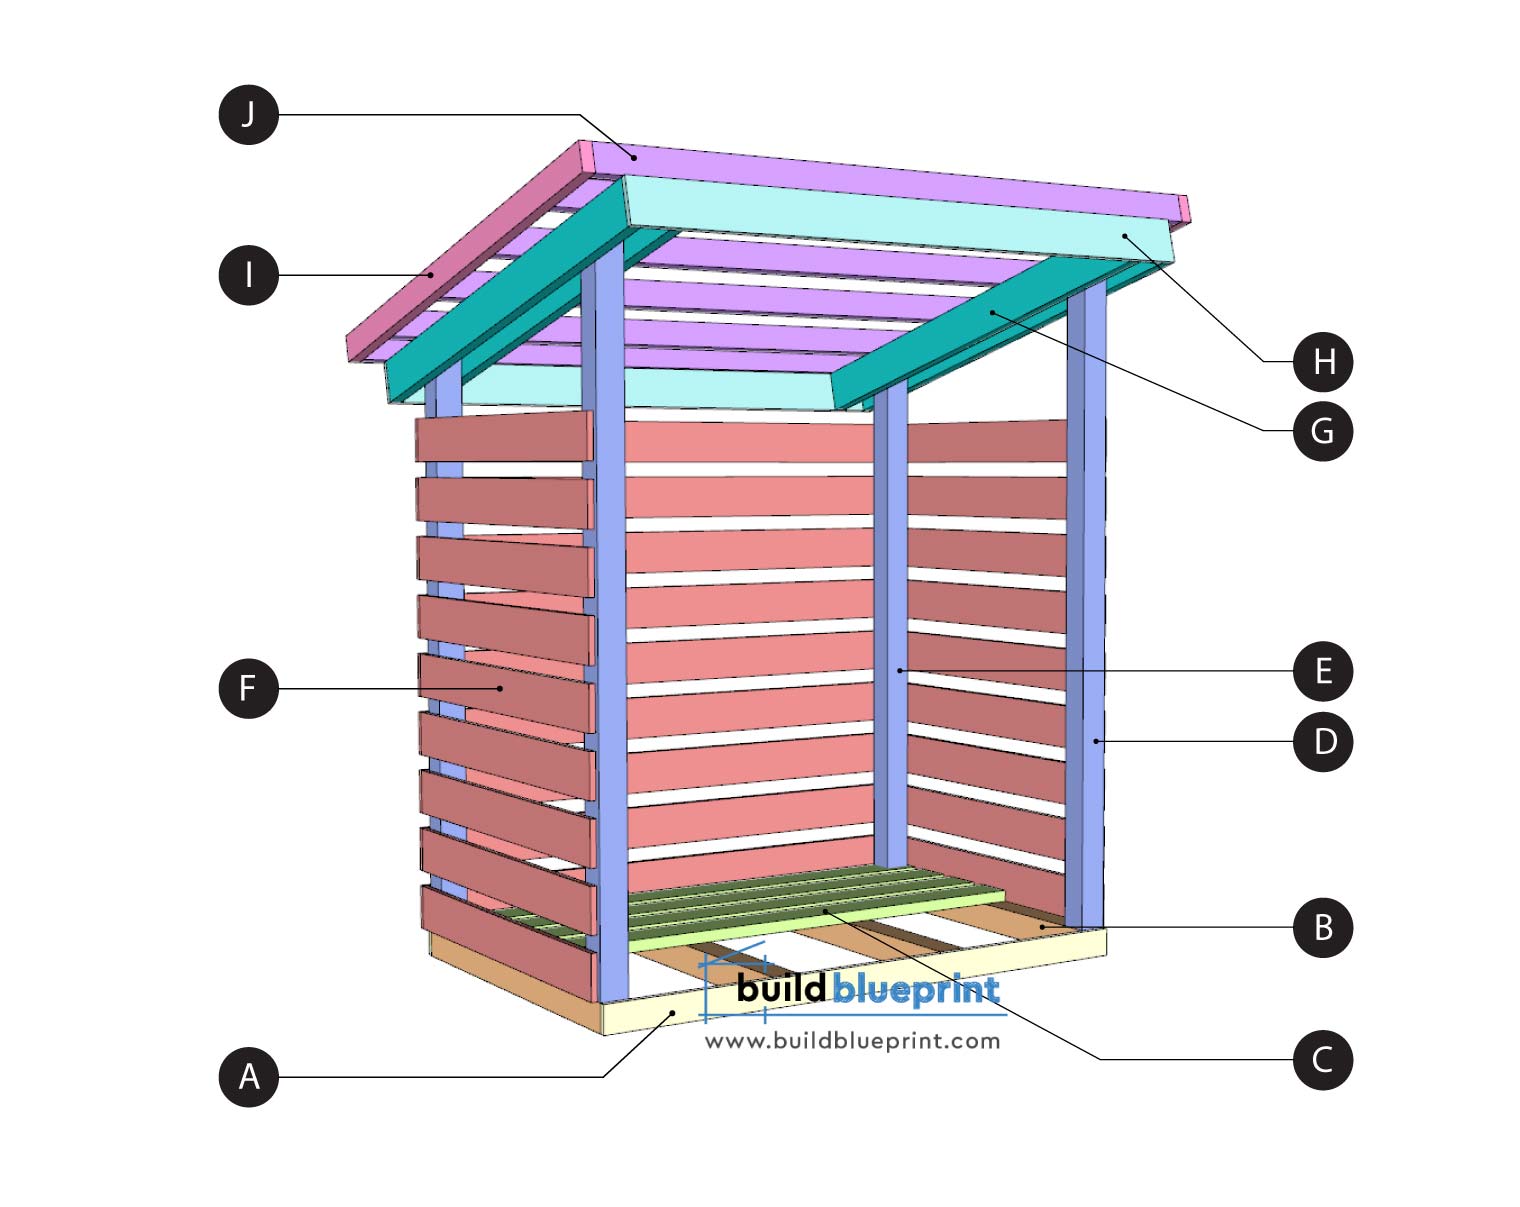
Material and Cut List
FLOOR
(A) 2 – 1×4 Floor Joist: 6′
(B) 4 – 4×4 Skid Foundation: 4′
(C) 7 – 2×4 Floor Deck: 6′
WALLS
(D) 2 – 4×4 Lumber: 7′-2 1/2″
(E) 2 – 4×4 Lumber: 6′-3 3/8″
SIDINGS
(F) 18 – 1×4 Lumber: 4′
(F) 9 – 1×4 Lumber: 6′-1 1/2″
ROOF
(G) 4 – 2×6 Rafter: 5′-8 1/2″
(H) 2 – 1×6 Lumber: 6′-3″
(I) 2 – 2×4 Lumber: 5′-10″
(J) 6 – 2×4 Purlin: 6′-9″
Corrugated Metal Roofing: 41SF
HARDWARE
3 1/2″ Galvanized Steel Nails
2″ Deck Screws
2″ Galvanized Finishing Nails
PROJECT TOOLS
Recommended woodworking tools for this project
4×6 Firewood Shed Plans & Instructions
Step 1 – Foundation and Support
At first, select an appropriate site for the firewood shed foundation, placing the backside of the firewood shed against a structure helps to increase protection from strong wind and rain.
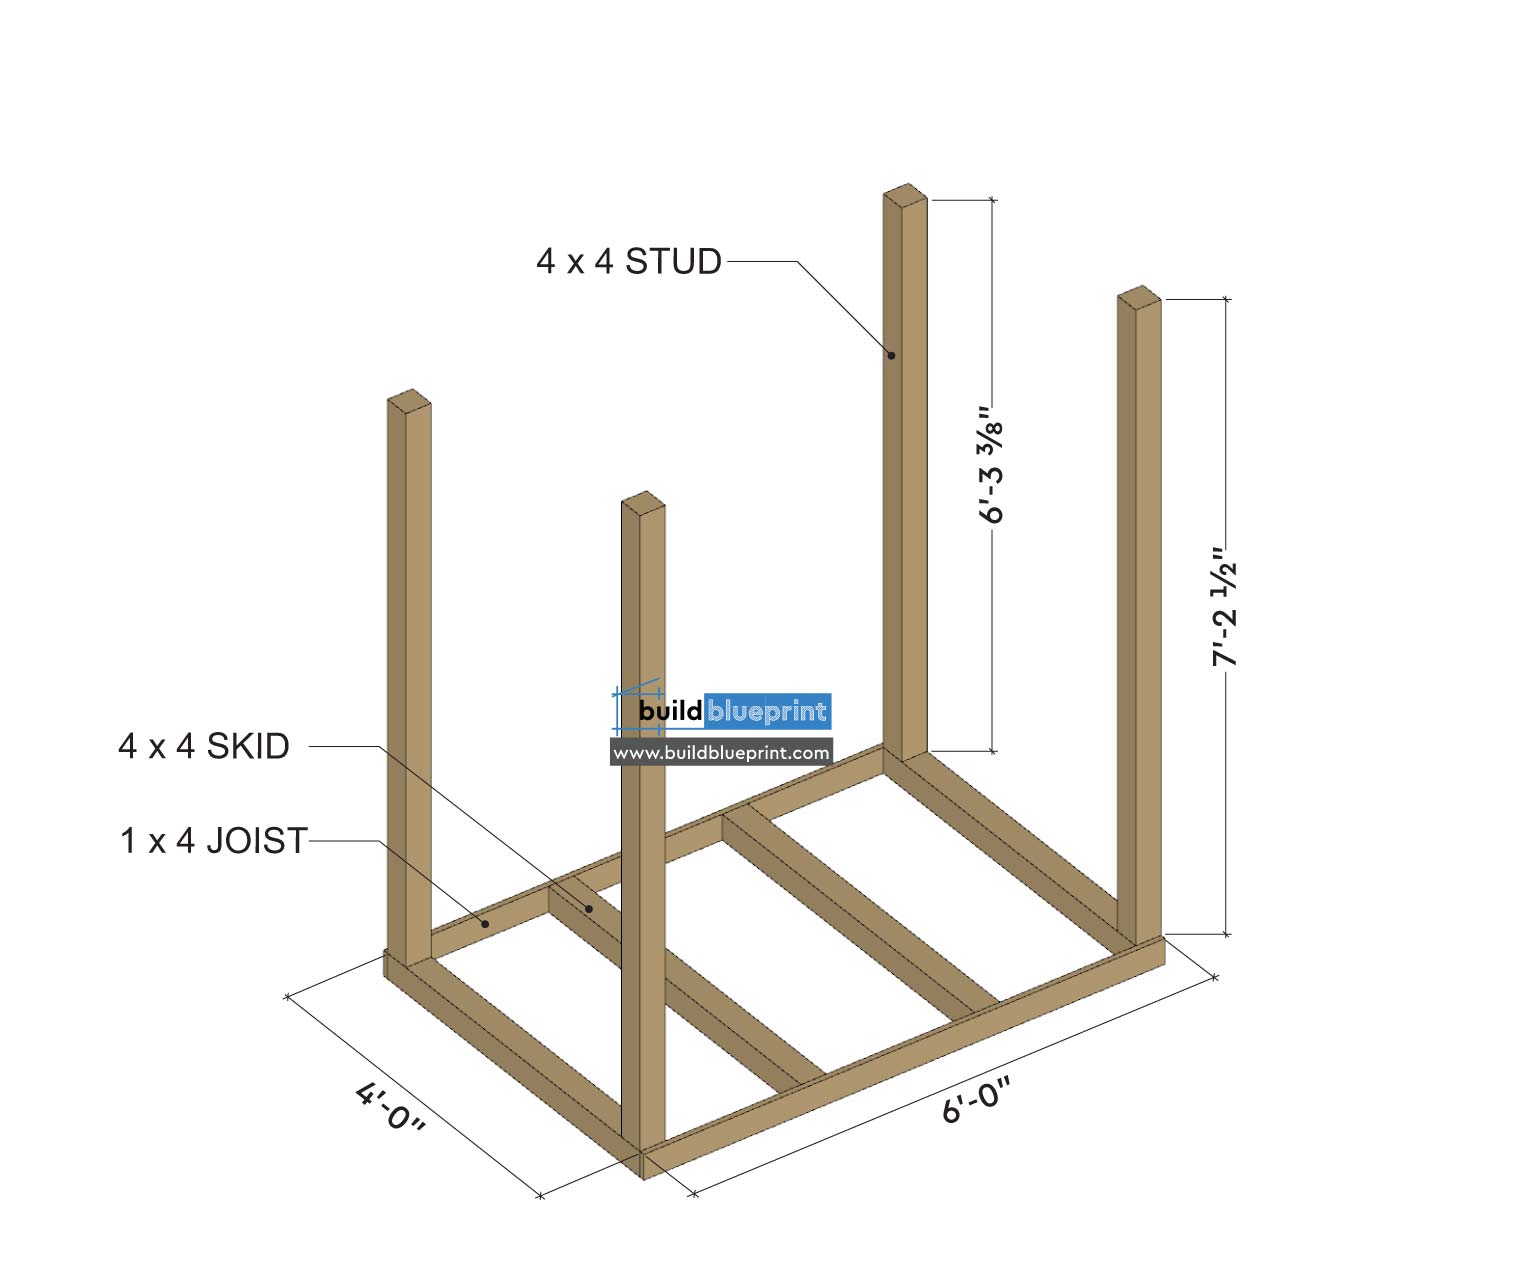
Once you select a site, cut four 4×4 lumbers to 4′-0″ length, these will be used as the skid foundation. Then, cut two 1×6 lumbers to 6’-0″, for perimeter floor joists. Arrange the 4×4 skids evenly spaced 24″ O.C. as illustrated in the diagram below, drill pilot holes into the joists and secure with 3 1/2″ screws.
Next, cut two sets of 4×4 lumbers to 7′-2 1/2″ and 6′-3 3/8″ to be used as studs. Then, position the 4×4 directly on top of the skid foundation, with the longer pieces in the front of the shed.
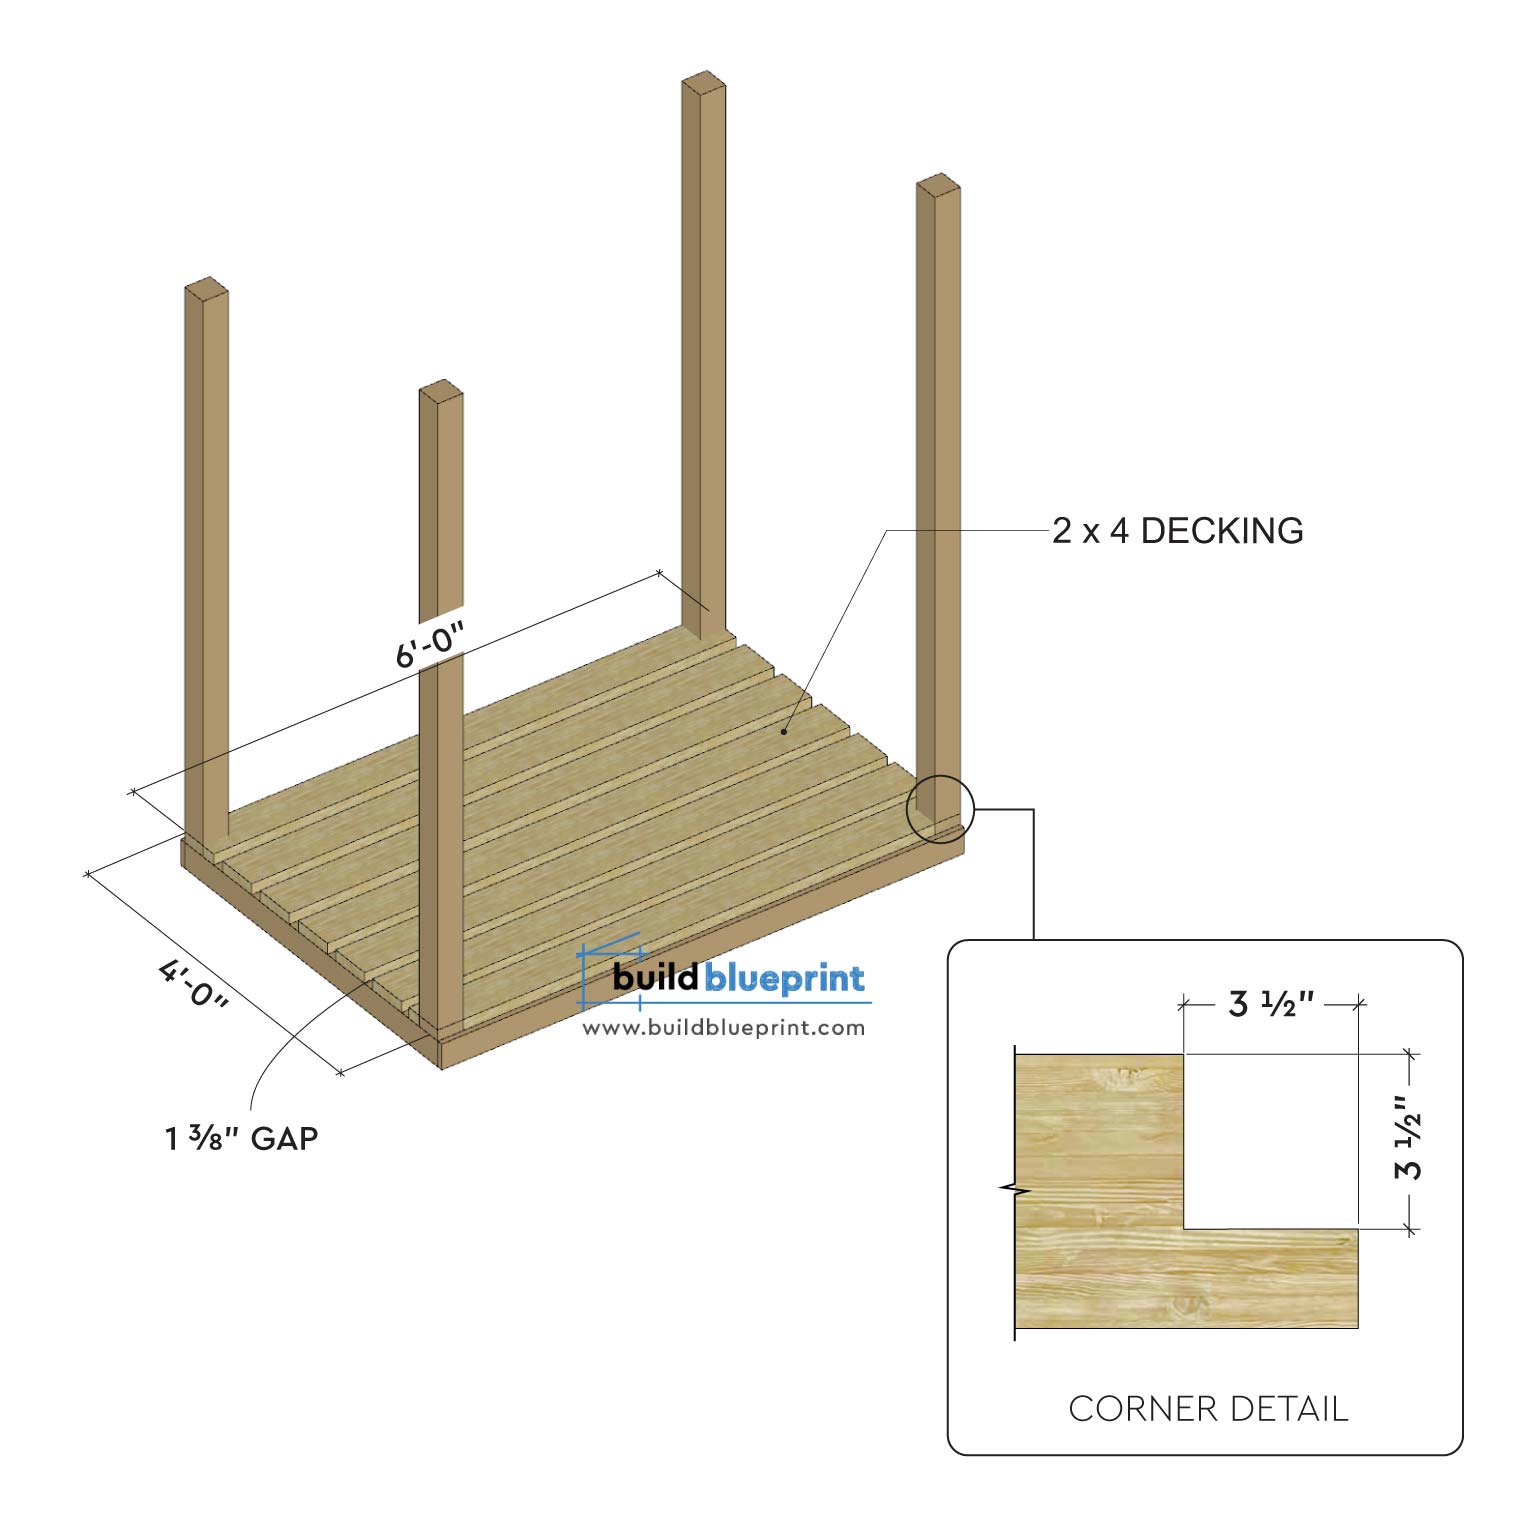
The floor deck is made up of seven 2×4’s in 6′ length, placed evenly across the foundation, with about 1 3/8″ gap in-between each lumber. Cut out a 3 1/2″ x 3 1/2″ corner for the two end 2×4 pieces, to fit into the 4×4 studs neatly. Then, drill pilot holes and secure in place with 3 1/2″ screws, directly attaching to the 4×4 skid below.
Step 2 – Rafters and Roofing
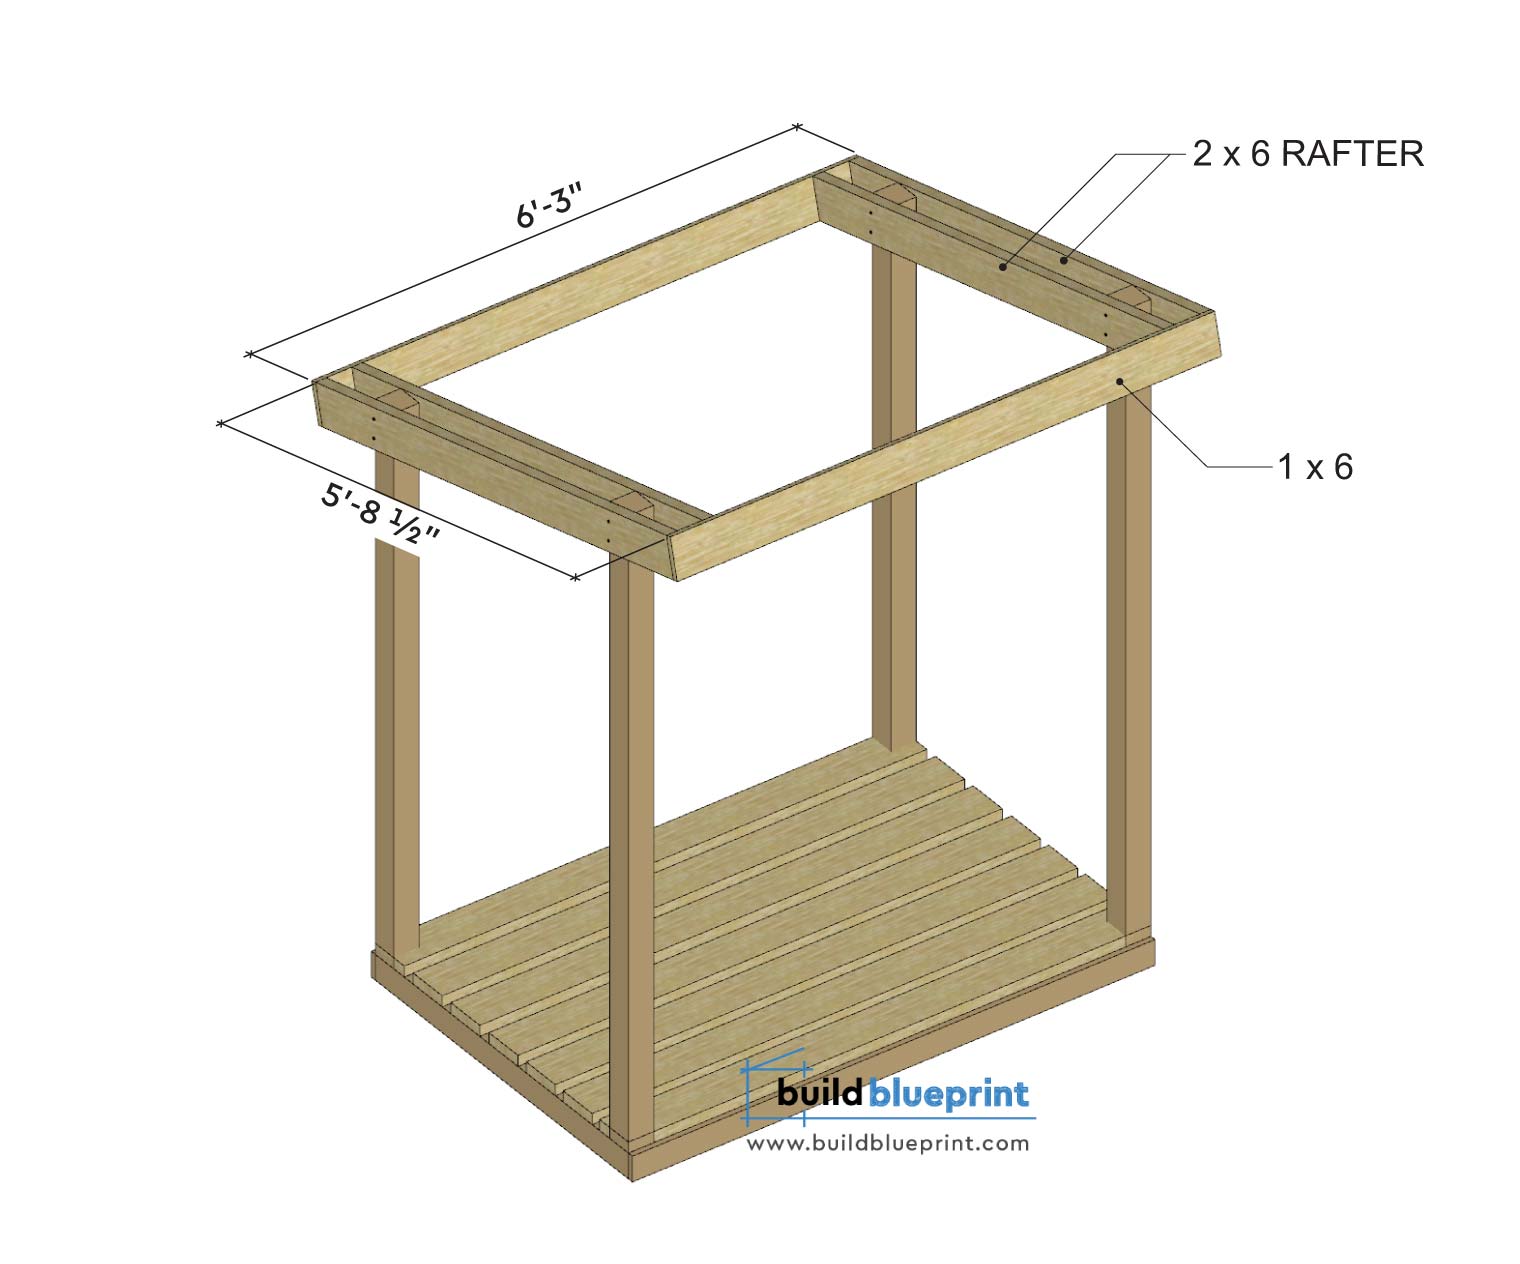
There are two primary rafters attached to the studs, which holds up the entire roof structure. These rafters are made up of four 2×6 lumbers cut to 5′-8 1/2″ length, secured to the 4×4 studs with 3 1/2″ screws. This will create a roof pitch of 3/12.
Then, attach two 6′-3″ 1×6’s to the front and back of the rafters, as illustrated below:
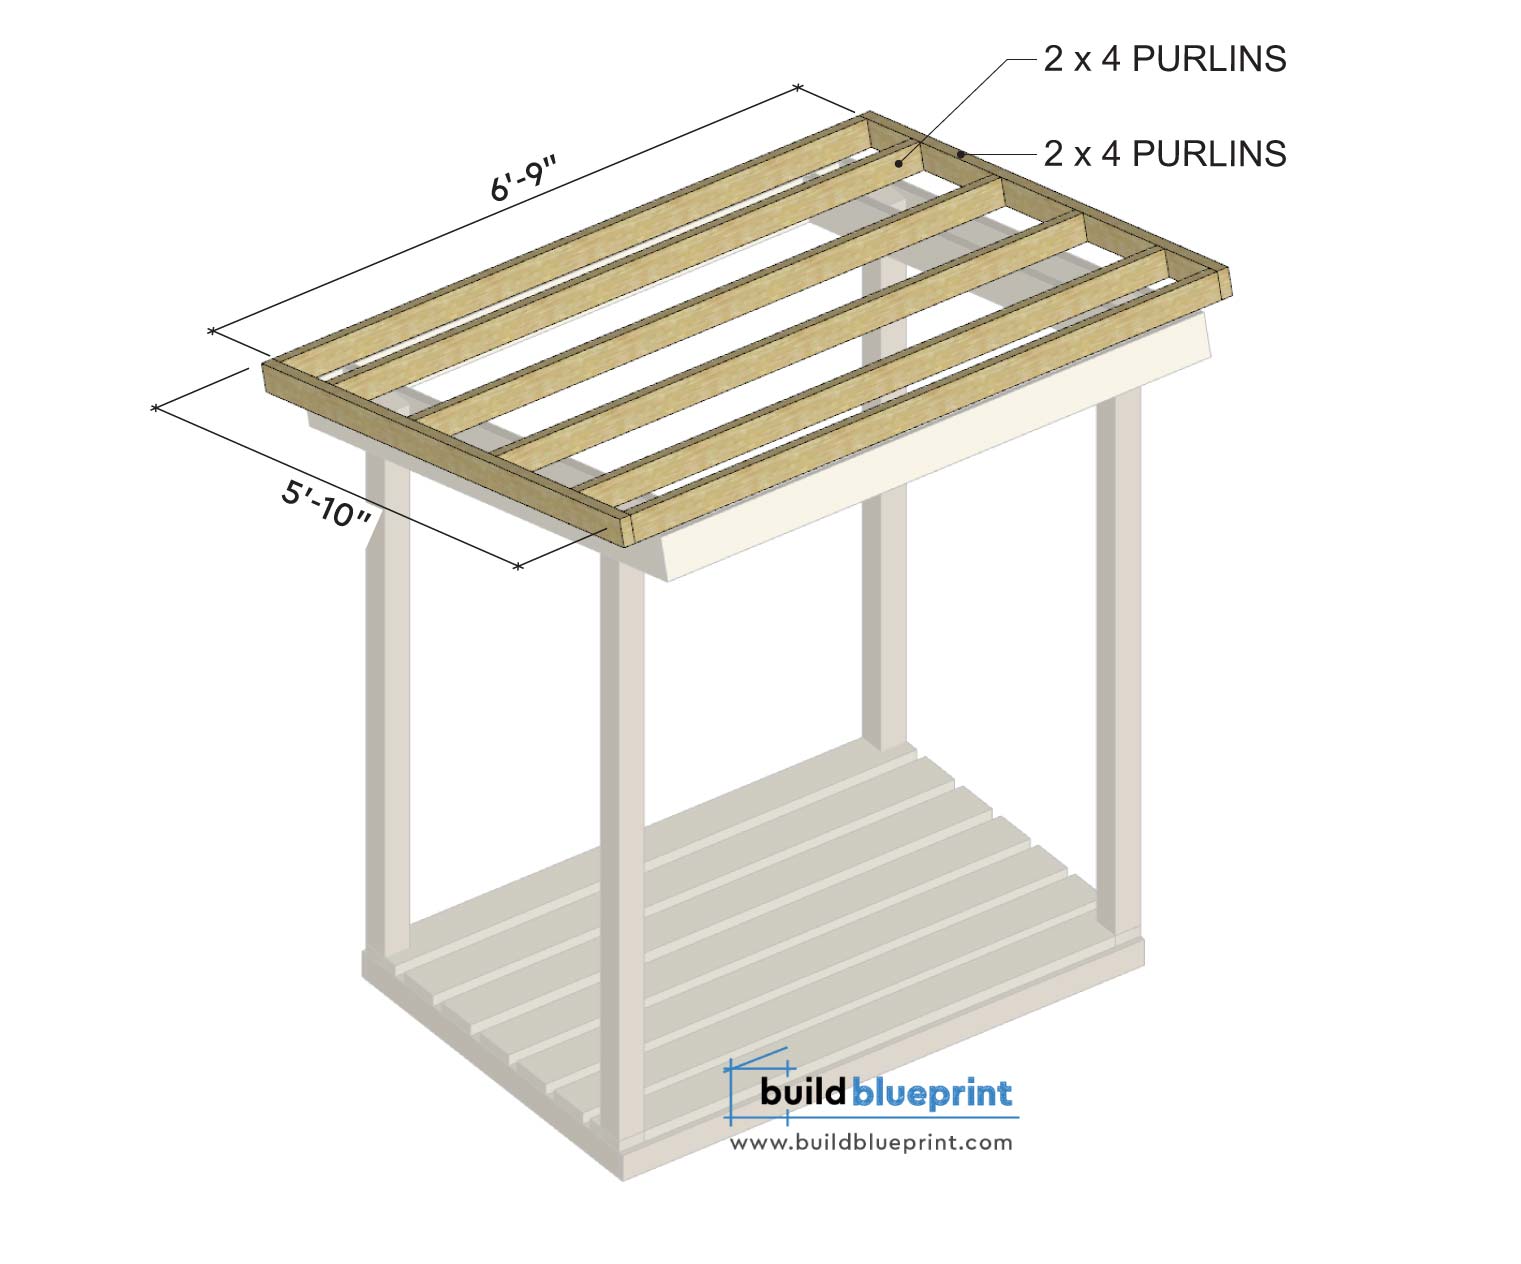
Once the rafters are in place, we will start to assemble the roof purlins. First, cut two 2×4’s to 5′-10″ for the side purlins, these will help to create overhangs. Then, measure and cut out six 2×4’s to 6′-9″ in length, space these out evenly. Secure to the side purlins and on top of the rafters with 3 1/2″ nails.
Tip: it’s easier to build the entire purlin structure on the ground and then raise in place on top of rafters.
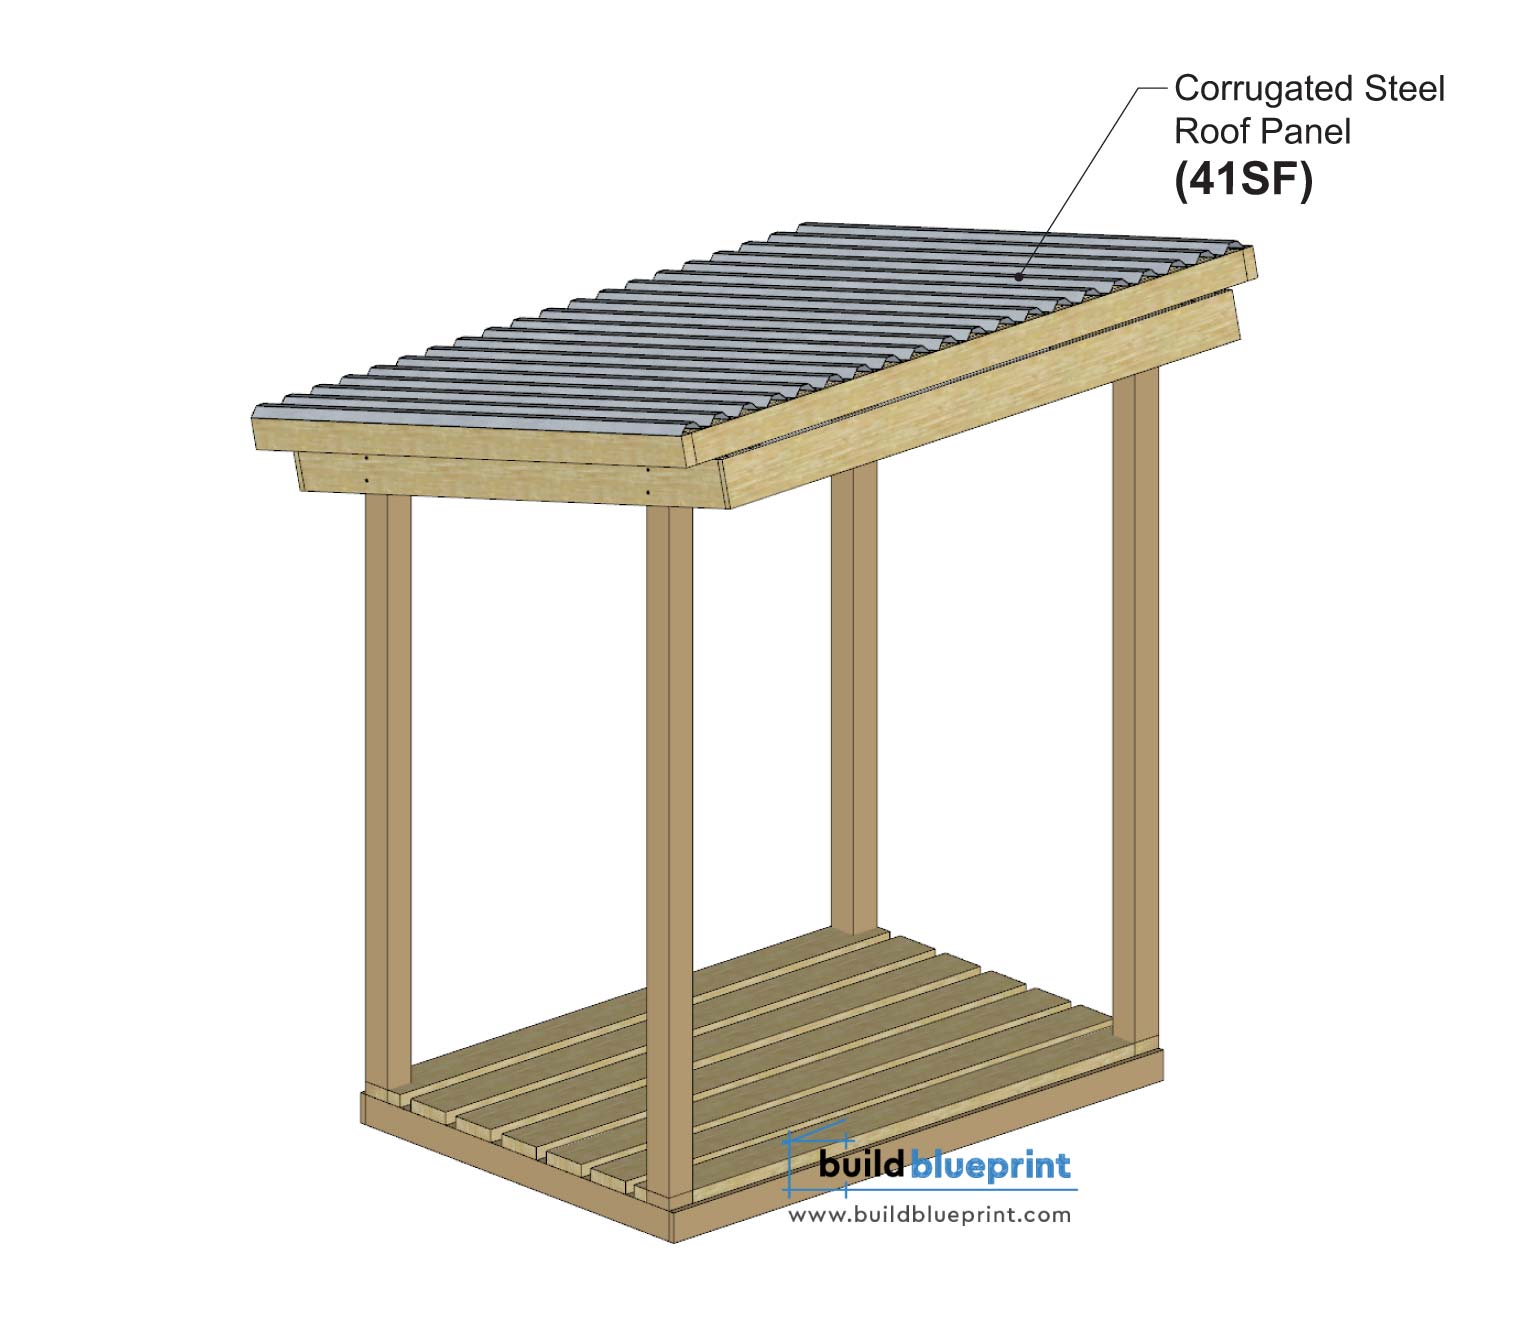
Next, cut and attach the corrugated metal roof panel on top of the purlins. Align the roof panel edges with the purlin perimeter edges to get a professional look, trim or sand away extra metals. You’ll need 41SF to cover the entire shed roof, these panels usually come in 3′ x 8 ‘ sized sheets.
Check out our recommended tools to cut metal
Step 3 – Exterior Sidings
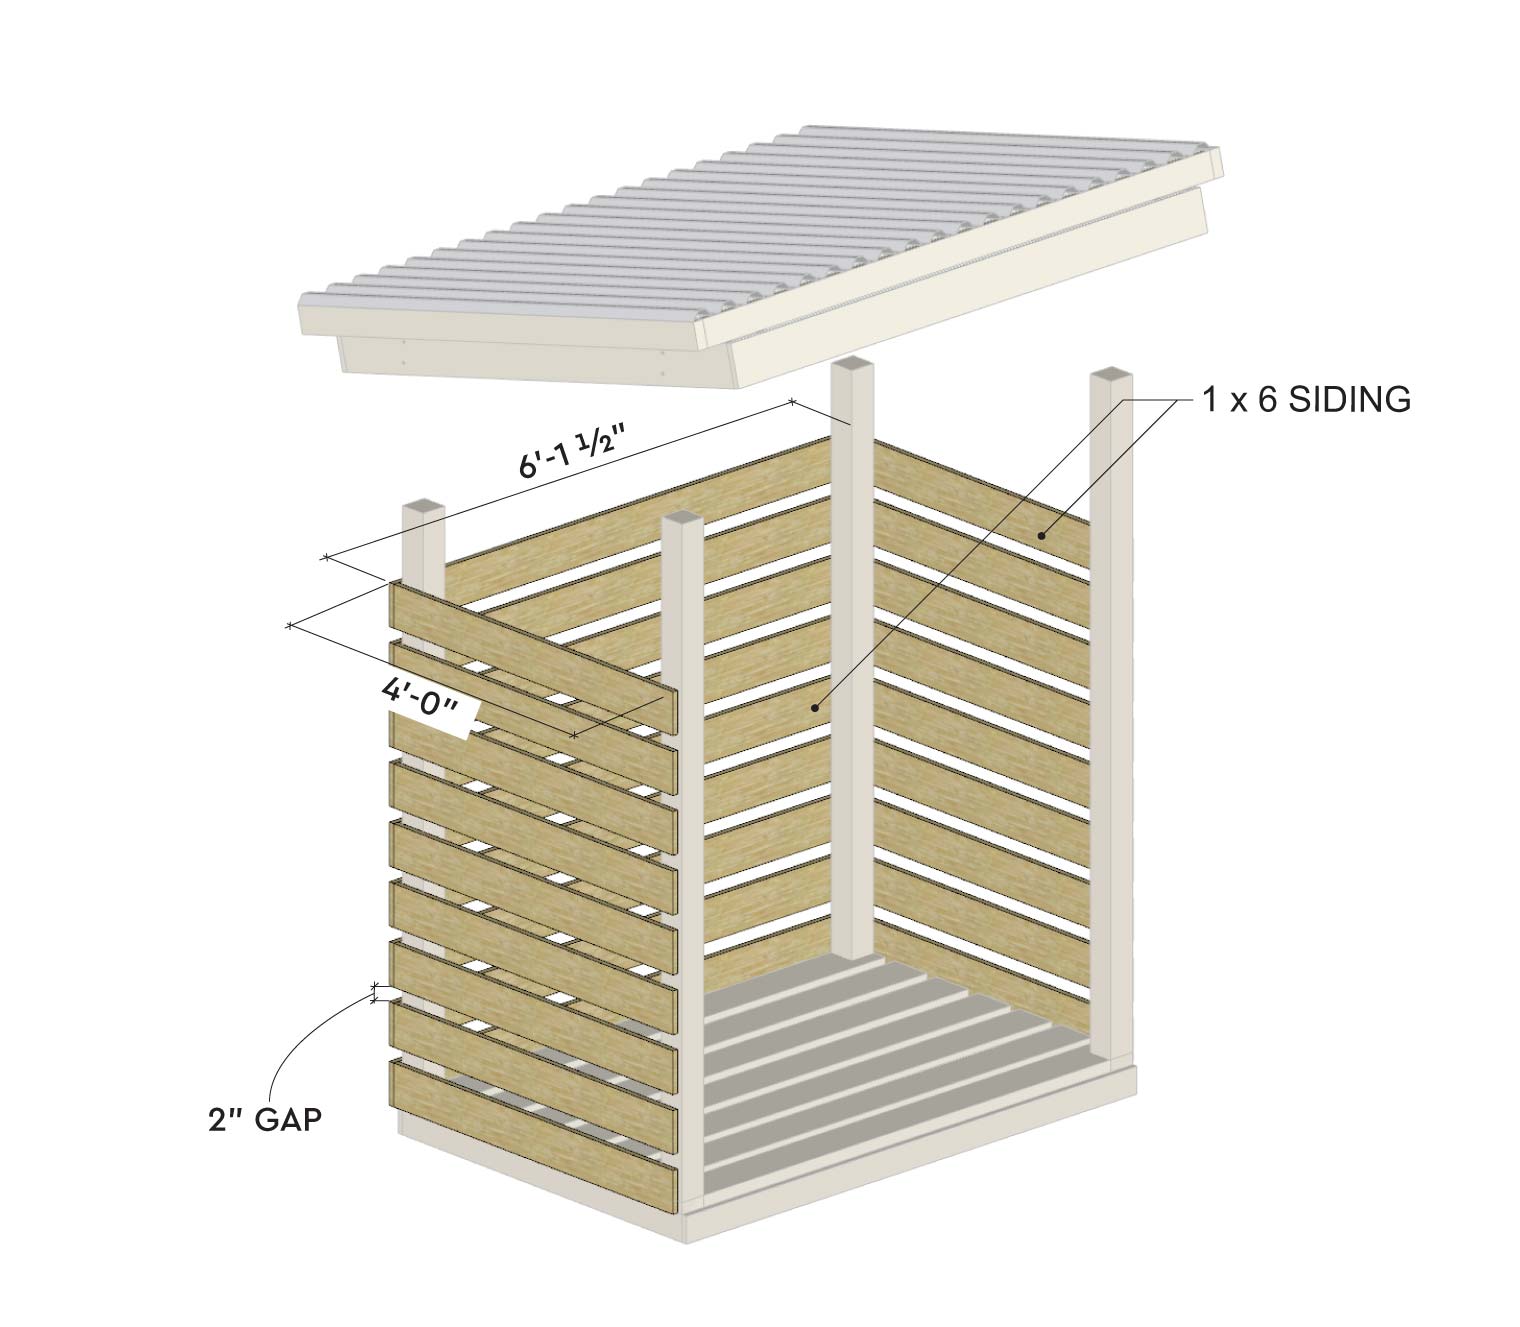
Finally, we will complete the 4×6 firewood shed by adding exterior side panels. You’ll need to cut 18 1×6’s to 4′, and nine 1×6’s to 6′-1 1/2″. Starting from the bottom, position the 1×6’s in place and secure with 2″ nails to the stud. Work your way up, leave approximately a 2″ gap between each panel.
Tip: you can use T1-11 plywood panels if you want to increase enclosure, it also takes less effort to install.
Lastly, check to make sure all the pieces are properly secured in place before loading in the firewood. You can also install a tarp to the front side of the shed during winter seasons to block out snow.
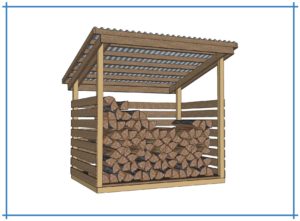
Well done! You’ve just completed building your very own 4×6 firewood shed!
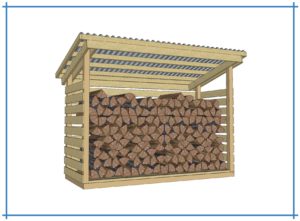
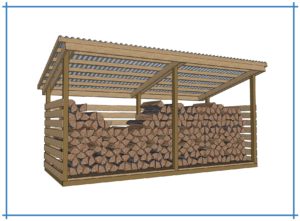
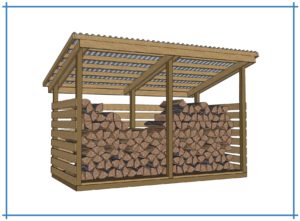
The 4×6 firewood shed is large enough to hold 1 cord of wood. If you need more storage space, check out our larger firewood shed plans.
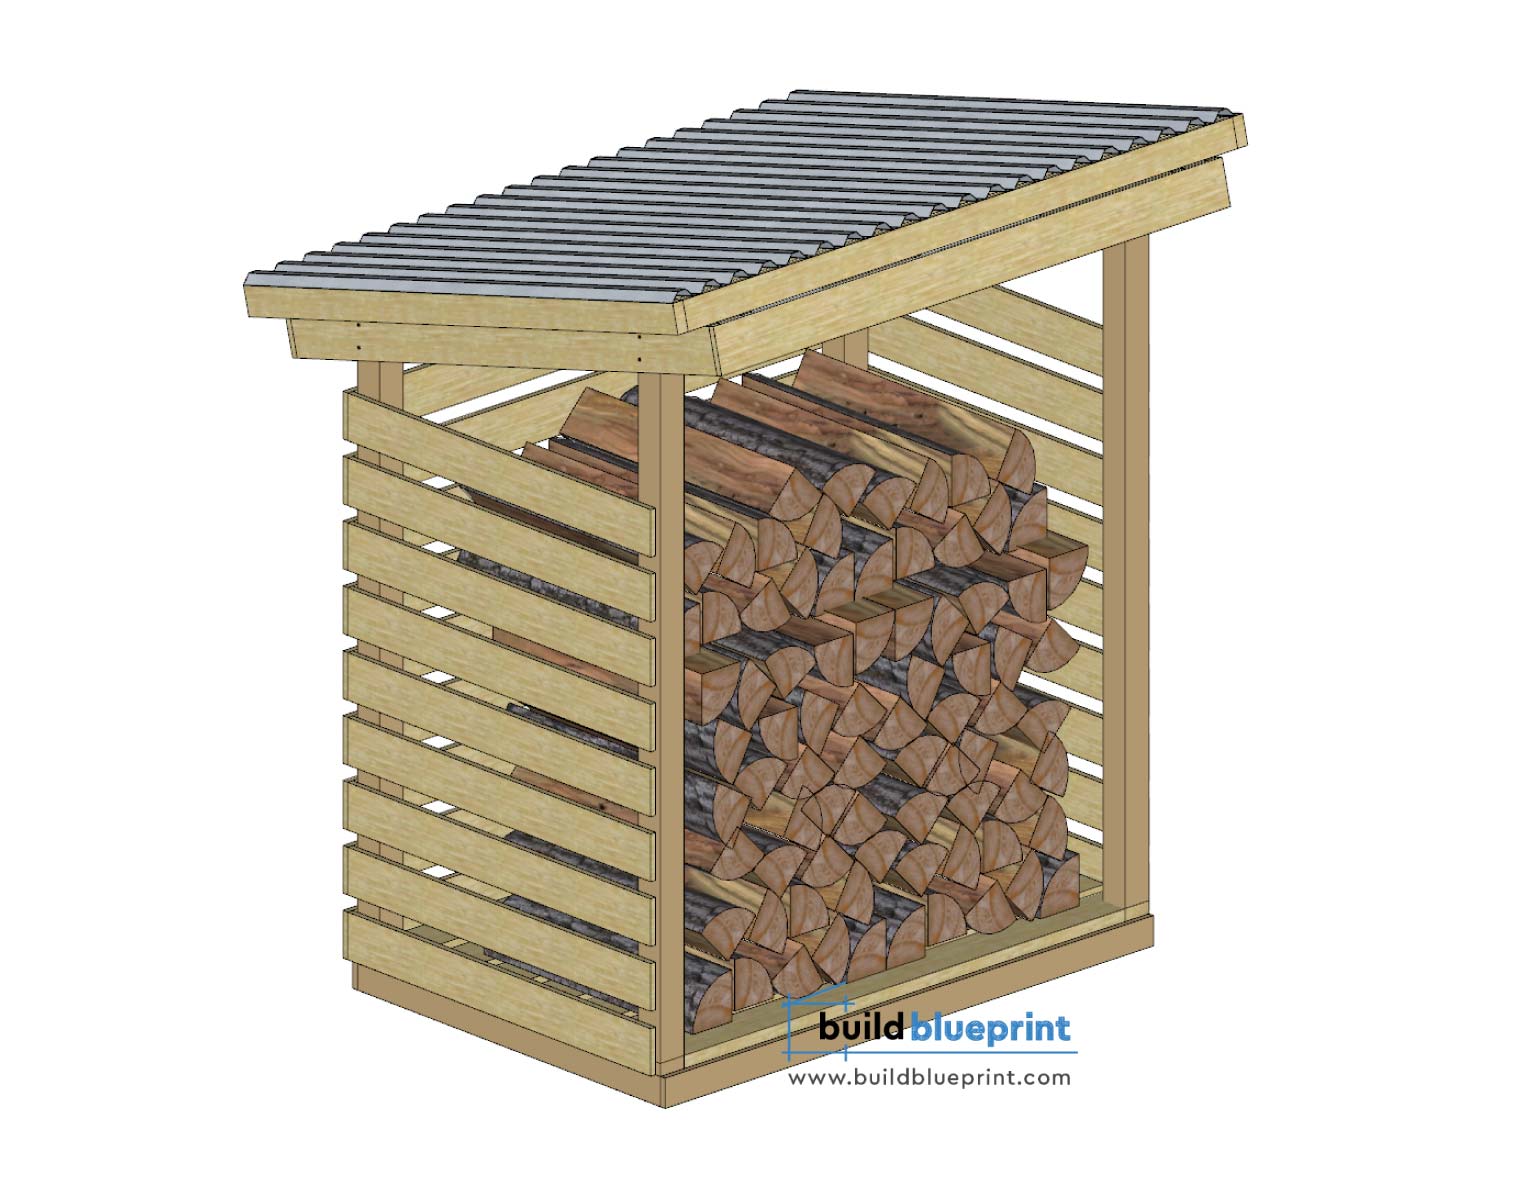
1 Cord Firewood Shed Summary
In summary, a well designed firewood shed is guaranteed to keep your logs dry and organized. Also, these sheds usually take up a small amount of space in your backyard or campsite, and can add a cozy cabin look to your property. This 4×6 firewood storage shed can hold up to 1 full cord of logs, The Spruce has a great article on how cord sizes are measured and stored.
