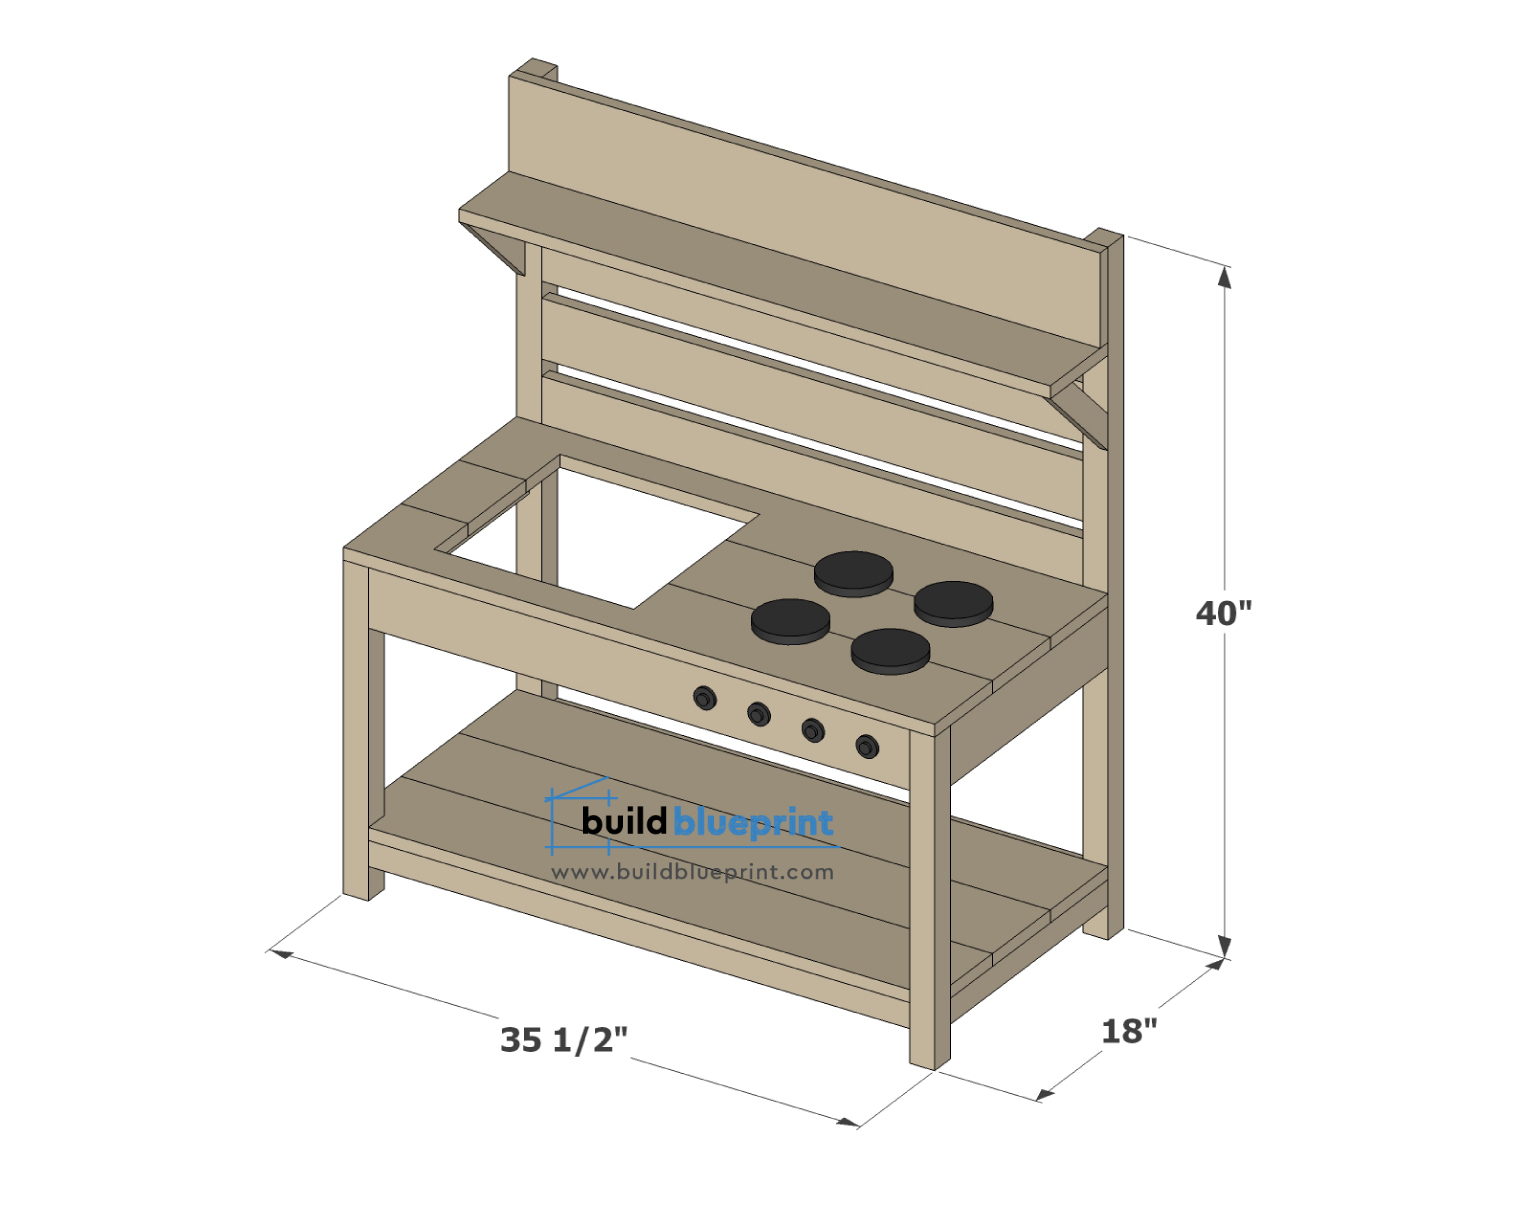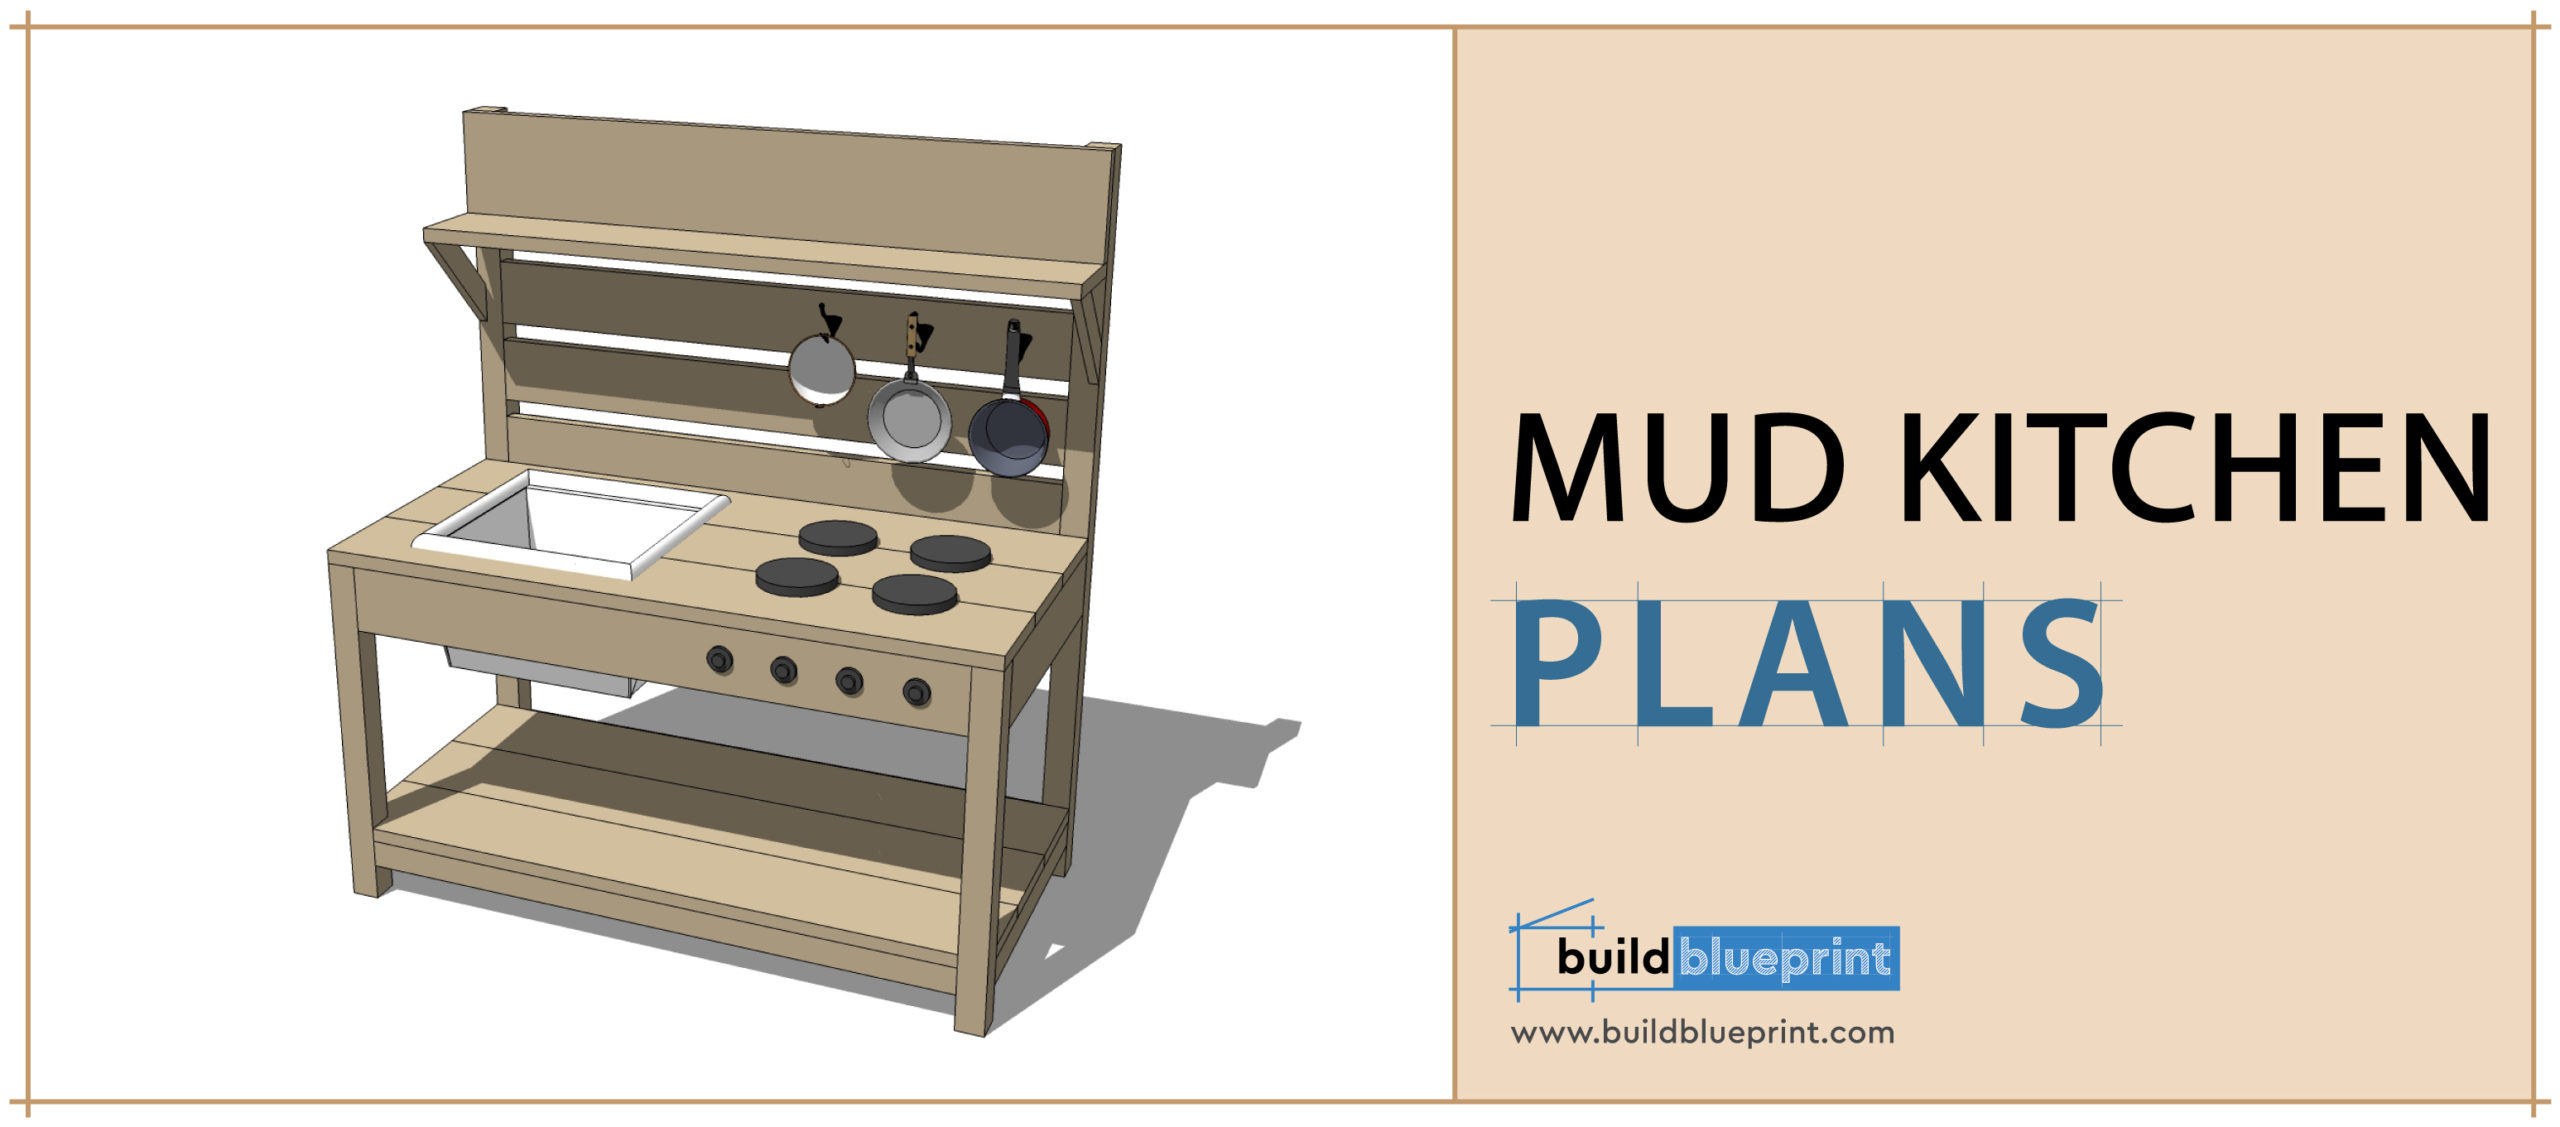
Backyard Kid’s Mud Kitchen DIY Plans
Mud kitchens are incredible backyard toys that can keep kids entertained and engaged for hours. It can help to develop your kid’s creativity and imagination, foster outdoors and nature, all while provide a good exercise. In this DIY plan, you will learn to build a standard kid sized mud kitchen using common wood materials from your local hardware store. The cost of construction materials for this project is about $200, including all wood materials and hardware.
This mud kitchen is an essential backyard toy for kids ages 3 and up. You’ll want to find a suitable bucket for the sink first, so you know what dimensions to cut the sink hole on the table top. You can modify the length of height easily from the plans to suit your requirements.
Get the complete Mud Kitchen DIY plans – Instant PDF download 8.5″ x 11″
PDF includes the cut list, additional diagrams and dimensions, complete step-by-step DIY instructions.
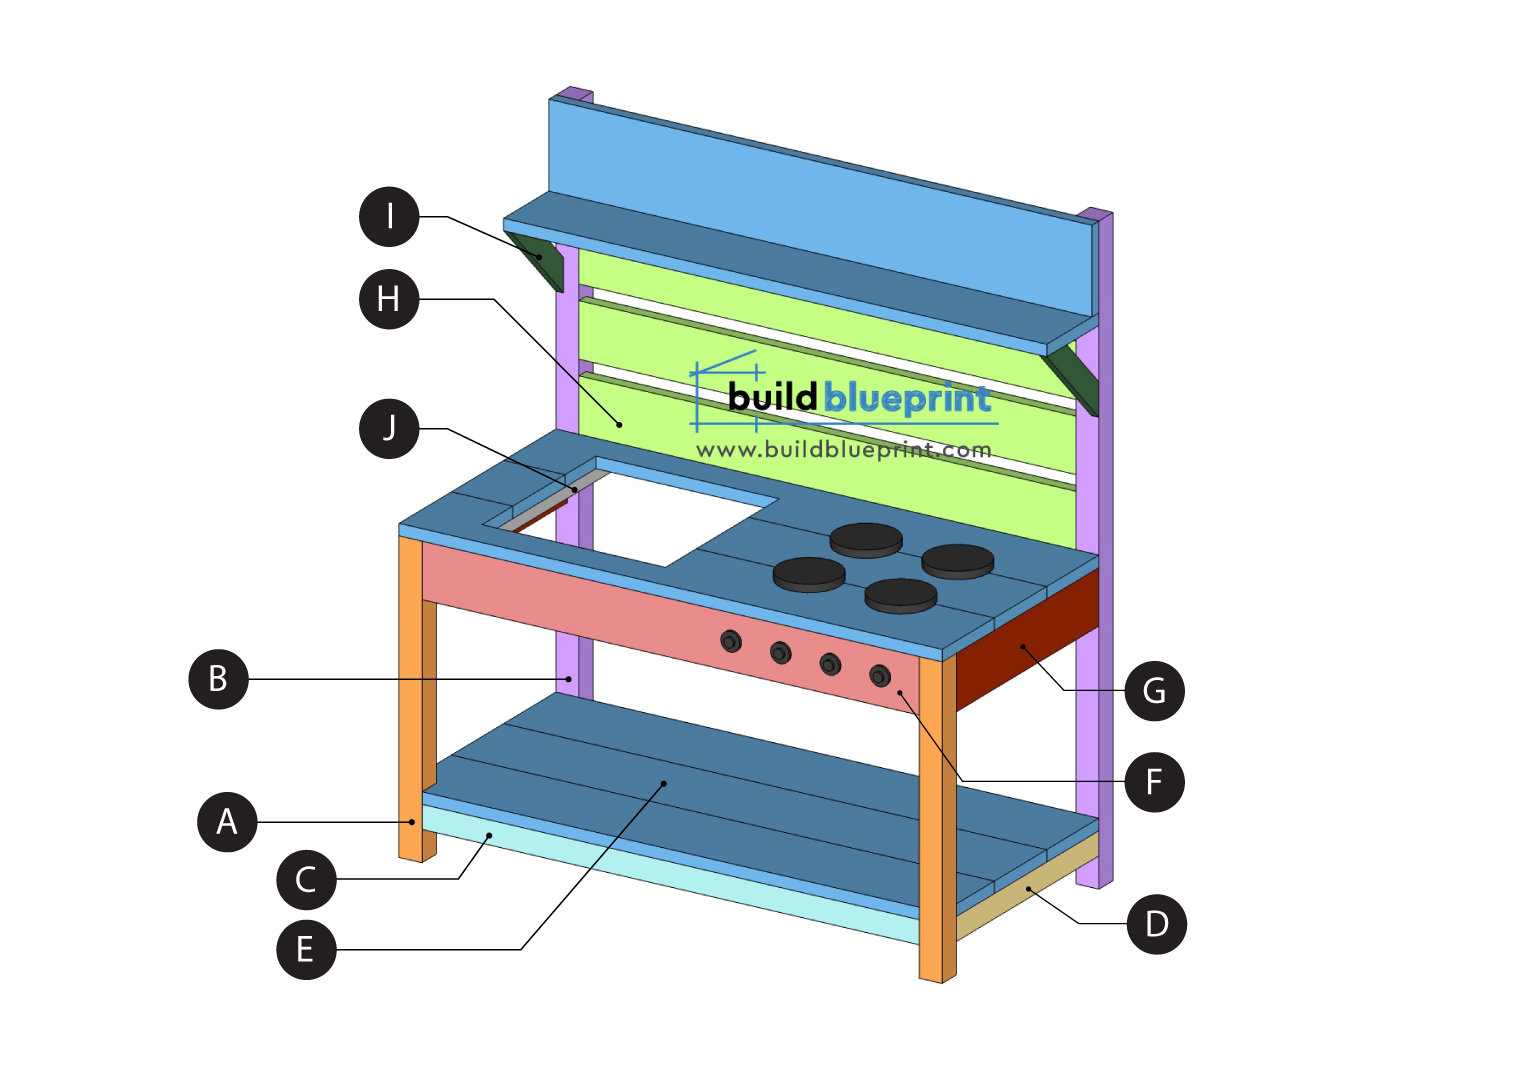
Material and Cut List
(A) 2 – 2×2 Lumber: 19 1/4″
(B) 2 – 2×2 Lumber: 40″
(C) 3 – 2×2 Lumber: 32 1/2″
(D) 2 – 2×2 Lumber: 15″
(E) 8 – 1×6 Lumber: 35 1/2″
(F) 5 – 1×6 Lumber: 43 1/4″
(F) 1 – 1×4 Lumber: 32 1/2″
(G) 2 – 1×4 Lumber: 15″
(H) 3 – 1×4 Lumber: 32 1/2″
(I) 2 – 1×2 Lumber: 7 3/4″
(J) 2 – 1×2 Lumber: 15 3/4″
HARDWARE
– 1 1/4″ Pocket Screws
– 1 1/4″ and 2″ Nails
– Wood Glue
PROJECT TOOLS
– Tape Measure
– Pocket-hole Jig
– Cordless Drill
– Miter Saw / Circular Saw
– Screwdriver
– Sandpaper or Sand Block
– Refer to the woodworking tool guide for more information
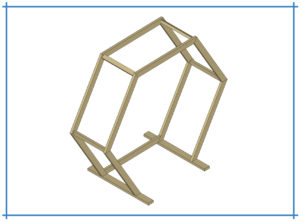
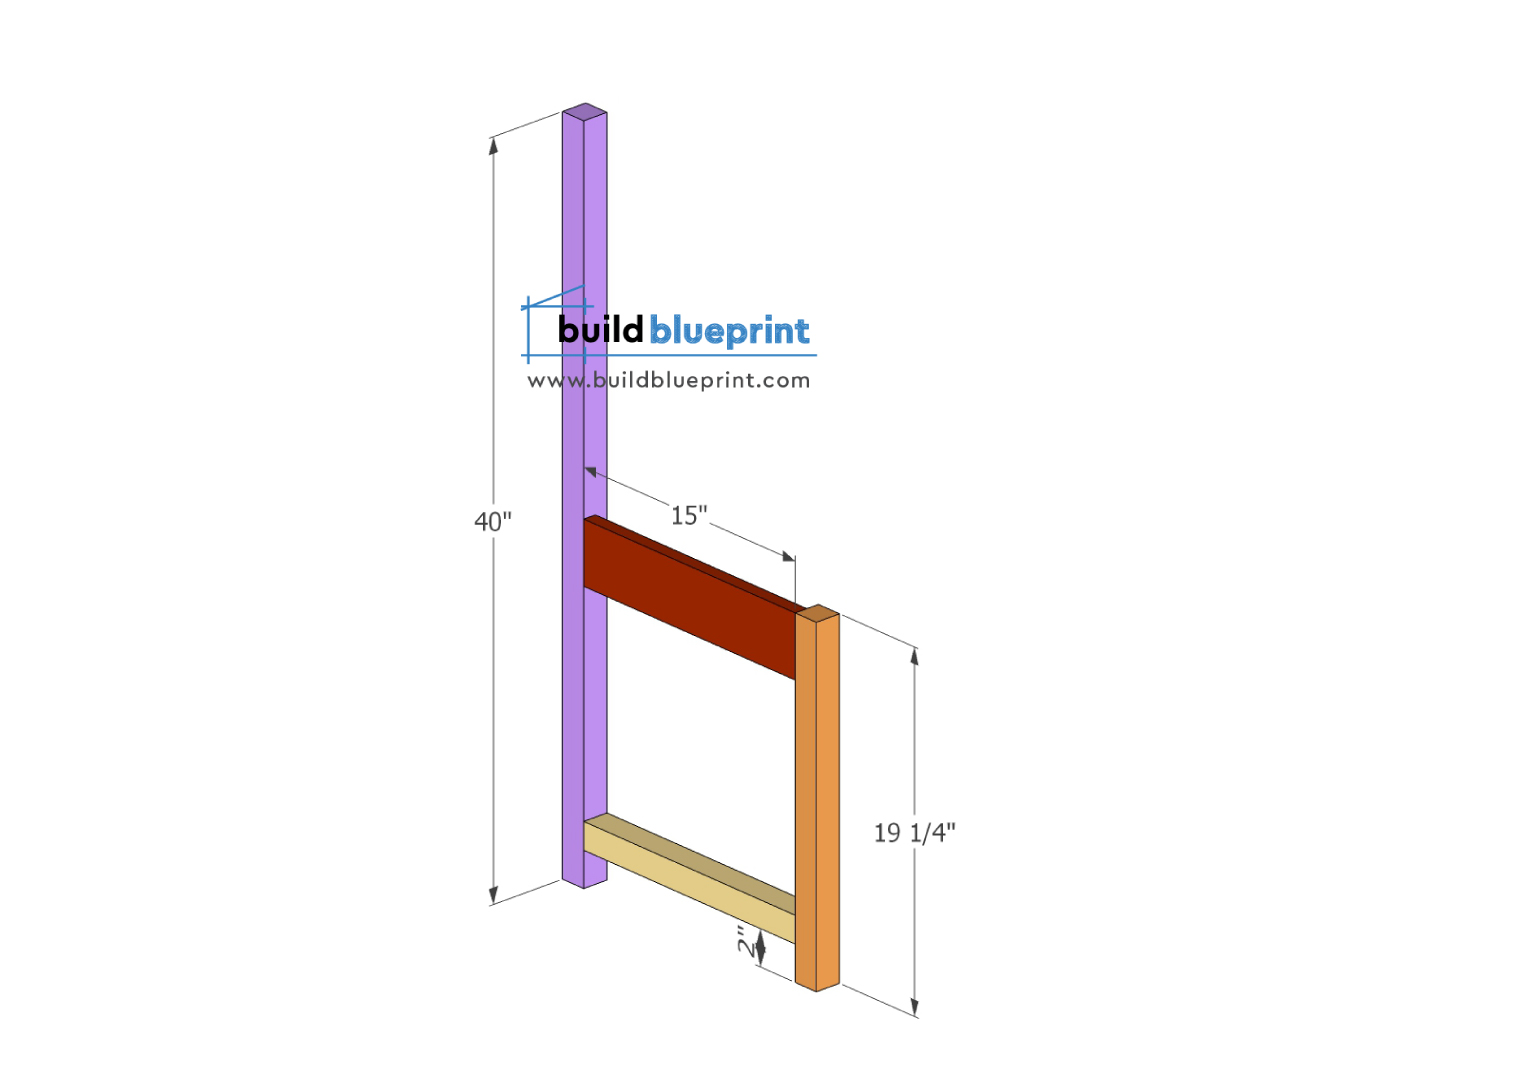
Step 1 – Legs
First, we will start with the overall framing of the mud kitchen. Cut the 2×2’s and 1x’4 per cut list, we will make two identical (mirrored) legs as illustrated below.
Use either dual pocket holes or toenailing method to secure all the joints.
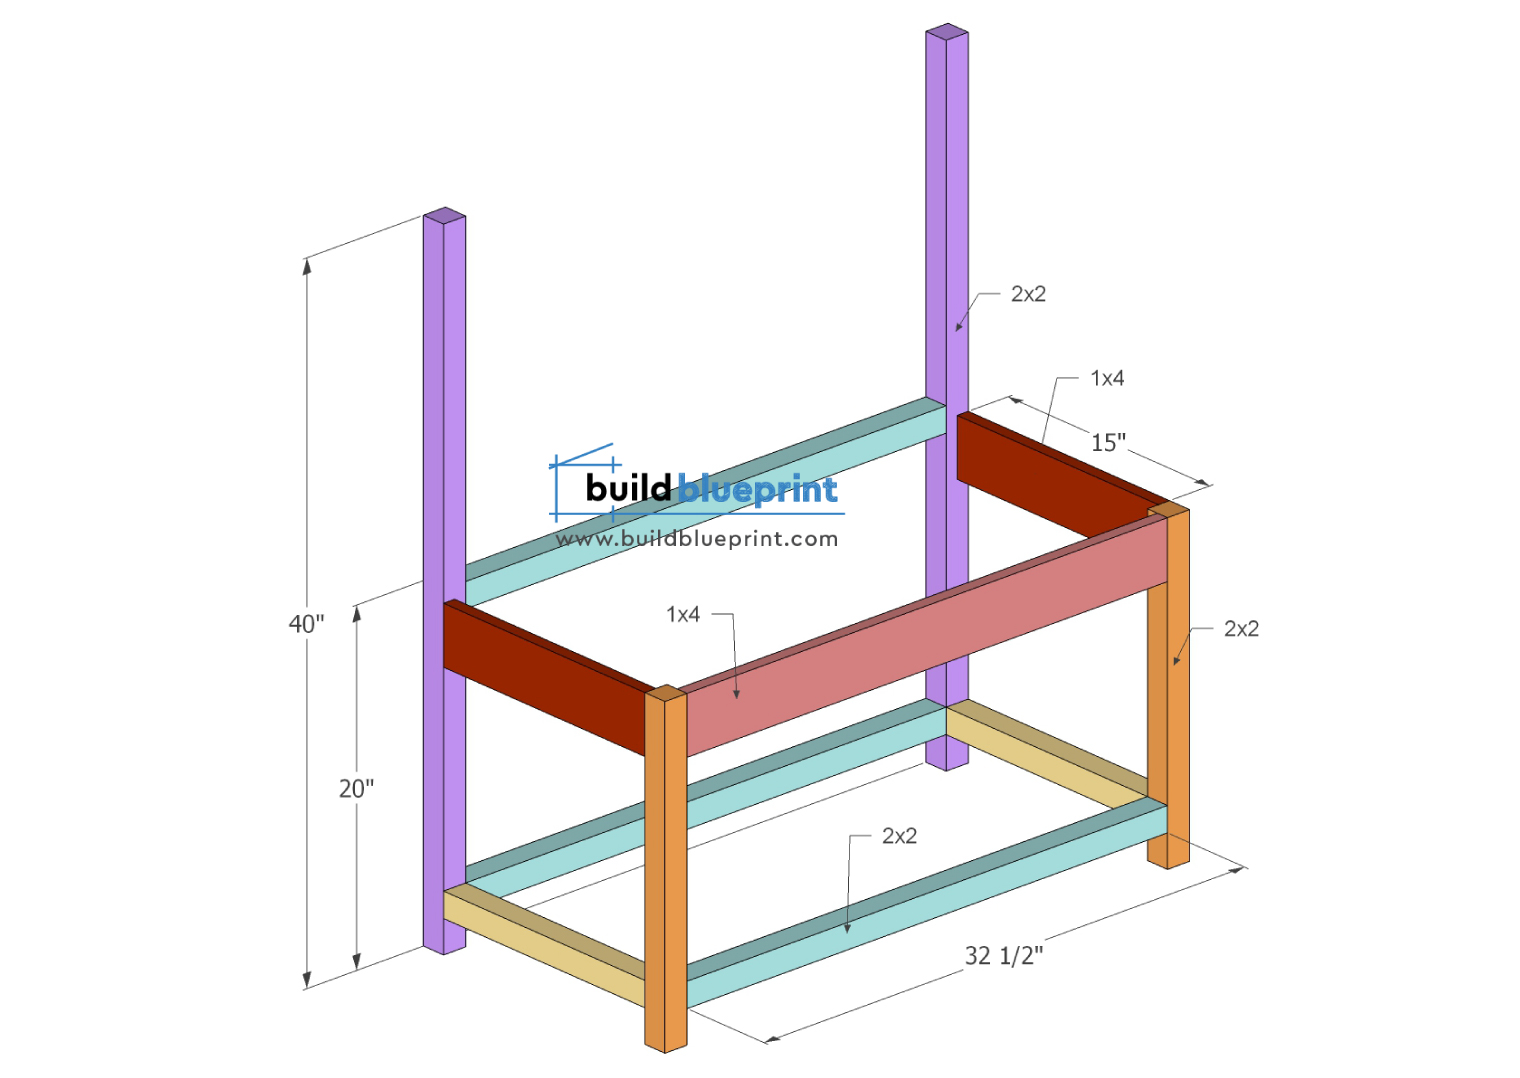
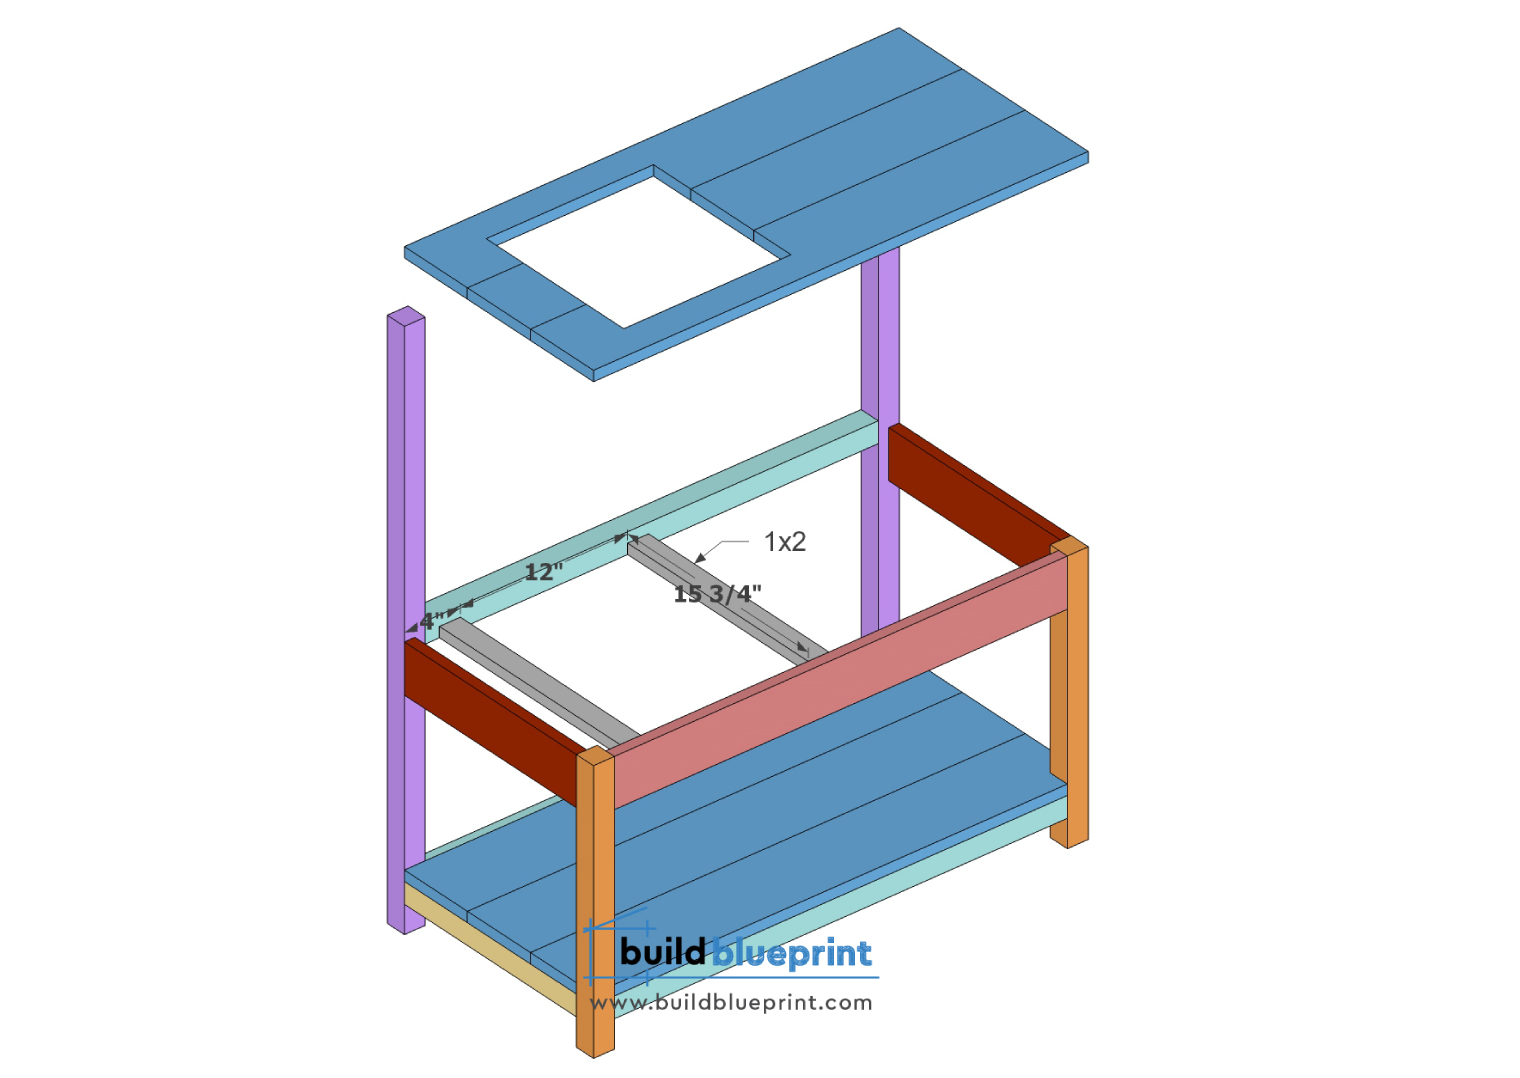
Step 2 – Overall Framing
After you’ve completed both leg frames, cut the 2×2 and 1×4 horizontal supports to 32 1/2” per cut list. Then, secure these pieces to the 2×2 legs per illustration below. Use either pocket holes or toenailing method to secure, you’ll want to make sure no nail heads are sticking out.
Step 3 – Table Top
Check to make sure the overall frame is secure and stable, then we will work on the table top and bottom shelf. Cut six 1×6’s to 35 1/2”. Next, cut two 1×2’s to 15 3/4” length, these will be used as the support for the sink opening. Place them flush with the sink hole, directly below.
You can drill finishing nails to secure these to the frame. To joint the 1×6’s together to make the table top, use pocket holes and 1 1/4” screw.
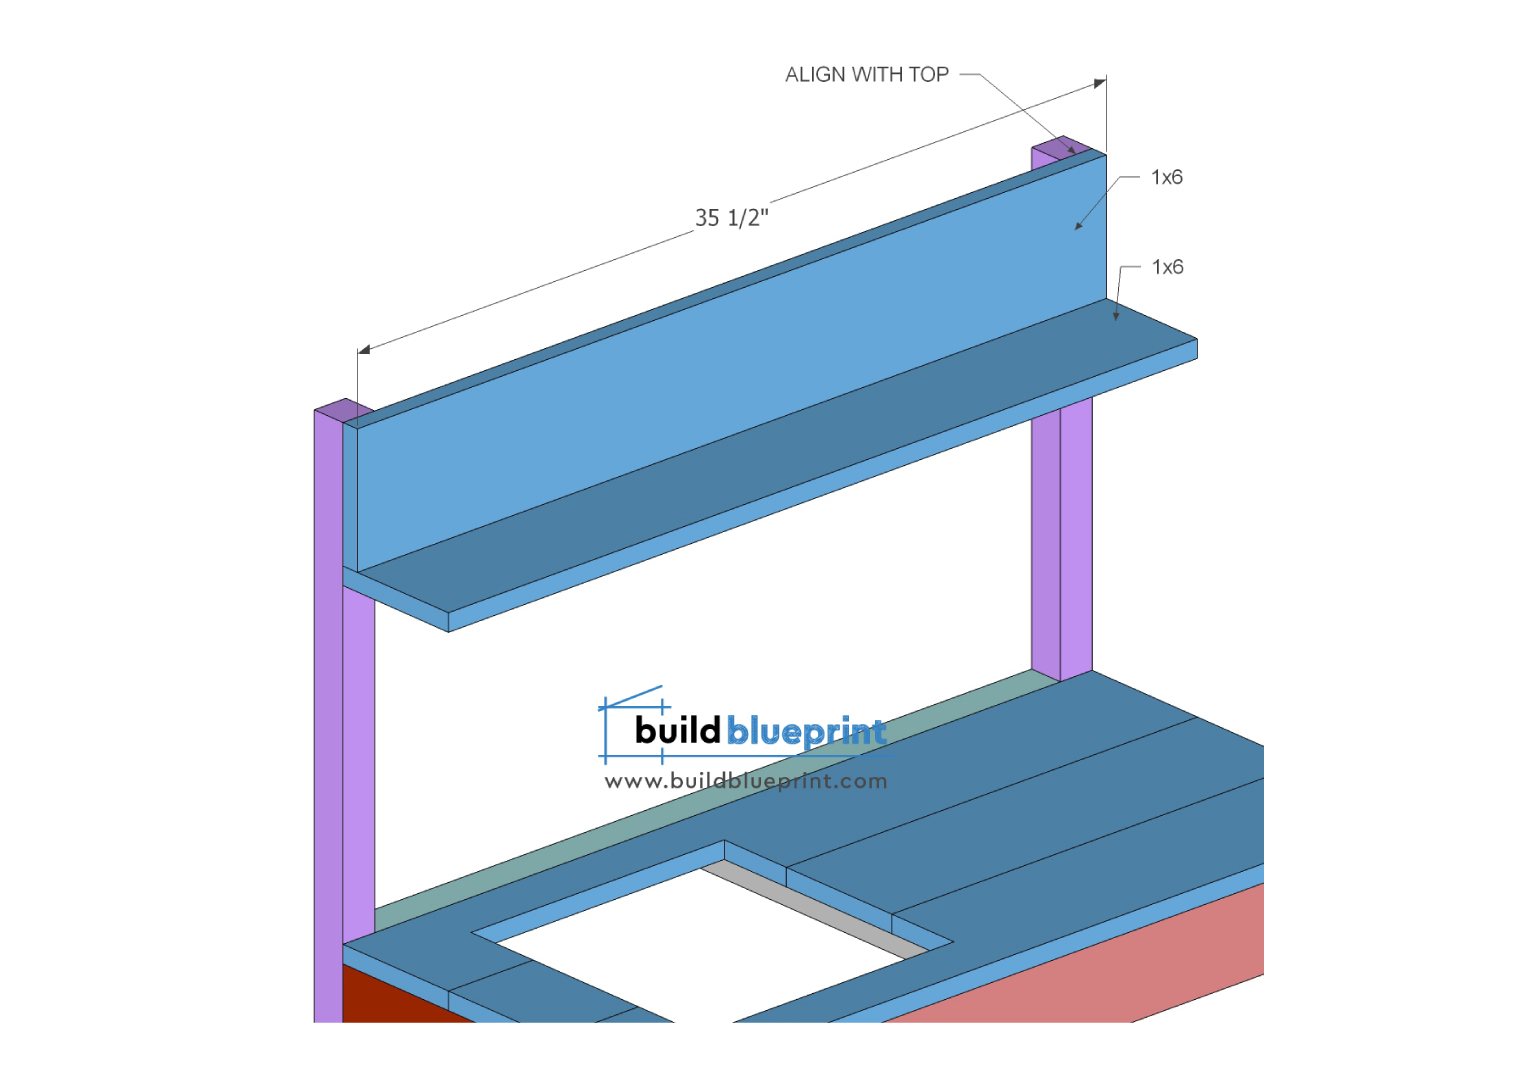
Step 4 – Shelves
The top shelf is made out of two 35 1/2” 1×6’s. First, attach the top 1×6 panel, which is aligned with the top of the 2×2 leg, use 1 1/4” nails to secure. Then place the 1×6 horizontal shelf piece directly below, you can secure this to the top panel using 1 1/4” nails.
Cut two 1×2’s to 7 3/4”, refer to cut pattern below. These will be used as shelf supports. Attach to the leg and bottom side of the shelf, you can use wood glue to secure these pieces.
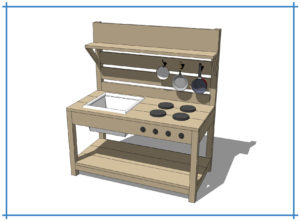
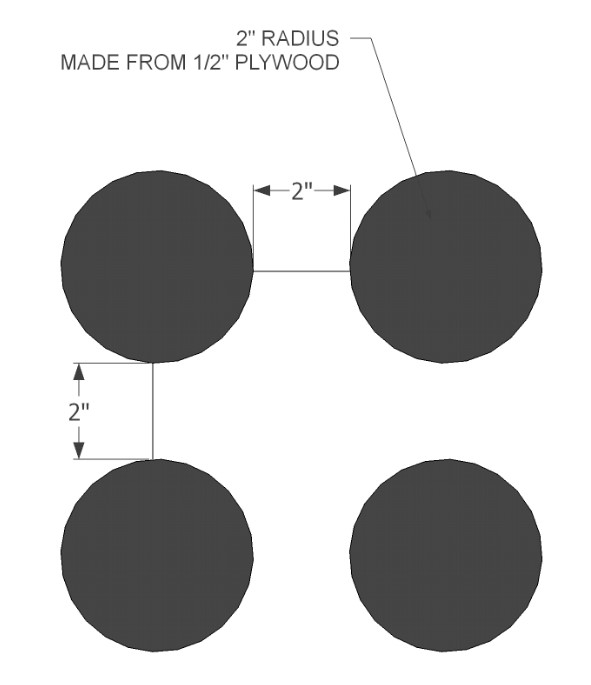
Step 5 – Stove Top
You’re almost done with the build! Next, use a hole saw to cut out four 2” radius circular pieces for the stove top burners, and four 1/2” radius pieces as dial knobs.
To finish off, paint these black using wood paint, then place them on top of the table top using wood glue.
Sand the overall build using a sand block, especially any sharp corners or rough surfaces. You can paint using an exterior grade wood paint, this is optional. Finally, place in your sink (bucket), optional to glue it to the table top. You can also install hook hardware to the backboard to hang pans.