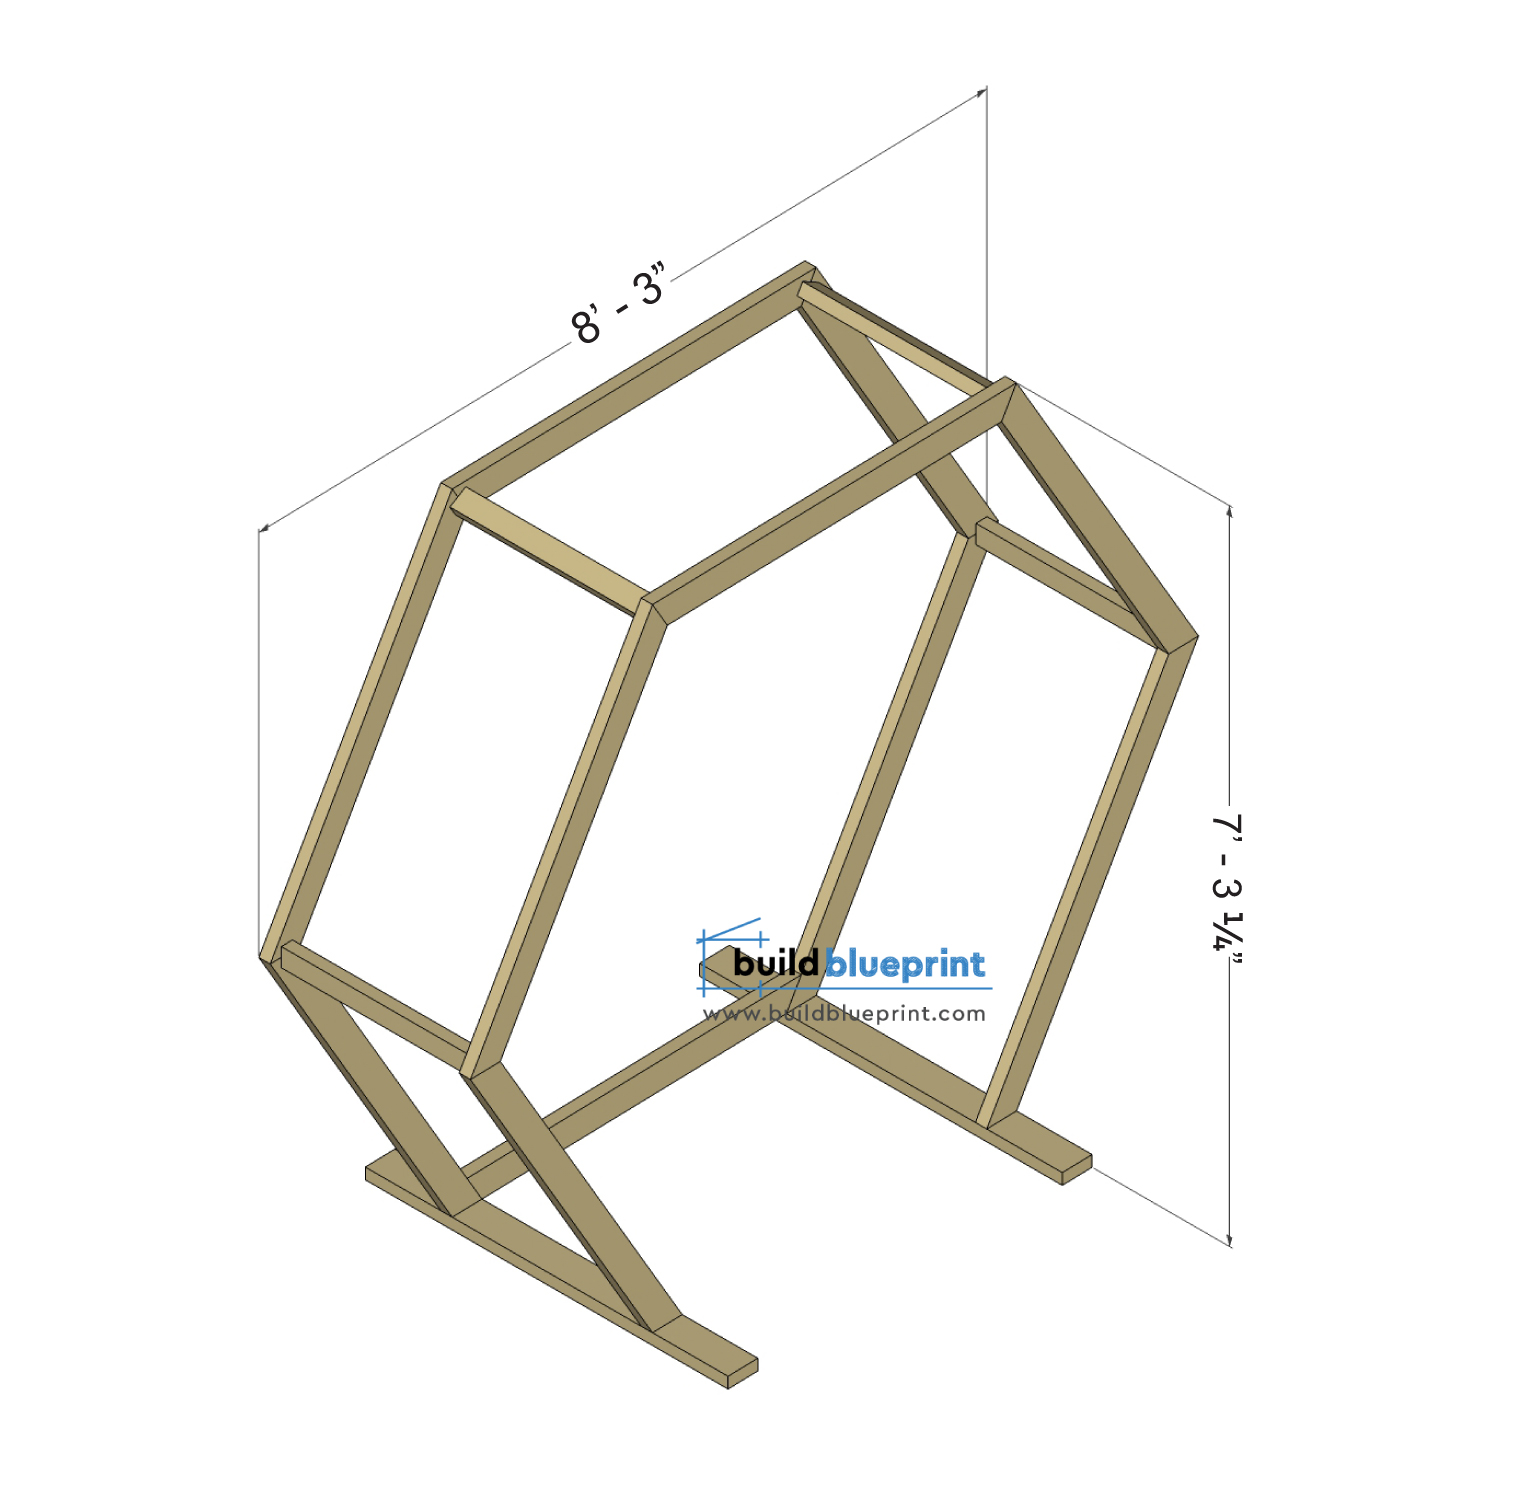
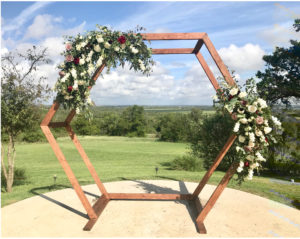
Hexagon Wedding Arbor DIY Plans
The hexagon wooden arbor is an elegant and beautiful centerpiece to any wedding, and the perfect backdrop for your wedding photos! The boho style hexagon arbor has gained popularity recently as the amount of backyard wedding ceremonies increased. The best part is this DIY arbor is very easy and can be completed within just a few hours, even for a beginner DIYer.
Looking for a different style? Check out our 5 easy DIY wedding arbor plans HERE
Get the complete Hexagon Wedding Arbor Plans – Instant PDF download 8.5″ x 11″
PDF includes the cut list, additional diagrams and dimensions, complete step-by-step DIY instructions.
Material and Cut List
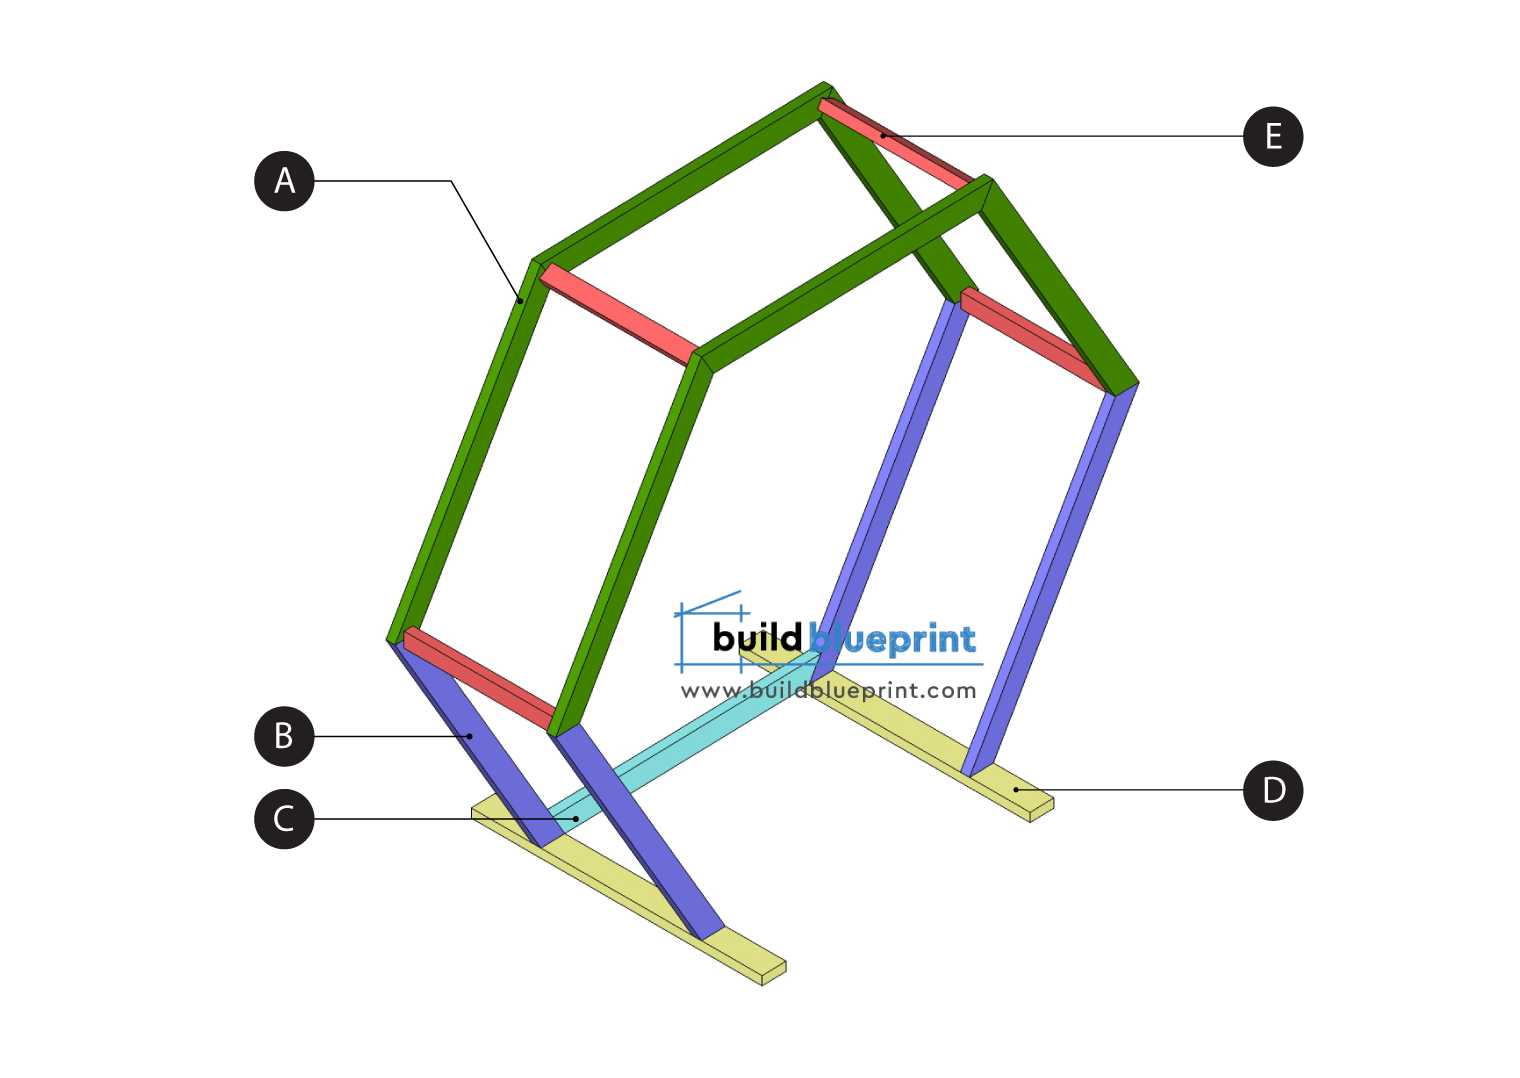
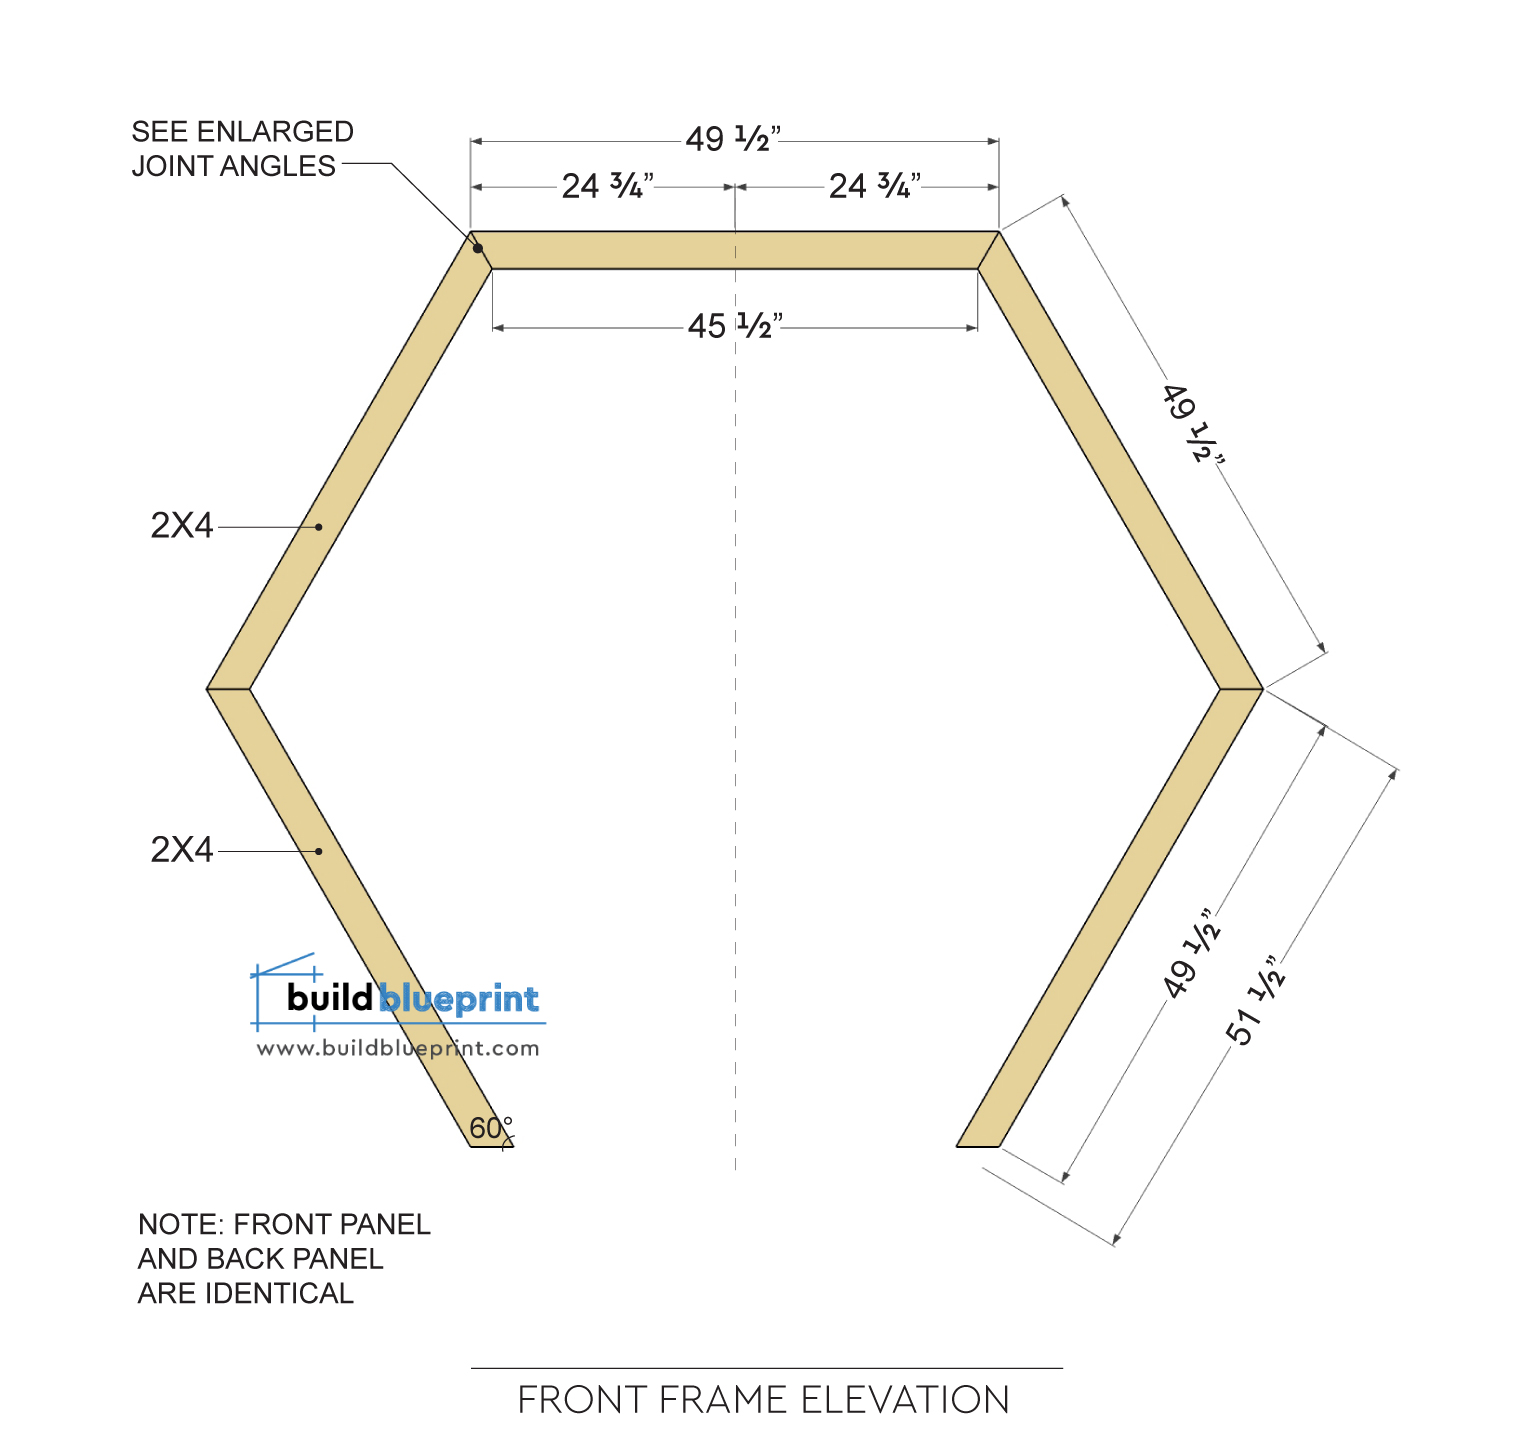
(A) 6 – 2×4 Lumber: 49 1/2″
(B) 4 – 2×4 Lumber: 51 1/2″
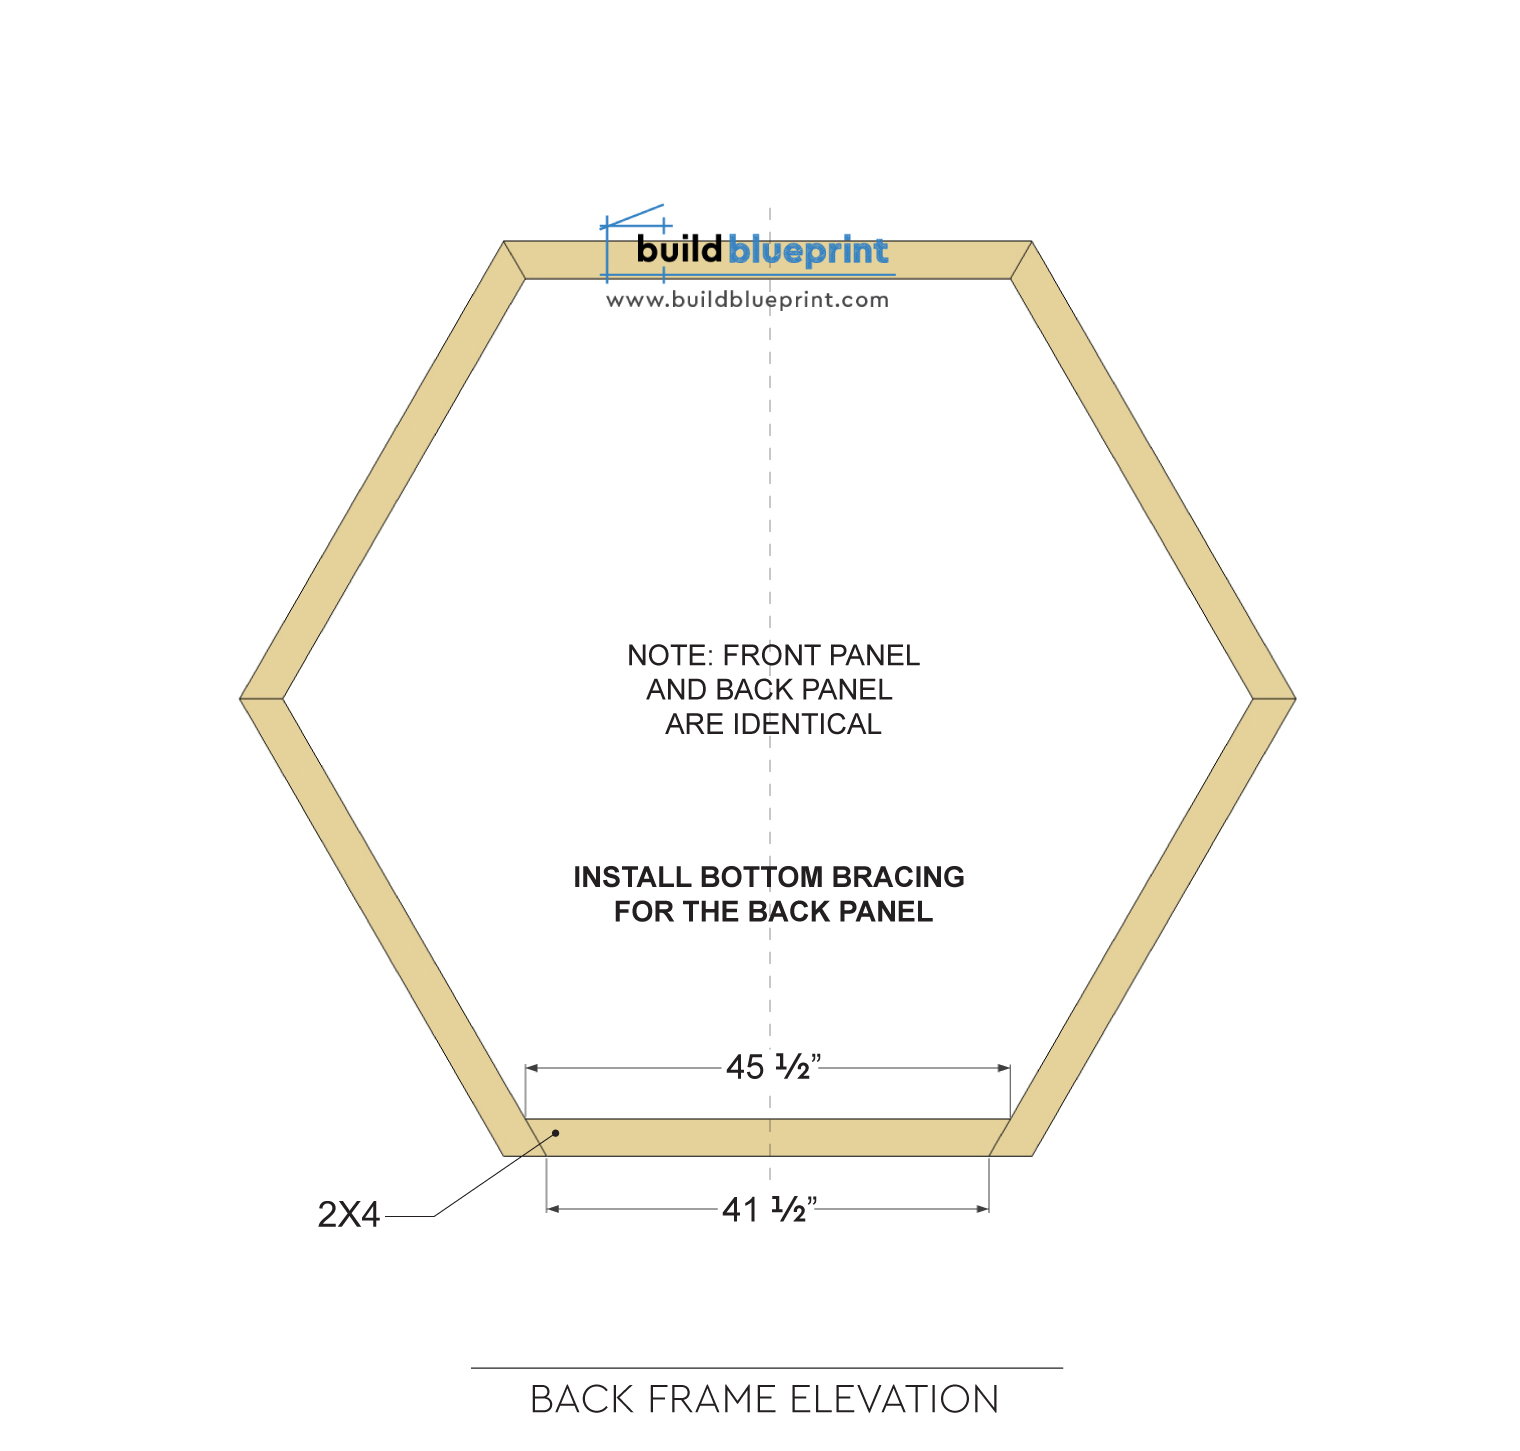
(C) 1 – 2×4 Lumber: 45 1/2″
(D) 2 – 2×6 Lumber ripped to 4″: 48″
(E) 4 – 2×3 Lumber: 25″
HARDWARE
– 2 1/2″ Pocket Screws
– 3 1/2″ Screws or nails
– 3/8″ Dowels
PROJECT TOOLS
– Tape Measure
– Pocket-hole Jig
– Cordless Drill
– Miter Saw / Circular Saw
– Screwdriver
– Sandpaper or Sand Block
– Refer to the woodworking tool guide for more information
Hexagon Wedding Arbor DIY Plans
Step 1 – Front Hexagon Frames
First, we will start to construction the overall hexagon shaped framing. Both front and back frames are made entirely from 2×4’s. Prepare and cut the 2×4’s per diagram below, the joint angle between each piece here is 60°, so set your miter saw angle to 30° cut. Next, proceed to assemble the front frame first. For joints, you can use either pocket holes (2 1/2” screws) or metal tie plates.
Optional: use 3/8″ dowels to cover up the pocket screw holes to get a cleaner look.
Step 2 – Back Hexagon Frames
The back frame is exactly the same as the front, with the exception of the 2×4 bottom bracing. Repeat step 1 and assemble the overall hexagon shape frame, then add on the bottom 2×4 bracing piece.
Step 3 – Horizontal Bracing
The 2×3 horizontal bracings attaching the front and back frame are 25” in length. If you’d like to adjust the overall width of the arbor, you can increase/decrease the bracing length accordingly. Use either 3 1/2″ screws or nails to secure these to the front and back hexagon frames.
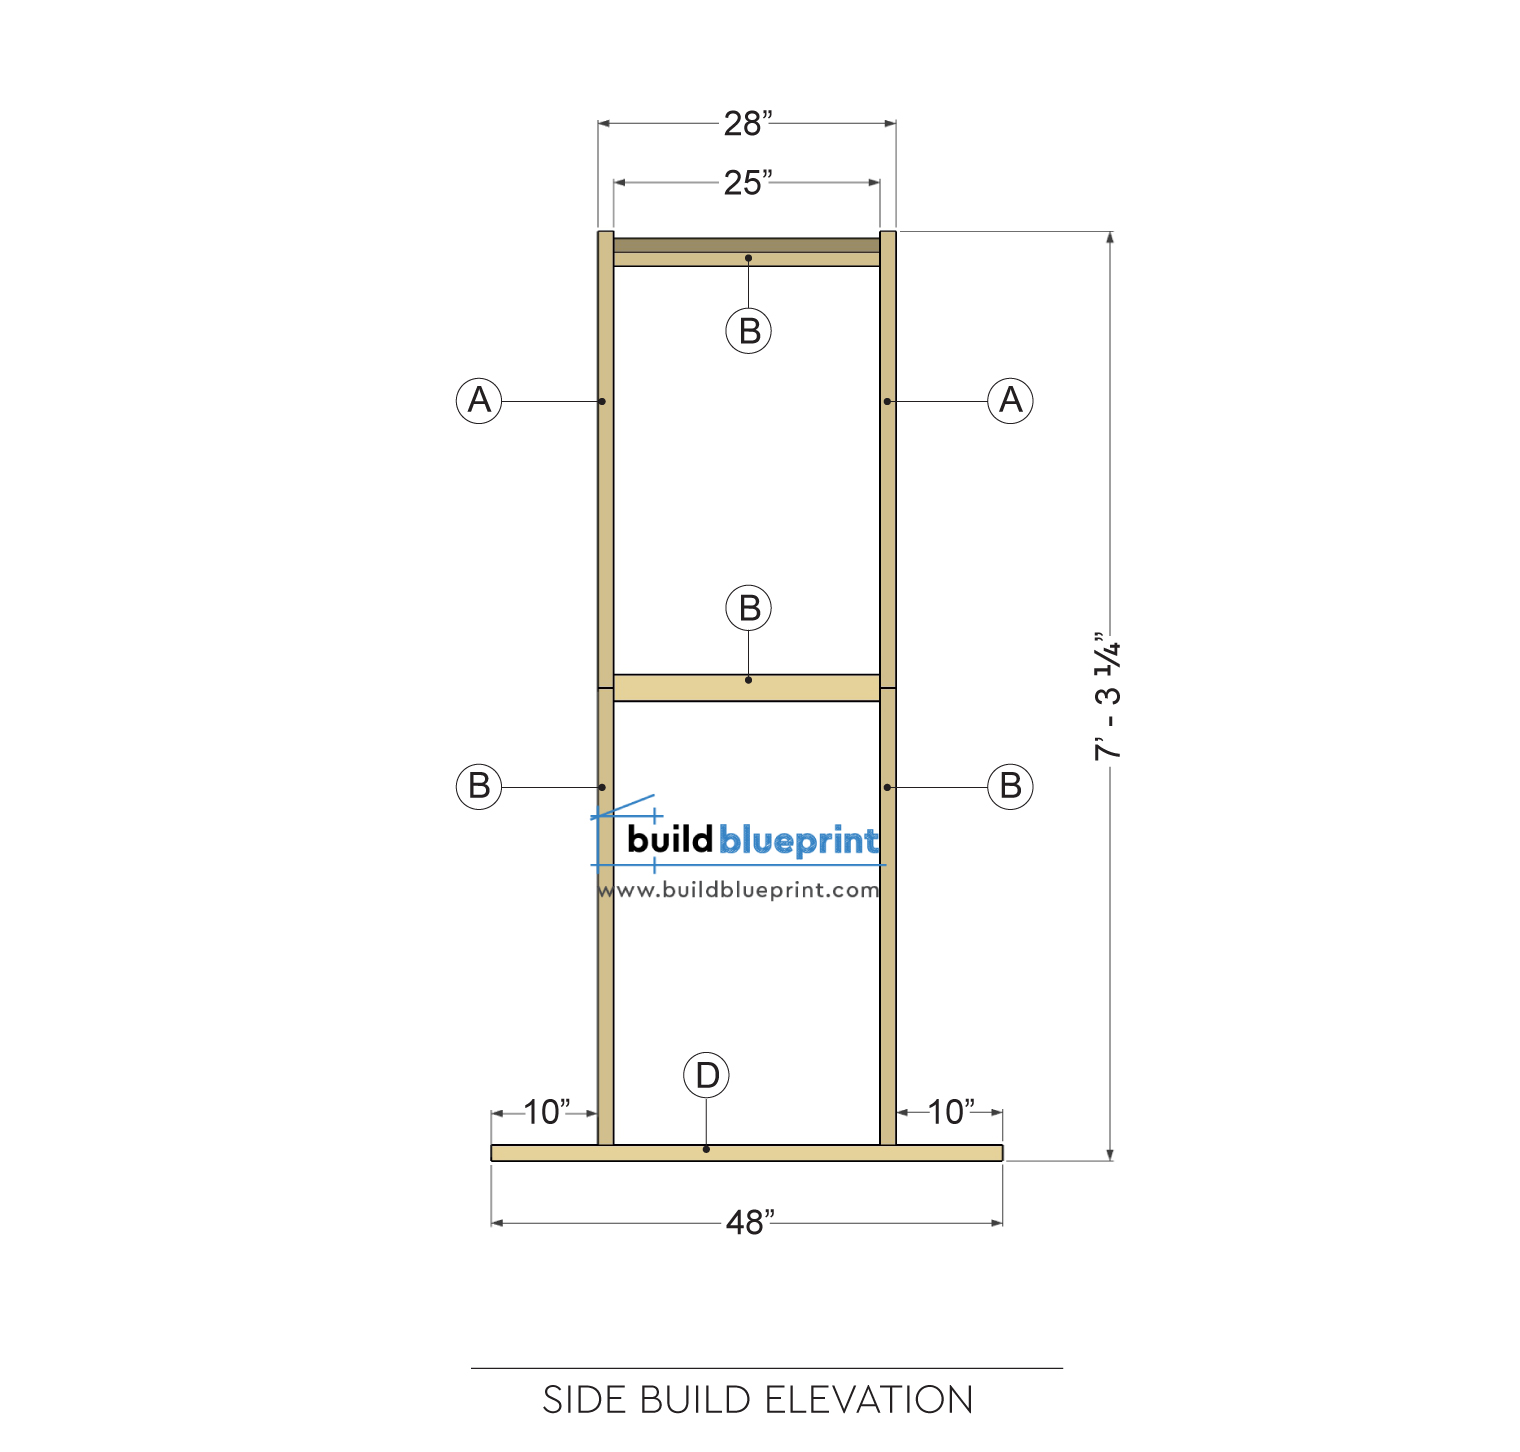
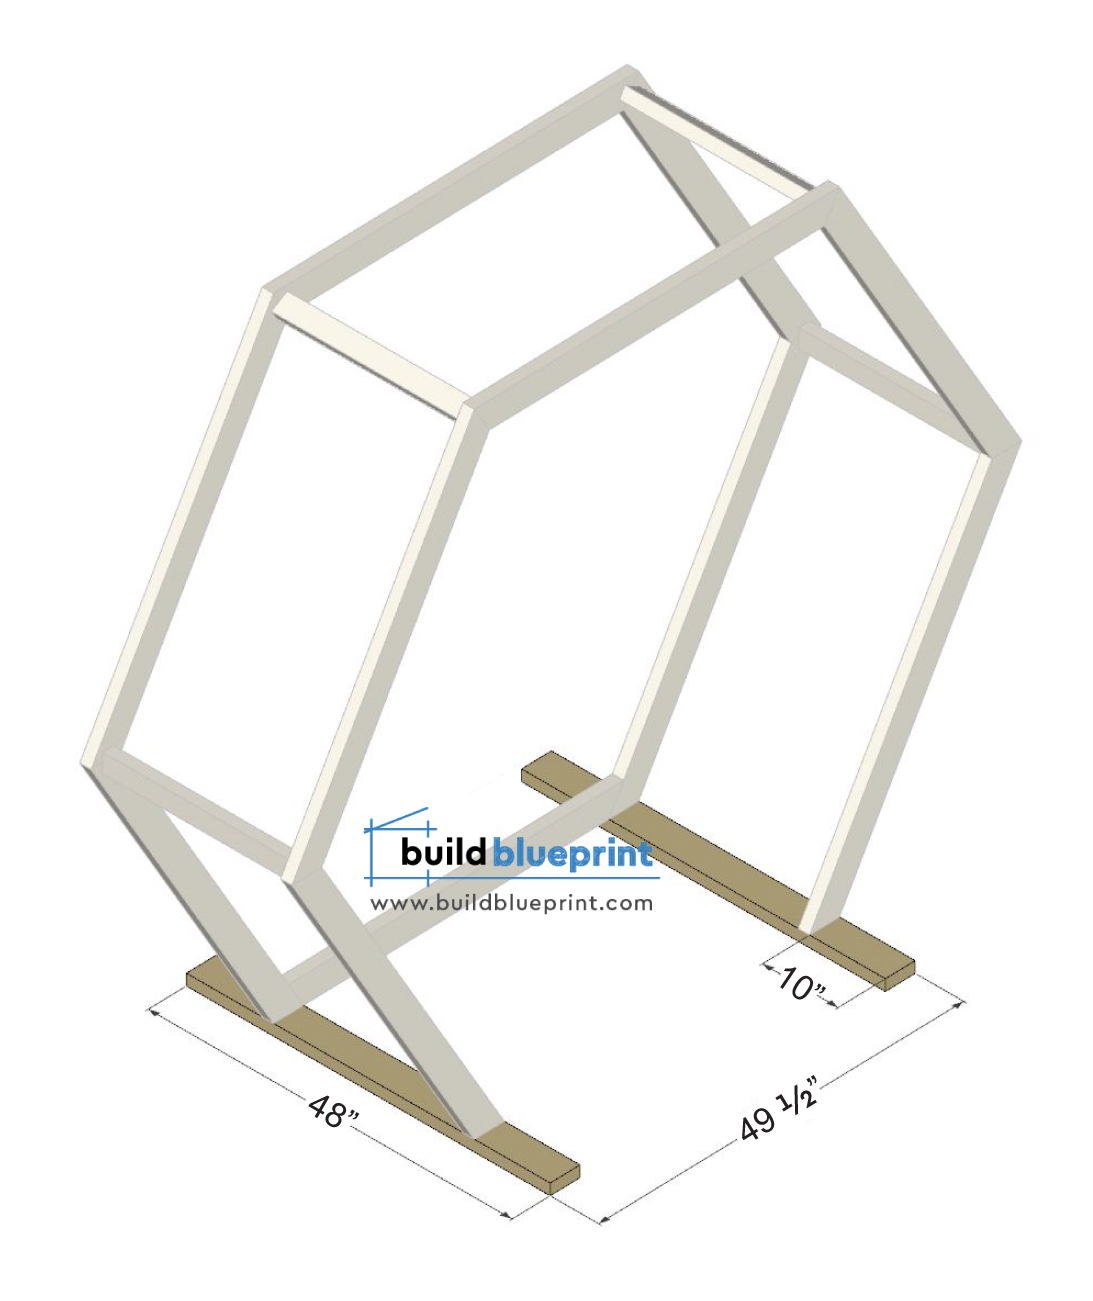
Step 4 – Arbor Base
The base is made from 2×6’s ripped down to 4”. To attach to the frames, drill pilot holes from the bottom and secure using 3 1/2” screws.
Step 5 – Stain or Paint
Before staining completed hexagon arbor, sand down the wood surface until it is a fine texture. The best type of stain for this is oil-based stains. Oil-based stains will penetrate deeper and give it a finer finish, and are more weather resistant for outdoor use. The hexagon wedding arbor is now complete and ready for your big day! You can also decorate it with flowers or leaves for a complete boho style look!
Not convinced this style fits your wedding? Check out our 5 easy DIY wedding arbor plans HERE