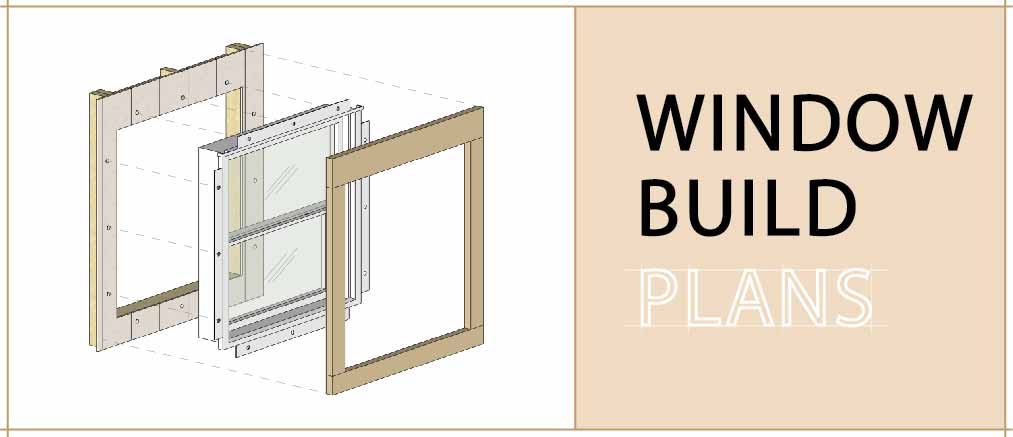
Overview
Adding a window will allow plenty of light into your shed to rummage around, but be careful with the placement so the sunlight doesn’t damage your valuables. The height and width of the window plan below can be adjusted to suit any size of window opening. It is recommended that you plan out the window placement before wall frame is assembled, as it’s more difficult trying to add it in afterwards. This window build fits all shed designs, check out our shed plans!
Window Opening
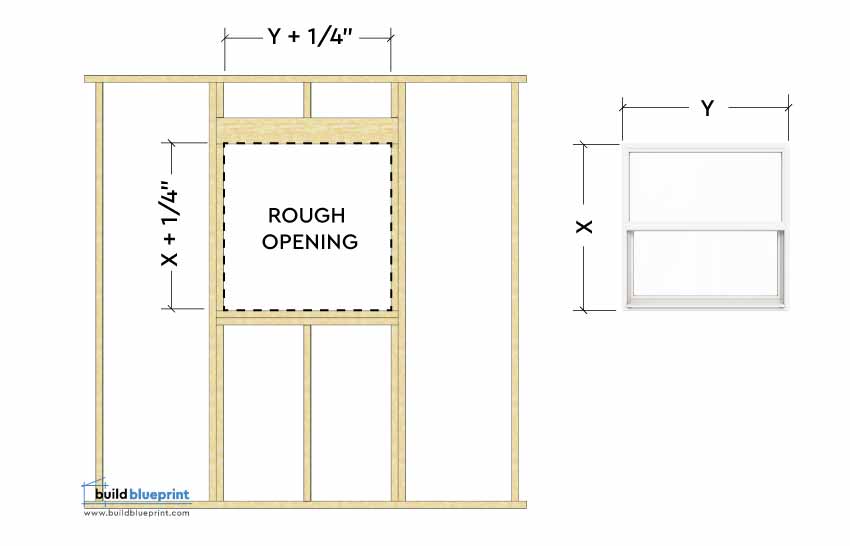
First, determine the exact size of the window opening you want before starting the wall frame build. Some standard size comes in 18″ x 23″ or 18″ x 27″, you can find these at almost any hardware stores. Next, you’ll want to determine the approximate placement of the window opening on the wall. It is recommended that the top of your window header lines up with the top of the door, for a professional look.
Cut the header and rough sill per your window width, the rule of thumb is to plan the opening 1/4″ larger than the actual window size, this will ensure the window fits into the frame and also leave a bit of room for error.
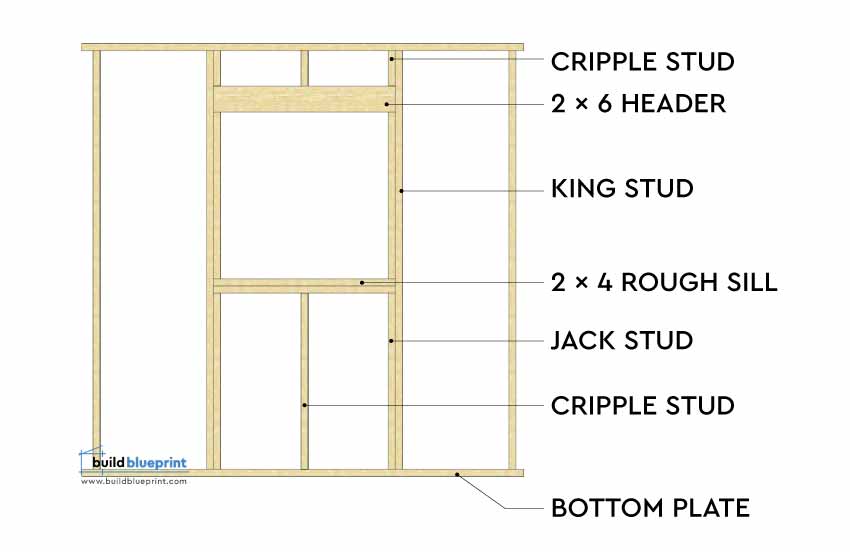
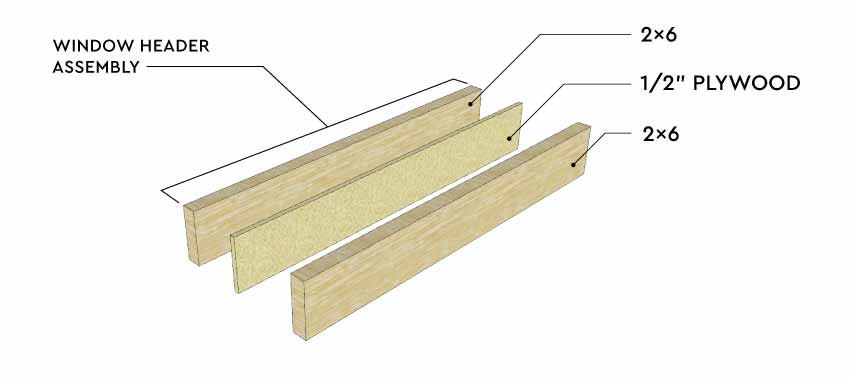
Construct window opening and secure the wall frame before adding in the actual window. The wall frame elevation below uses all 2 x 4 lumbers, and 2 x 6’s for window header.
The window header length is window width + 3″ if you’re using 2 x 4 for studs. You can use a 1/2″ plywood or any wood material as the filler piece.
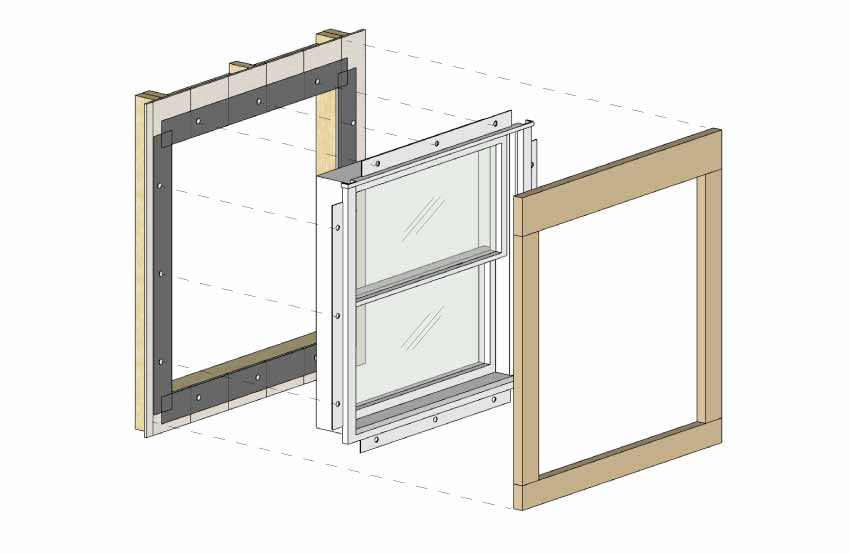
Window Flashing
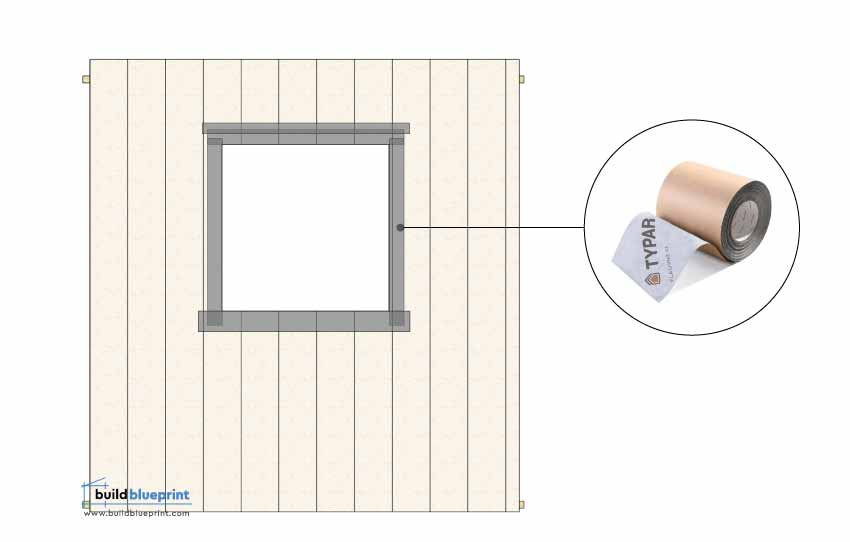
Cut and install exterior siding panels, carefully measure and cut the window opening along the framing.
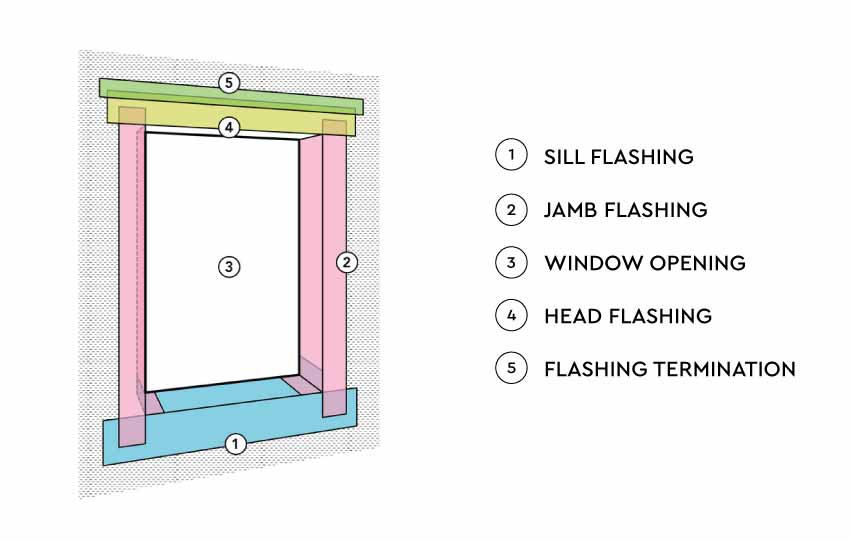
Apply 6″ window flashing tape along the opening per diagram below, make sure you cover the entire sill, jamb, and header. This will create a waterproofing barrier between the window and framing, preventing any moisture from getting into your shed.
Window Installation
After the flashing is in place, you’re now ready to install the window. Hold the window in place, then insert screws or nails into the hinge openings (these should already been pre-drilled in the product).
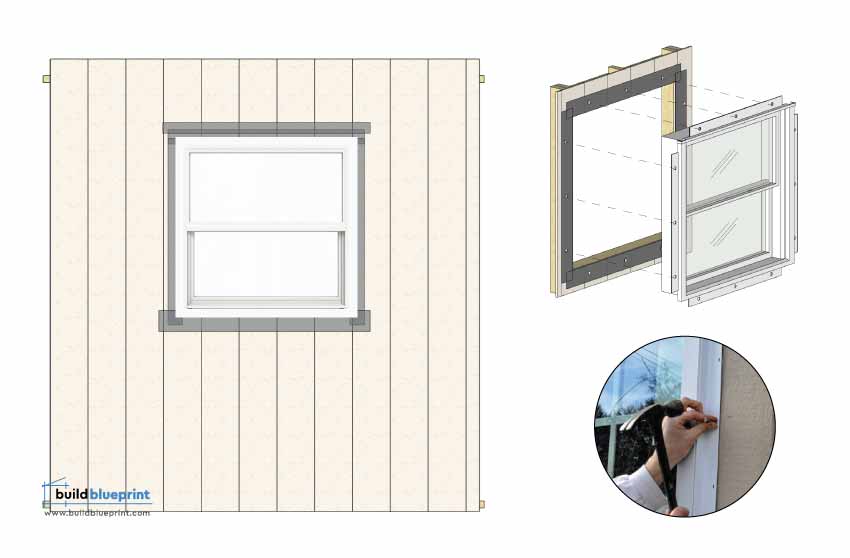
Add in window trim, this will help to cover up the flashing giving it a clean finish. You can use 2 x 6’s or 2 x 4″ for the trims, and 3 1/2″ nails to secure in place.
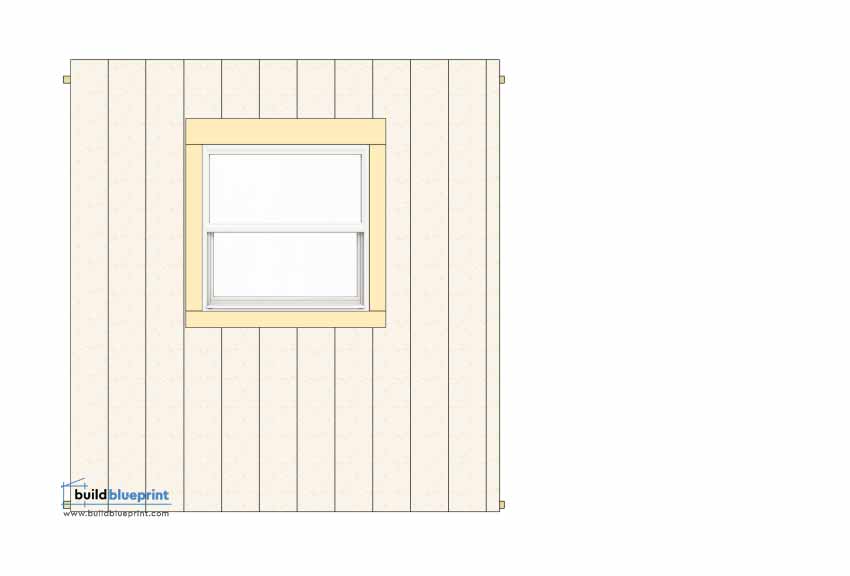
Finished window:
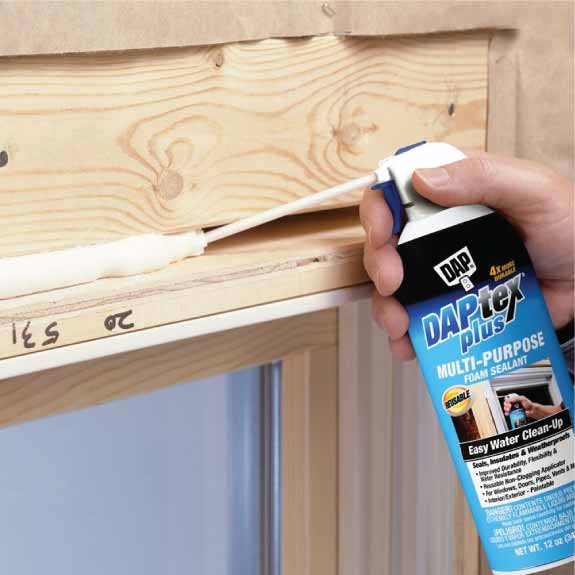
Optional: Sealant Foam
On the interior, you can fill any leftover gap with a sealant foam.