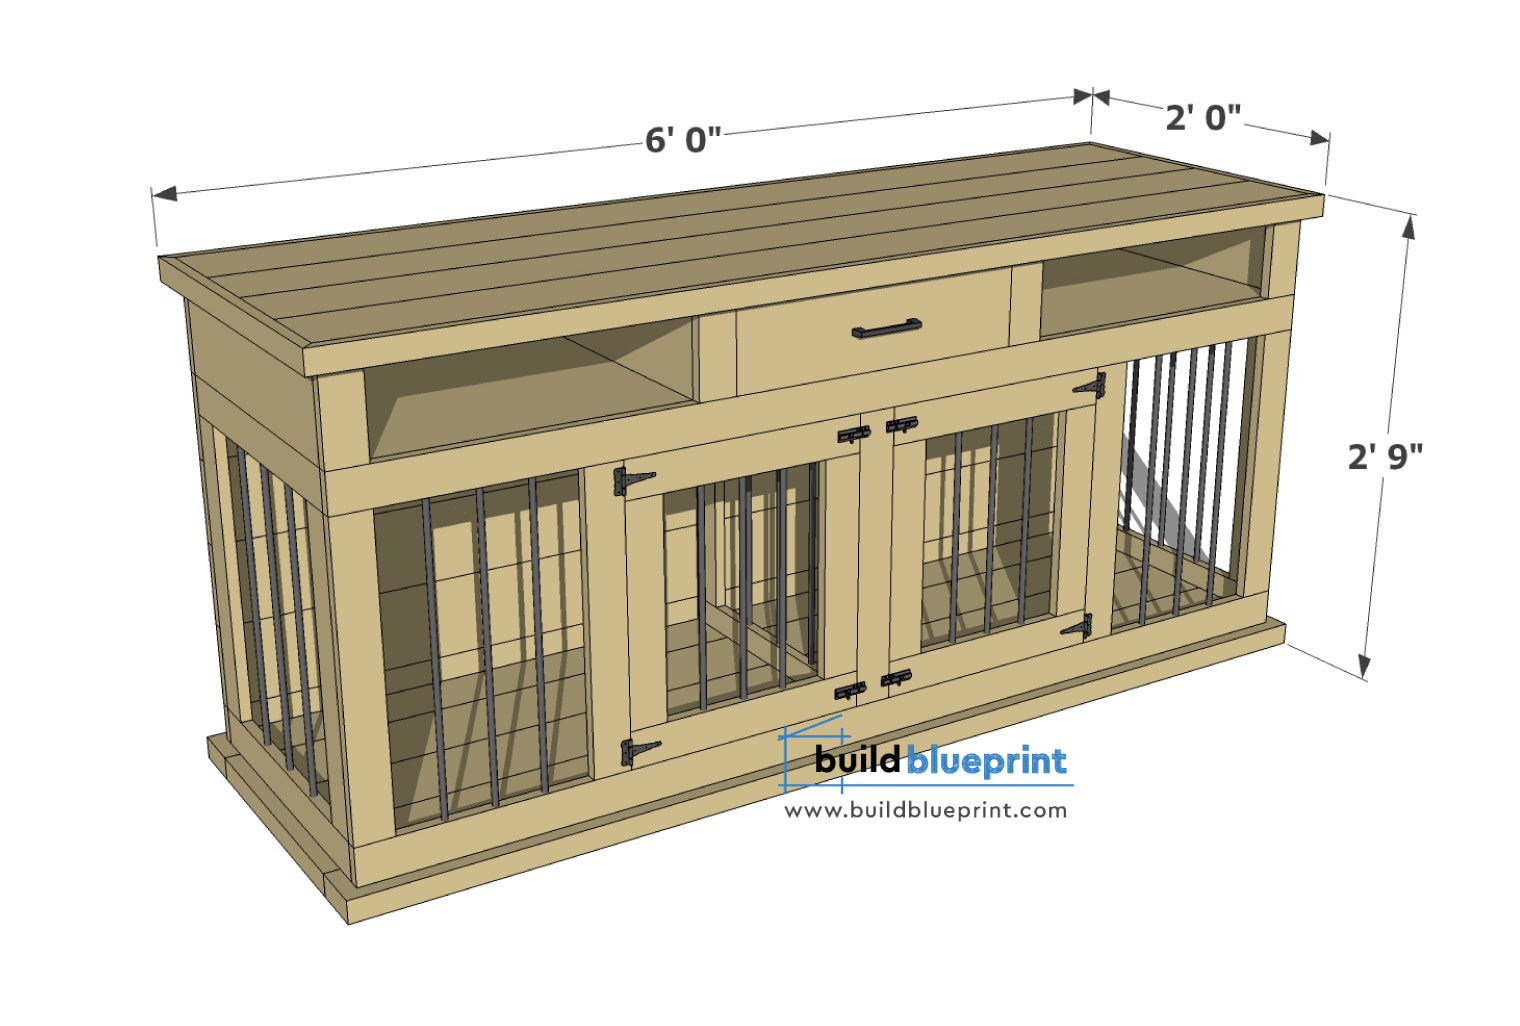
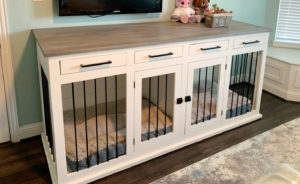
Kennel Bottom Structure DIY Plan:
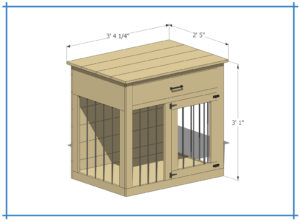
The bottom portion of this dog kennel tv stand is exactly the same as the Medium Double Dog Kennel build, please build the bottom panels using these plans first before continuing.
Get the complete Double Kennel TV Stand plan – Instant PDF download 8.5″ x 11″
PDF includes the cut list, additional diagrams and dimensions, complete step-by-step DIY instructions.
Buy Complete PDF Plan
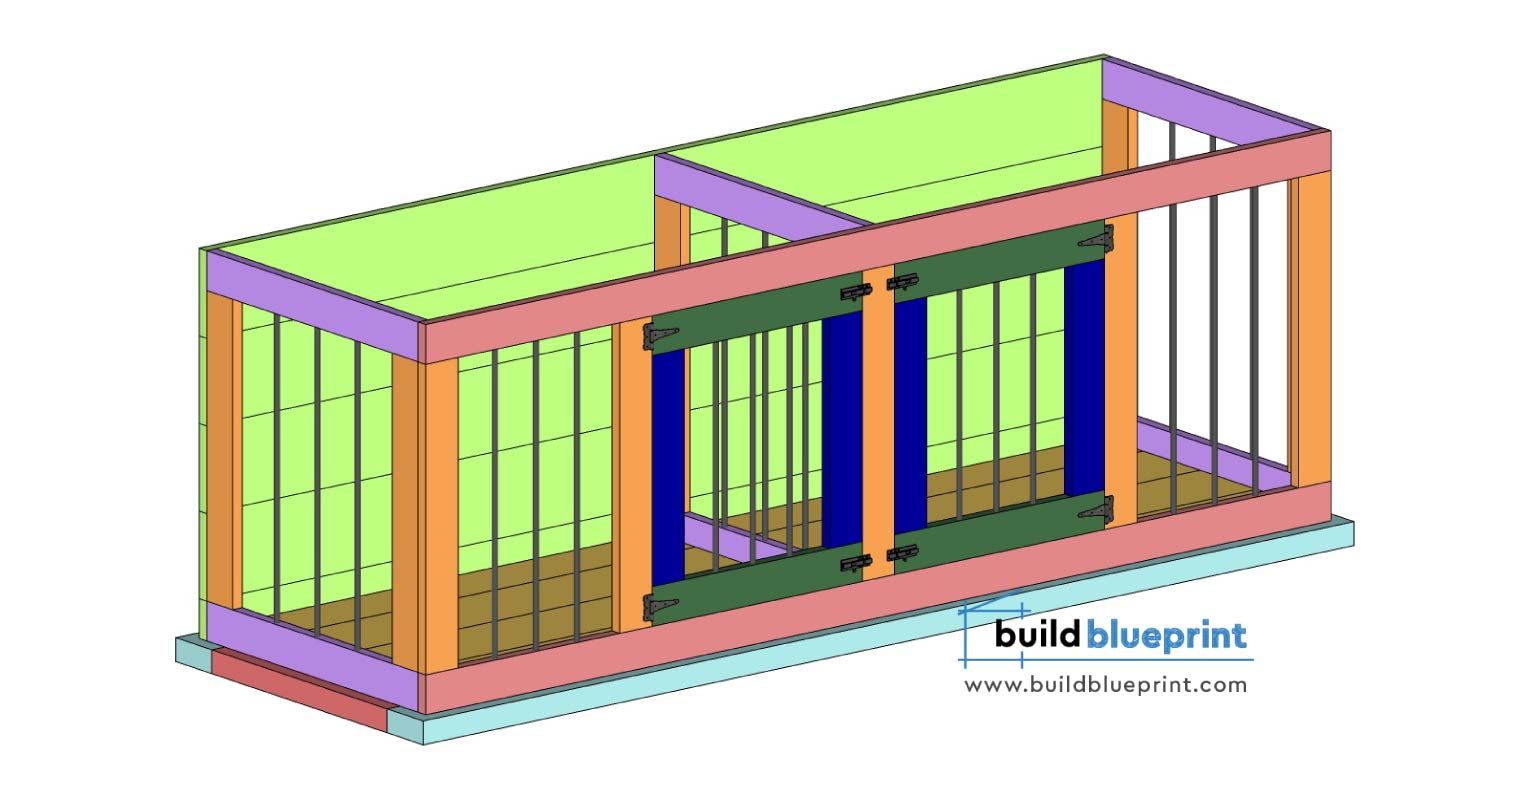
Next, purchase and cut the following materials in order to build the kennel shelves, drawers, and table top.
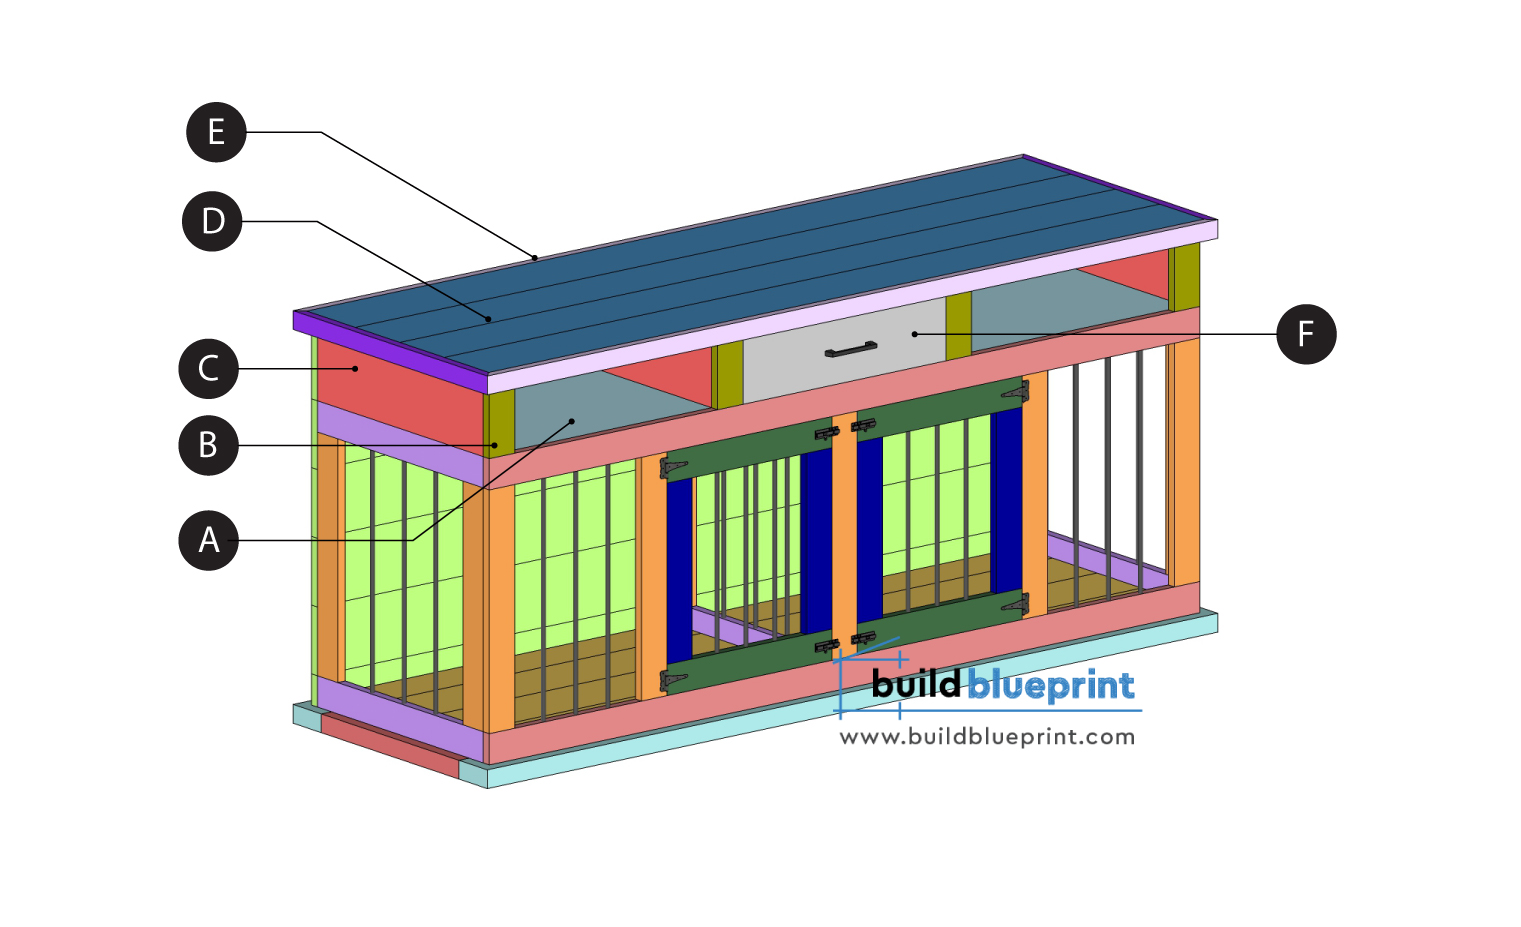
(A) 2 – 3/4″ Plywood: 20 1/2″ x 33 7/8″
(B) 4 – 1×3 Lumber: 5 1/2″
(C) 8 – 1×6 Lumber: 20 1/2″
(D) 3 – 2×6 Lumber: 70 1/2″
(D) 1 – 2×8 Lumber: 70 1/2″
(E) 2 – 1×2 Lumber: 72″
(E) 2 – 1×2 Lumber: 24″
(F) Drawer Materials:
1 – 1×6 Lumber: 20″
2 – 3/4″ Plywood: 20″ x 4″
1 – 3/4″ Plywood: 17 1/2″ x 4″
1 – 1/4″ Plywood: 19″ x 20″
Support Materials:
4 – 1×2 Lumber: 30 7/8″
4 – 1×2 Lumber: 20 1/2″
HARDWARE
– Rust-Oleum Epoxy Metal Paint
– (4) 3″ T-Hinge Hardware
– (4) 3″ Barrel Bolts
– (3) 5″ Bar Drawer Handles
– 1 1/4″ Pocket Screws
– 2 1/2″ Pocket Screws
– 3/8″ Dowels
PROJECT TOOLS
– Tape Measure
– Pocket-hole Jig
– Cordless Drill
– Miter Saw / Circular Saw
– Sandpaper or Sand Block
– Refer to the woodworking tool guide for more information
Step 1
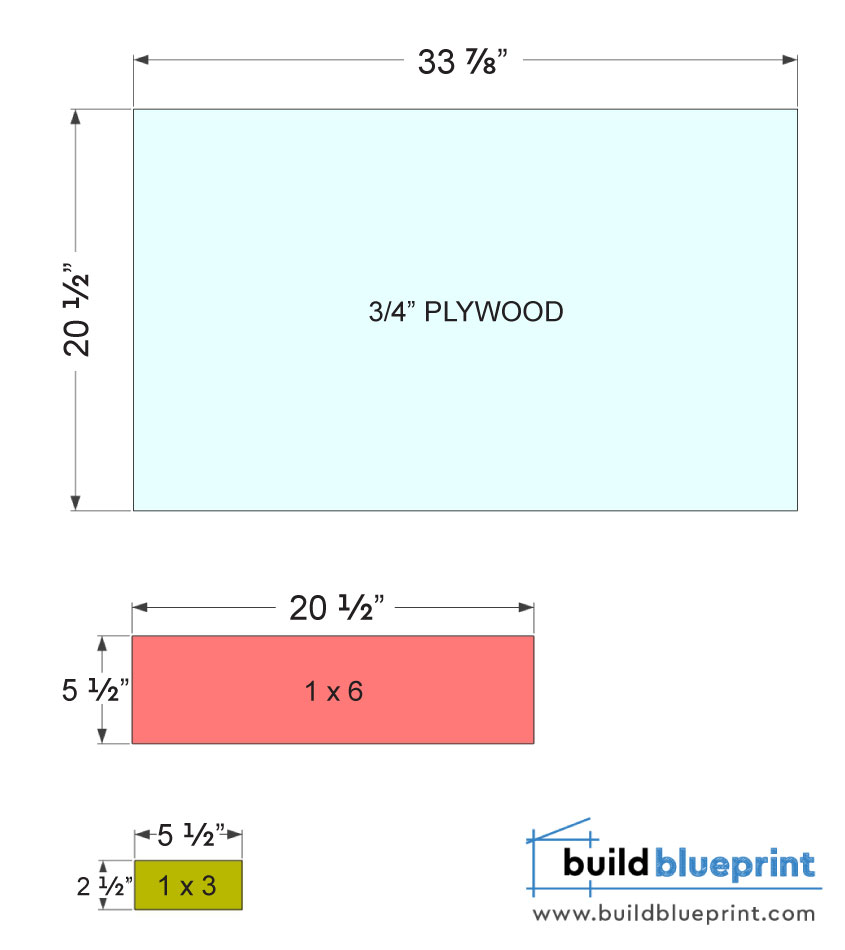
First, we will build out the kennel’s top shelves, this is where the drawers will insert to (you can also leave them as cubbies). Cut the 1×6 lumbers and 3/4″ plywood per cut list dimensions below, you will need 2 identical plywood for the shelf panels.
Step 2
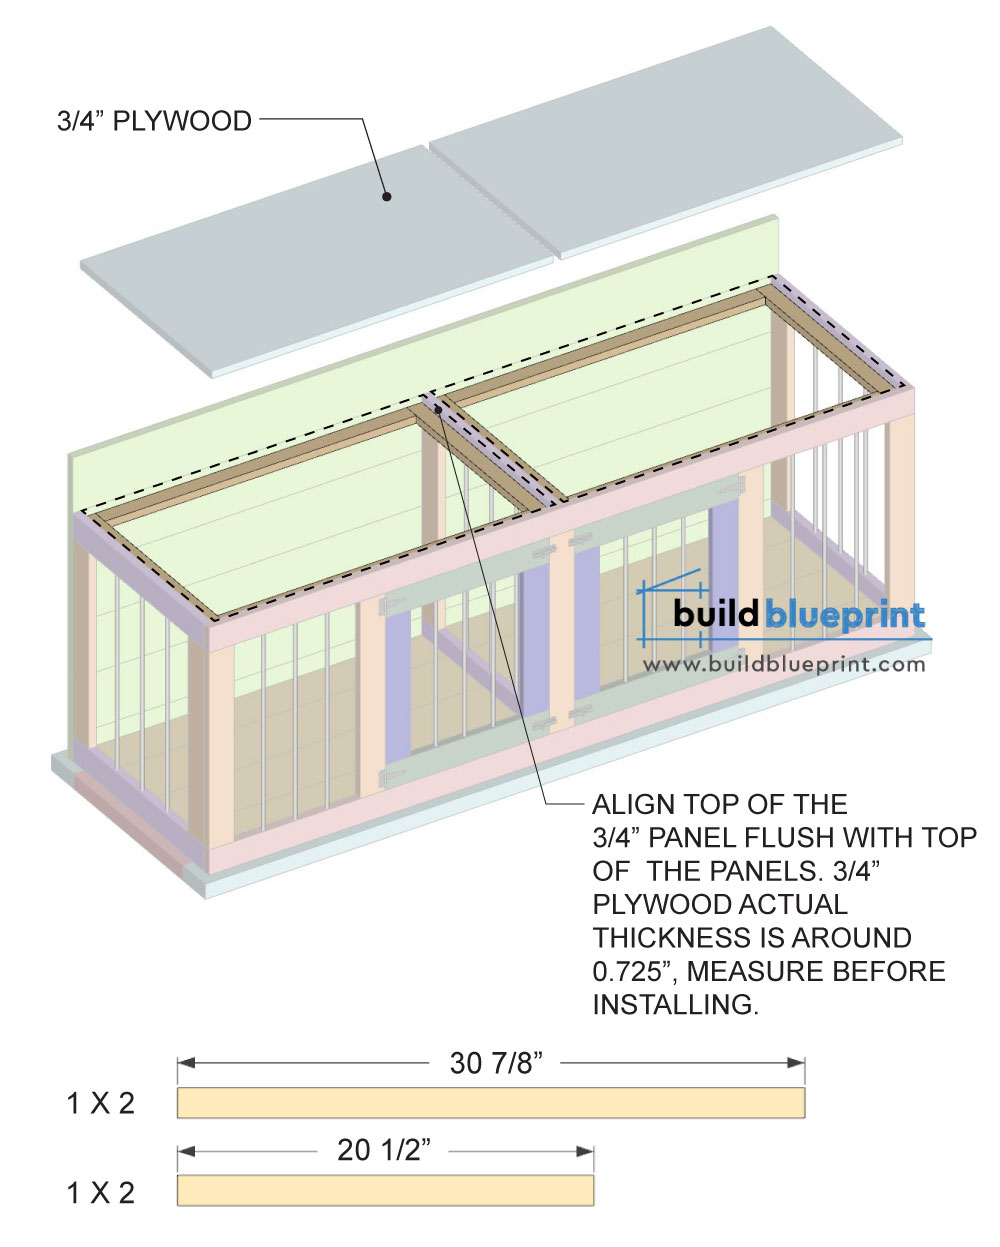
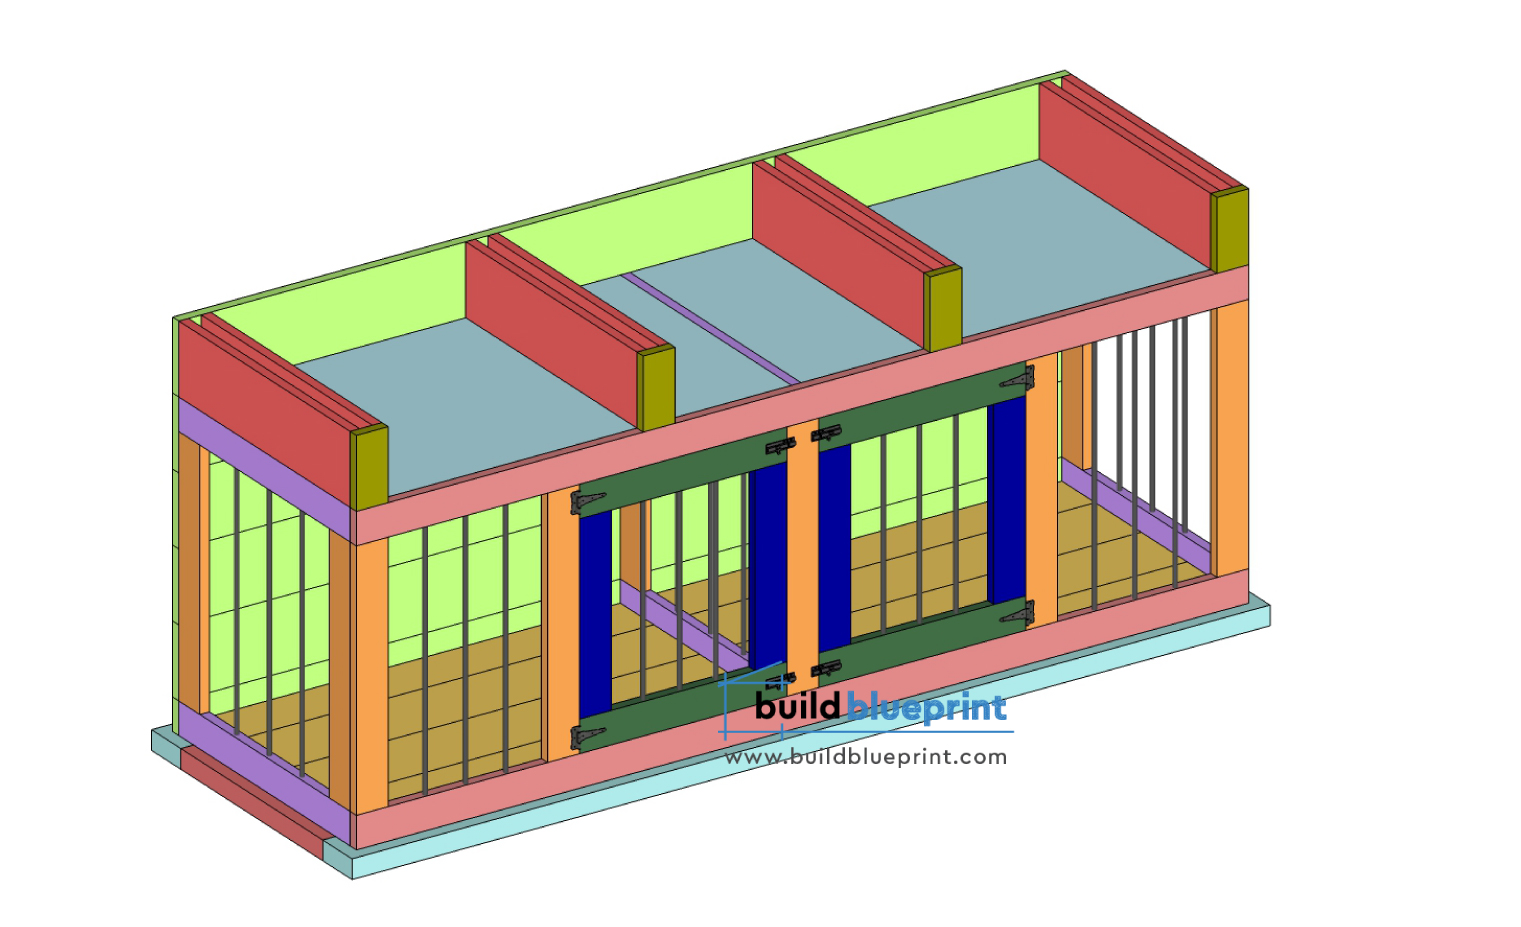
Before placing the shelf panels in place, we will need to build out the supports using 1×2’s. Cut four 1×2’s to 30 7/8″ and four more 1×2’s to 20 1/2″, you can use wood glue and 1 1/4″ pocket screws to secure these in place. These will sit directly below the two shelf panels, so about 0.725″ below the top of the vertical panels, measure carefully before installing. You’ll want the top of the shelf panels to be flush with top of all the vertical panels.
Step 3
Next, install the cubby panels per layout below. The smaller front 1×3 stiles are spaced with 20″ of gap in-between each one, refer to the elevation diagram below for exact placement. Use wood glue and 1 1/4″ pocket screws to secure these in place.
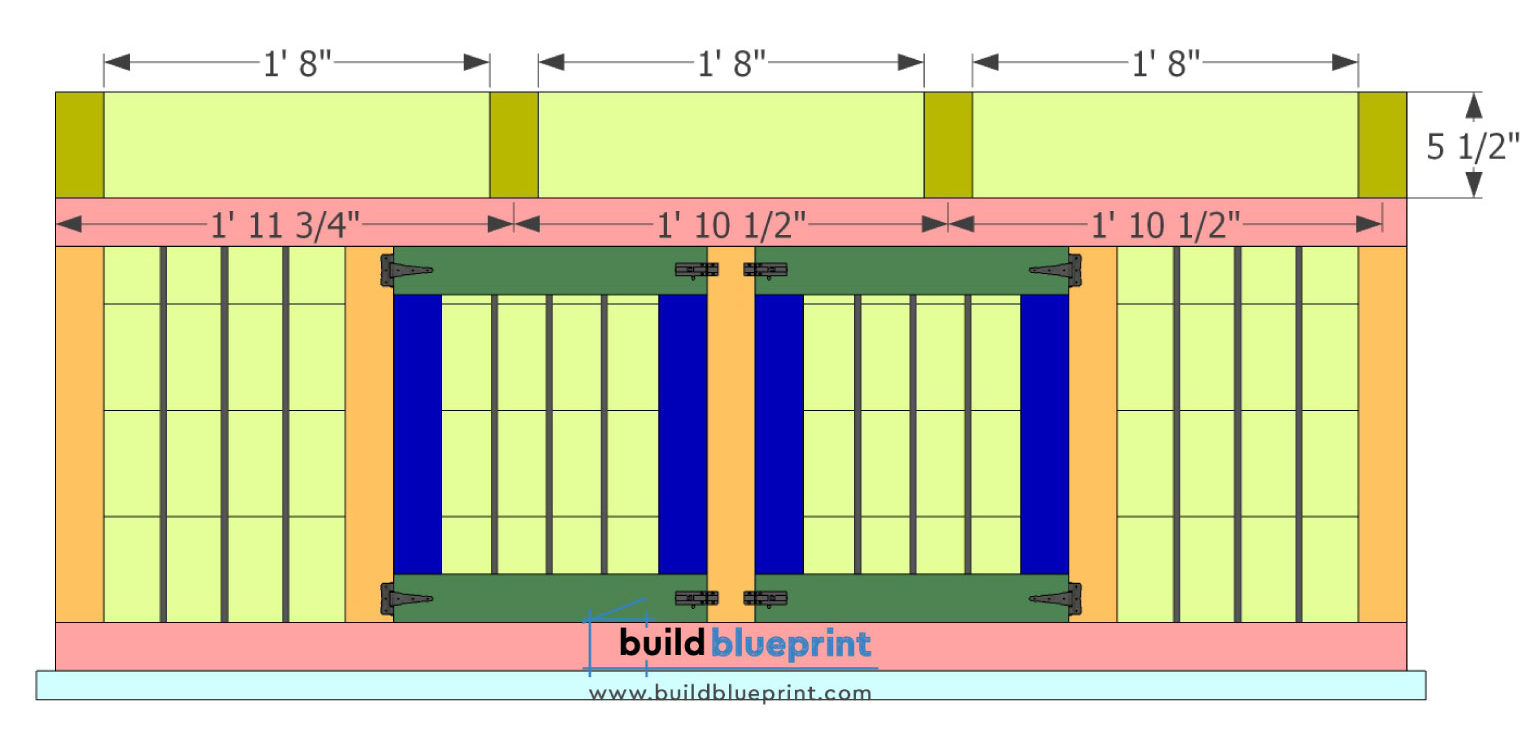
Then, add in the eight cubby dividers (20 1/2″ 1×6’s) to align with the cubby stiles per layout below. Use wood glue and 1 1/4″ pocket screws to secure them in place, to create three identical cubbies. The drawers in the next step will slide into these cubbies.
Step 4
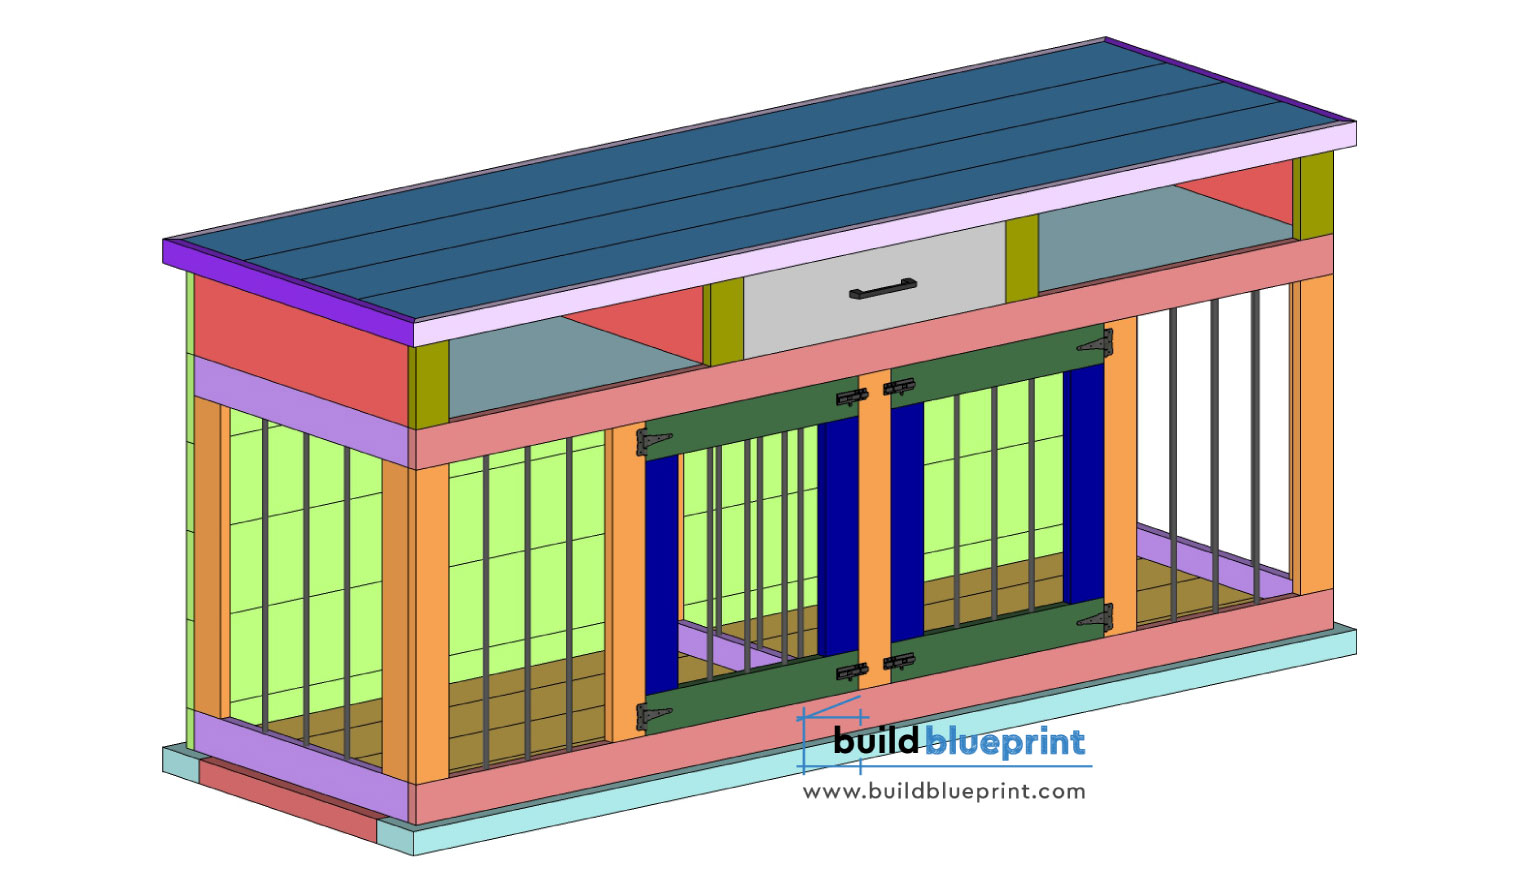
The table top panel is 24″ x 70 1/2″, you can make these out of four 2×6’s, secured together with 2 1/2″ pocket screws. The border trim is made from 1×2’s, this is optional if you want a more polished perimeter edge. Sand down the surfaces and edges before attaching the table top to the panels below.
Use 1 1/4″ pocket screws to secure the back panel, cubby stiles to the table top.
Step 5
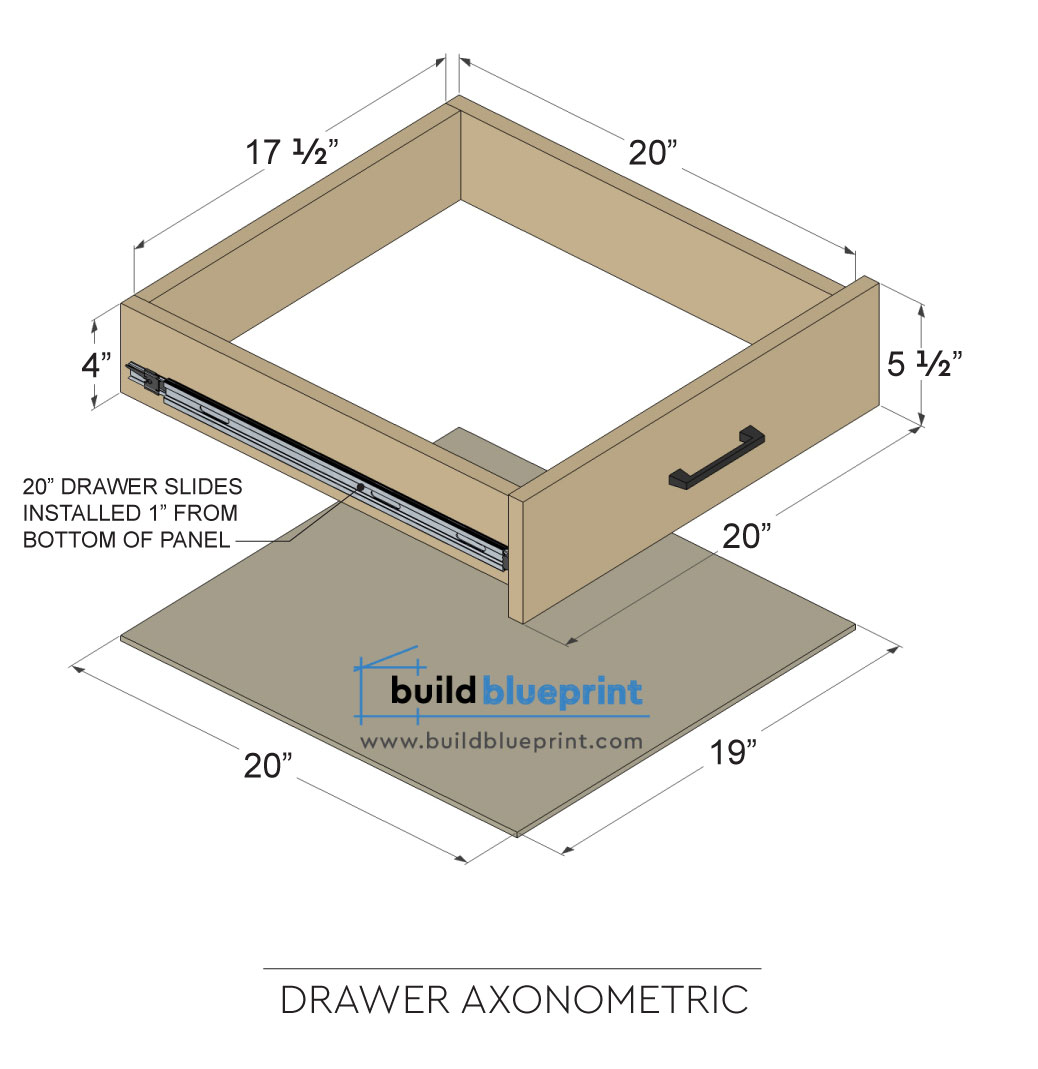
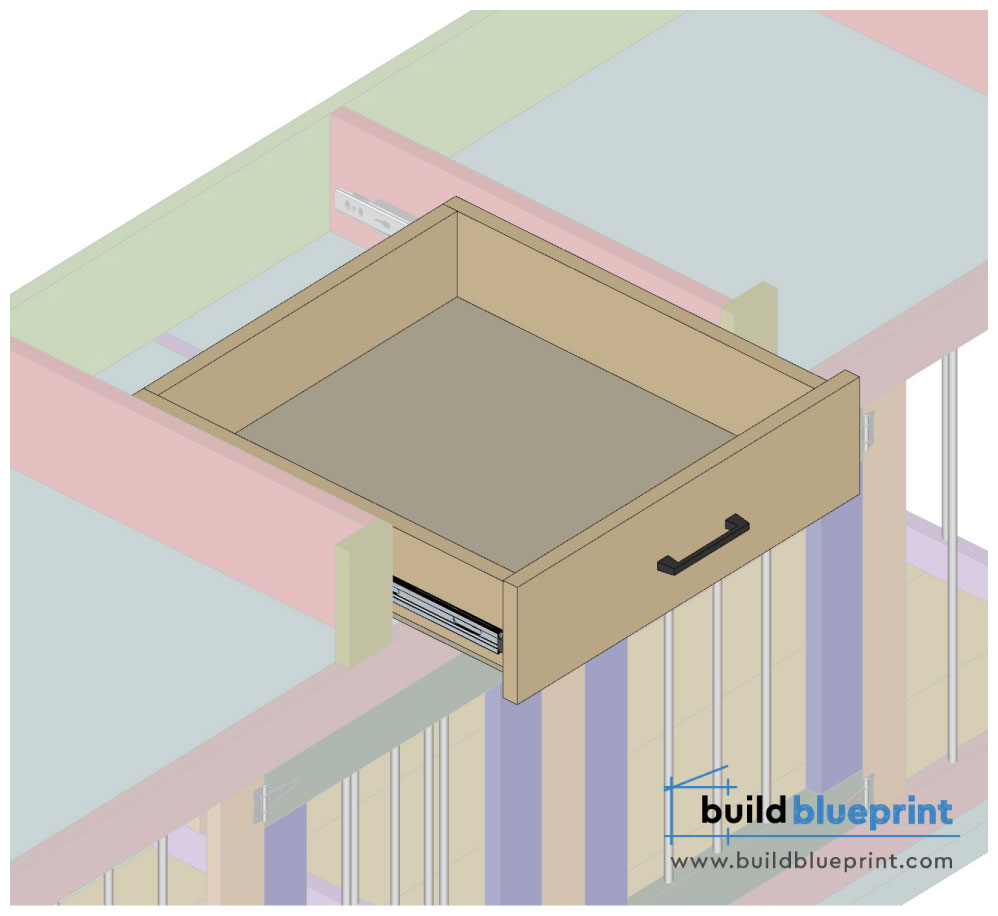
The drawers are made out of 1×6’s and 3/4″ and 1/4″ plywood. You will also need 20″ drawer slides (available on Amazon) that attaches to the side of the drawers and cubbies. The drawers are optional for this kennel design, you can also just omit these and keep the cubbies.
Finally, add 5″ black metal bar drawer handles, on center with each drawer face. You can build up to three drawers for this kennel.
5″ Bar Drawer Handles (5 pack): https://amzn.to/3A53OHd
Insert the completed drawers into the cubbies. And just like that, your double kennel tv stand is complete!
Need another kennel size? Check out my shop for more kennel design and sizes. The full PDF plans include the full materials list, cut list, complete dimensions, 2D/3D diagrams, step-by-step instructions, and helpful tips. Thank you for your support!
