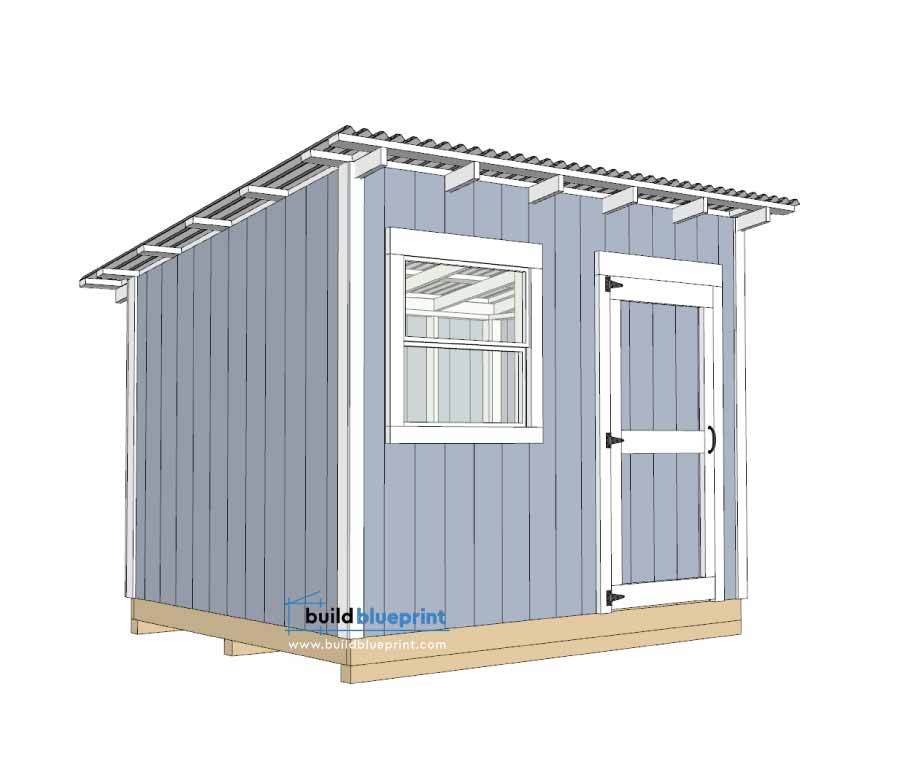
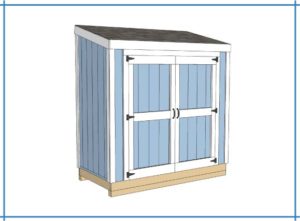
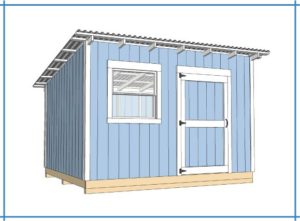
Get the Complete 8×10 Lean-To Shed Plans – PDF Version 8.5″ x 11″ Print Ready:
PDF includes the cut list, additional diagrams and dimensions, complete step-by-step DIY instructions.
Buy Complete PDF Plan
Material and Cut List
FLOOR
9 – 2×6 Pressure Treated Lumber 8′ (cut to 7′-9″)
2 – 2×6 Pressure Treated Lumber 10′ (no cut)
3 – 4×4 Pressure Treated Lumber 10′ (no cut)
3 – 23/32″ Tongue and Groove Plywood 4′ x 8′ Sheet (cut to size)
WALLS
8 – 2×4 Lumber 8′ (cut to 7′-4 1/2″)
18 – 2×4 Lumber 8′ (cut to 6′-2″)
4 – 2×4 Lumber 8′ (cut to 7′-5 “)
4 – 2×4 Lumber 10′ (no cut)
SIDINGS
9 – 4′ x 8′ Plywood Siding Panel T1-11 (cut to size)
RAFTERS
6 – 2×4 Lumber 10′ (cut to 9′-10 3/8″)
3 – 2×4 Lumber 10′ (cut to size)
ROOF
7 – 2×4 Lumber 12′ (cut to 11′-8″)
3 – 2×4 Lumber 8′ (cut to size)
10 ft. Corrugated Steel Roof Panel (100SF)
TRIM
10 – 1×4 Lumber 8′ (cut to size)
HARDWARE
3 1/2″ Galvanized Steel Nails
2″ Deck Screws
2″ Galvanized Finishing Nails
1 1/2″ Drilling Roofing Screws
DOOR FRAME
2 – 2×4 Lumber 8′ (cut to 6′-5 3/4″)
2 – 2×4 Lumber 8′ (cut to 6′-3 1/2″)
1 – 2×6 Lumber 4′ (cut to 3′-7″)
2 – 2×6 Lumber 4′ (cut to 3′-3″) (used for header)
1 – 2×6 Plywood Filler (used for header)
DOOR
2 – 2×4 Lumber 6′ (cut to 5′-6″)
2 – 2×6 Lumber 3′ (no cut)
1 – 2×6 Lumber 3′ (cut to 2′-5″)
1 – Door Handle or Latch
3 – 3 1/2 in. x 5/8 in. Door Hinge
WINDOW (optional)
2 – 2×6 Lumber 4′ (cut to 3′-2 3/8″)
2 – 2×6 Lumber 4′ (cut to 3′-6 3/8″)
2 – 2×4 Lumber 4′ (cut to 3′-2 3/8″)
2 – 2×4 Lumber 4′ (cut to 2′-11 1/4″)
1 – 35 3/8″ x 35 3/8″ Single Hung Vinyl Window
Step 1 – Foundation and Floor
Start with selecting a proper site for the 8×10 lean-to shed foundation, ideally a flat solid surface away from any large trees.
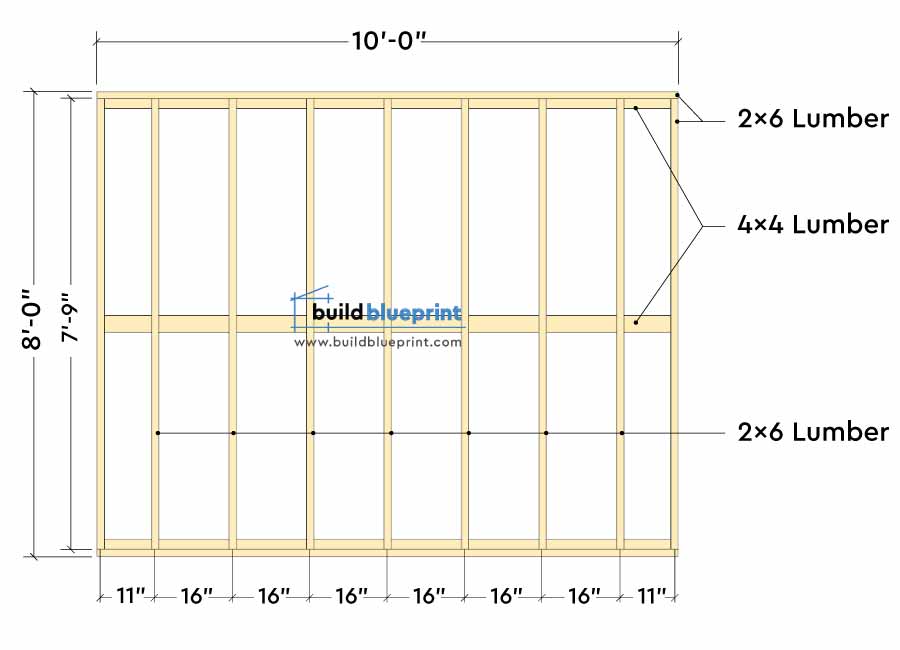
The first step is cut all the 2×6 lumbers as shown in the cut list or in the plan below. Next, place the three 10′ 4×4 lumbers parallel to each other at 4′ apart. Then, assemble the four 2×6 perimeter frame on top, this will outline the overall floor frame. Drill pilot holes through the joists and secure with 3 1/2″ screws. Finally, install the seven 2×6 floor joists at 16″ O.C., and 12″ O.C. near the sides.
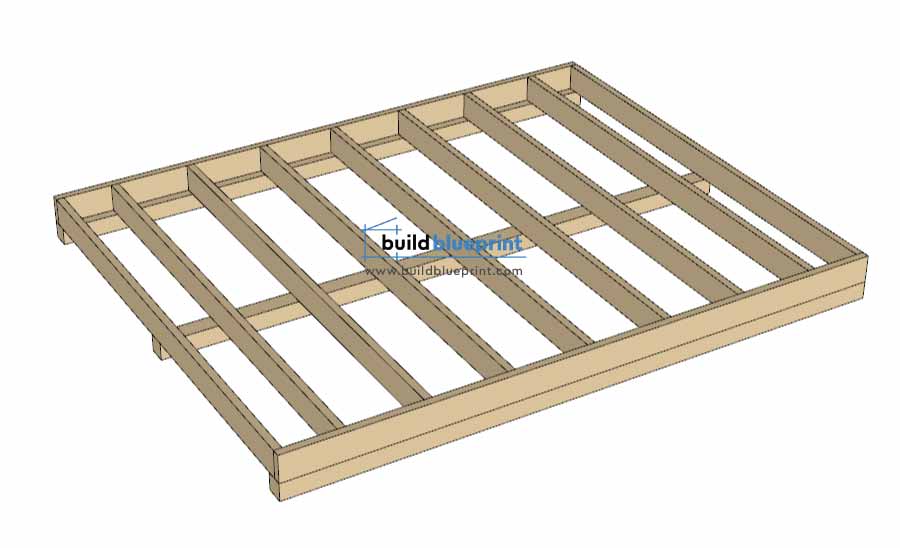
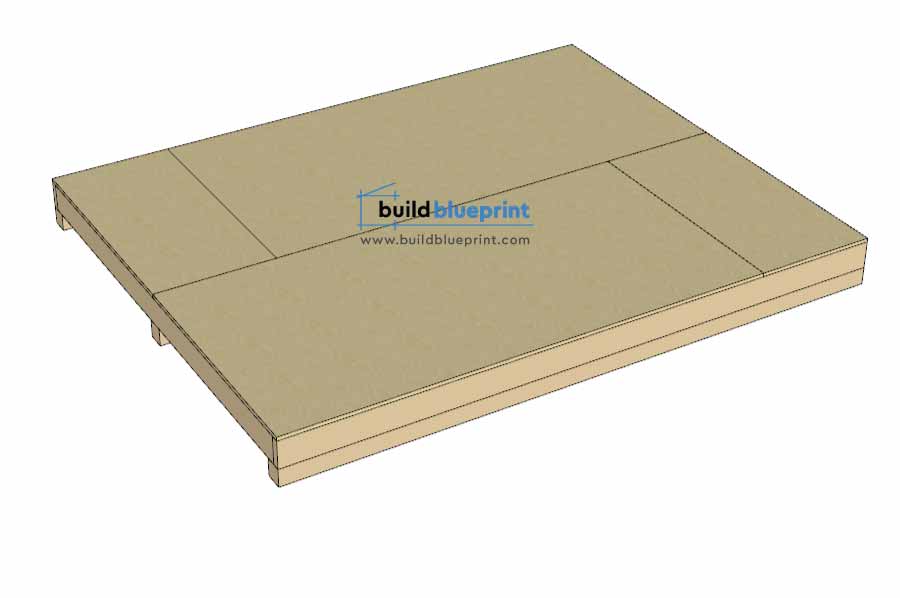
After the floor frame is secured, cut the tongue and groove 23/32″ plywood to size and attach to the frame. These sheets usually come in standard sizes of 48″ x 96″. Insert 2″ deck screws every 8″ along the joint, don’t leave any gaps between the sheets. You’ll need 80SF of plywood panels to cover the 8×10 shed floor. Refer to the cut pattern below:
Step 2 – Walls
Start with the front wall frame first, all frames used here are 2×4’s (except the door and window header which are 2×6’s).
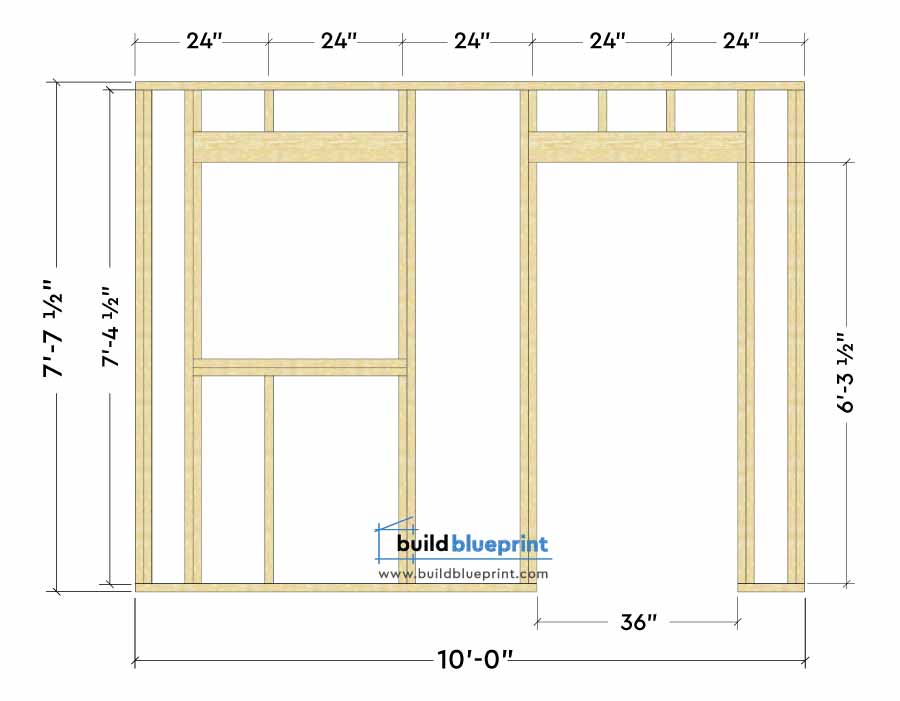
Cut two 2×4 to 10′ in length, these will be used for the top and bottom plates. Then, cut eight 2×4 to 7′-4 1/2″ for wall studs, these will be placed 24″ O.C. Drill pilot holes through the plates and insert the 3 1/2″ screws into the studs to secure in place. Align the frame edges and make sure all corners are flush for a professional result.
See detailed Door and Window framing instructions here:
Shed Single Door Plan
Shed Window Plan
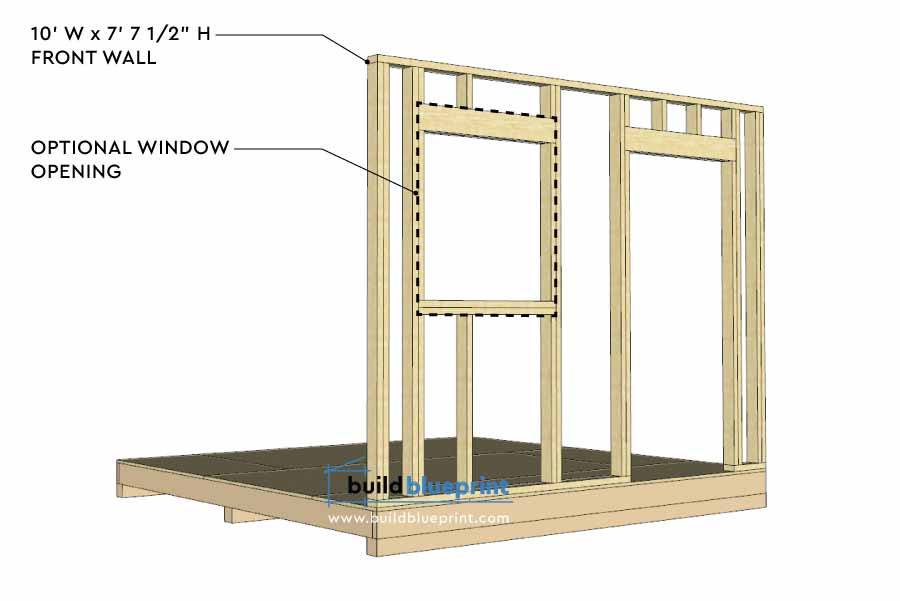
The 2×4 studs holding up the door header need to be cut at 6′-3 1/2″.
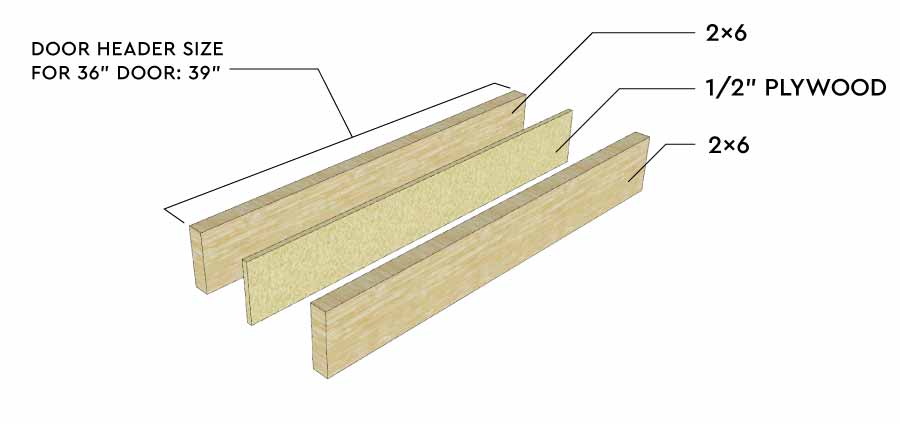
To construct the door header, cut two 2×6 lumber to 39″ length, and insert 1/2″ plywood as filler. Use wood glue to to secure all the pieces together.
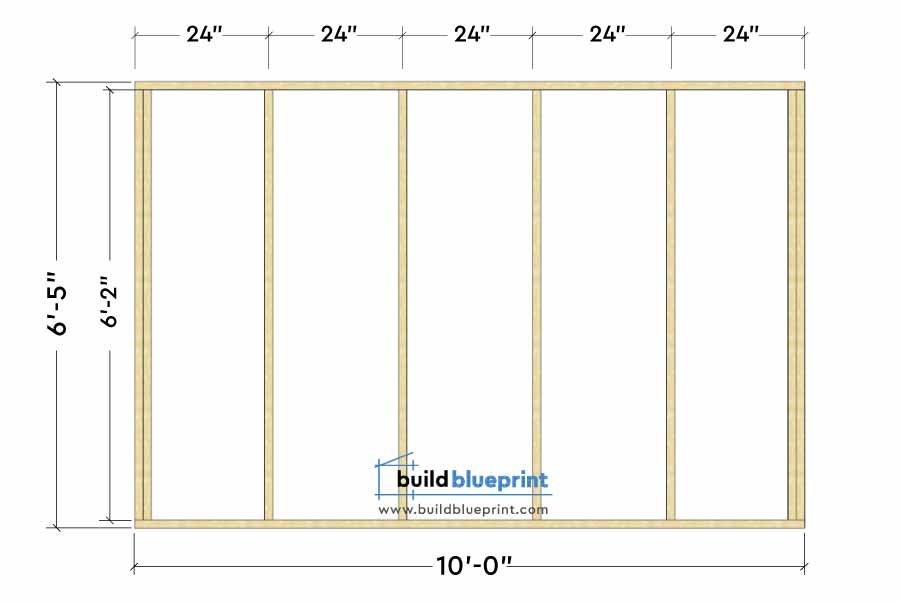
Next up is the building up the shed’s back wall. Cut two 2×4 to 10′ length, and eight more 2×4’s to 6′-2″ length. Follow the framing plan below.
Space the wall studs to 24″ O.C., identical to the front wall. Drill pilot holes through the plate and insert 3 1/2″ screws to secure the studs.
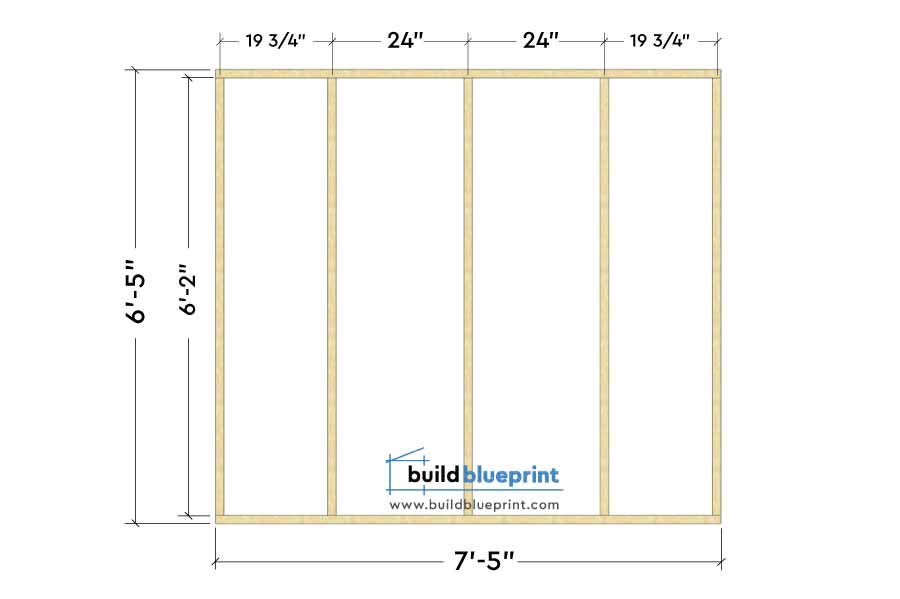
Continue the build by assembling the 2 side wall frames. Cut two 2×4 lumber to 7′-5″ as top and bottom plate, then cut six 2×4’s to 6′-2″ for the studs. Follow the wall frame plan below and assemble 2 sets of side walls.
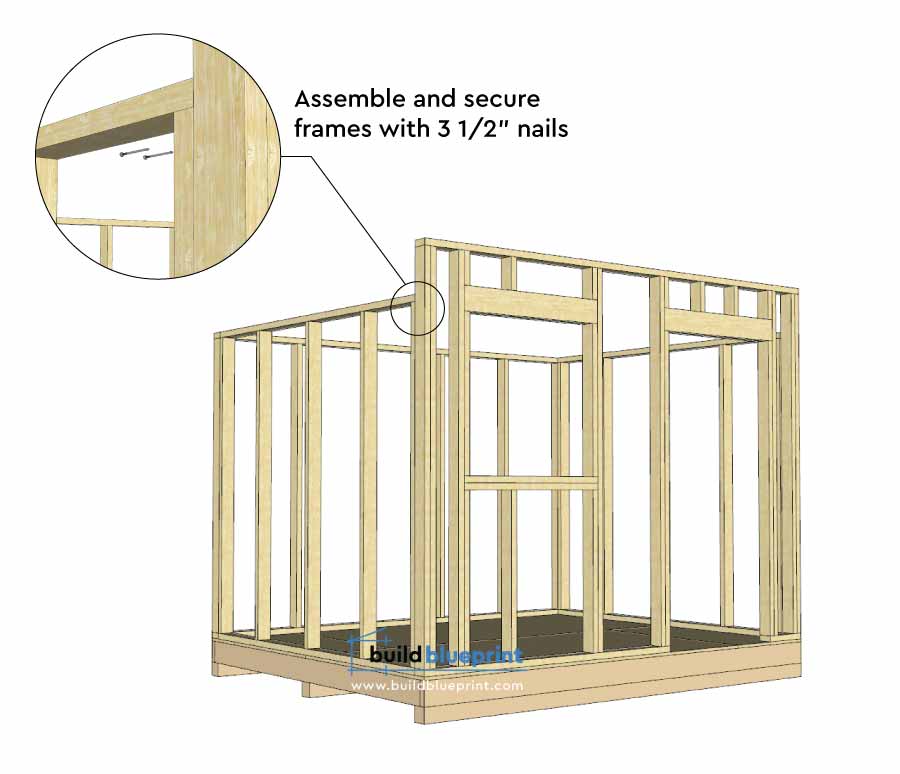
Now that all 4 wall frames are done, time to put them together!
First, line up the edges of the front and side wall frame with the floor frame perimeter. Make sure edges line up and there’s no gaps, use a spirit level if needed. Then, drill pilot holes through the bottom wall plate, and insert 3 1/2″ screws to secure wall frame to the floor. After both wall frames are secured, lock the adjacent walls together by inserting 3 1/2″ screws or nails.
Repeat and assemble all 4 wall frames.
Step 3 – Roof
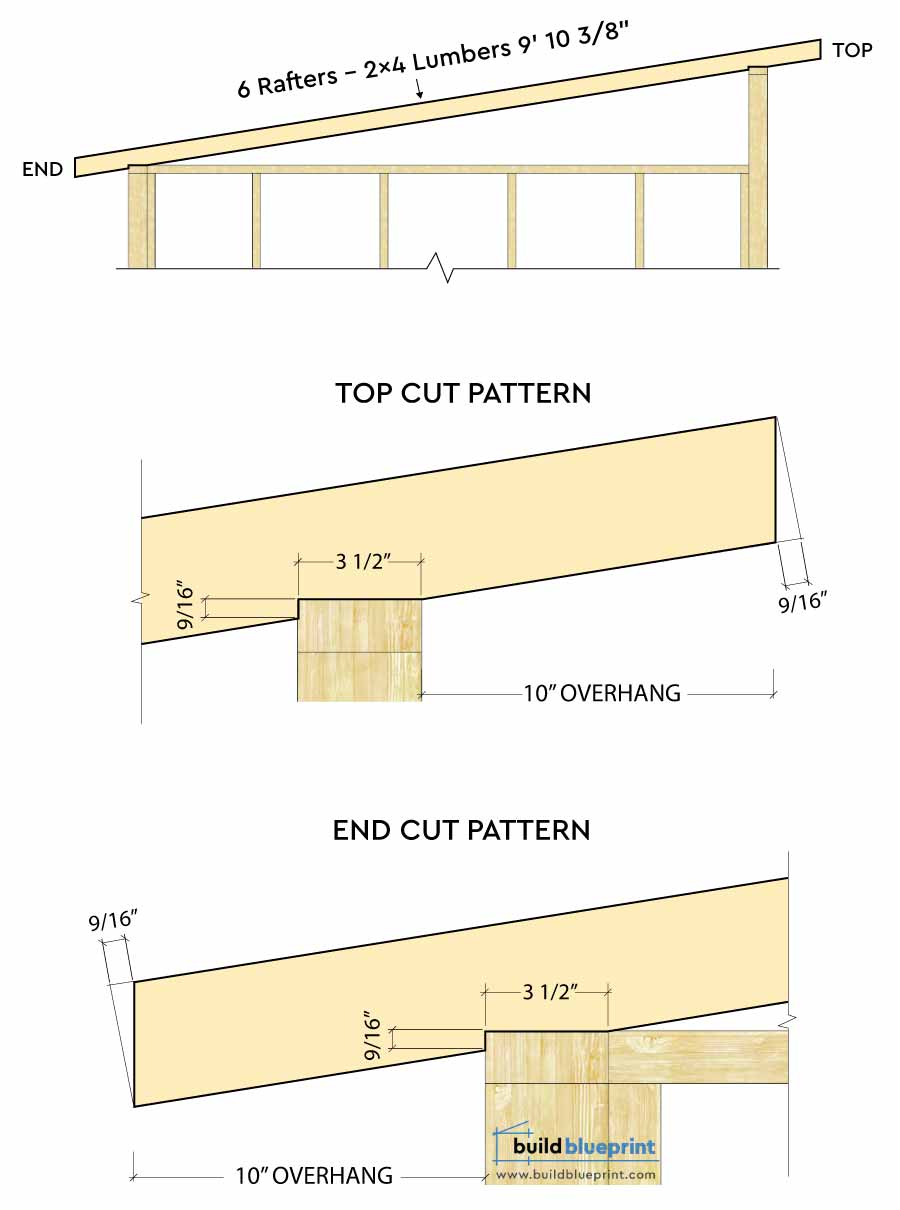
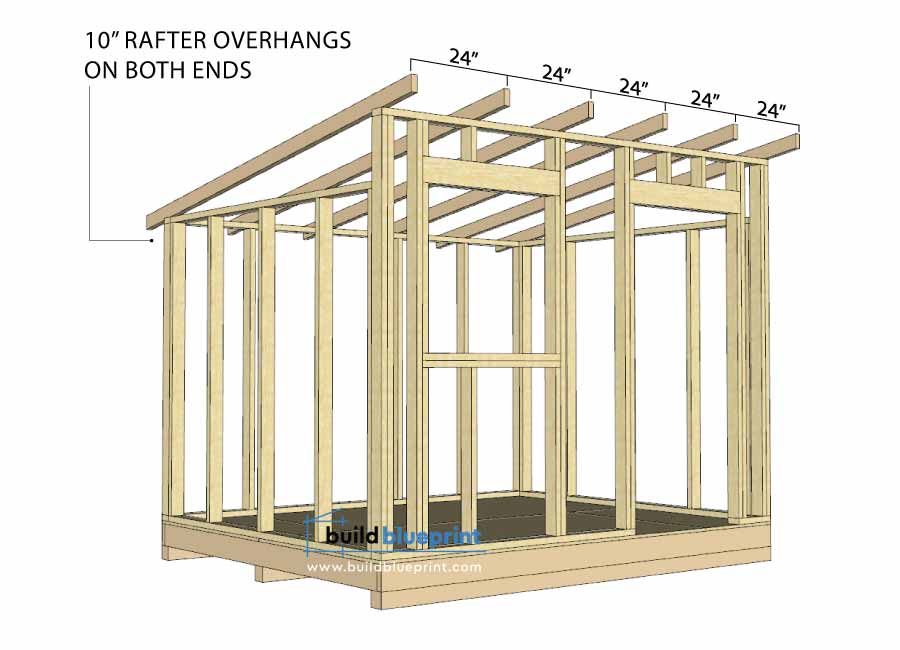
Prepare and cut six 2×4 rafters to 9′-10 3/8″ length. Then cut out 2 notches per Rafter Detail illustration below, these notches are to sit flush with top of the front and back wall frames. The rafters are designed to have an overhang of 10″ on both sides.
Tip: start with cutting one rafter first, to make sure everything fits in place.
After you’ve finished cutting up the rafters, place them 24″ O.C. on top of the wall frames. Then use 3 1/2″ nails to secure each rafter from the underside of the plate.
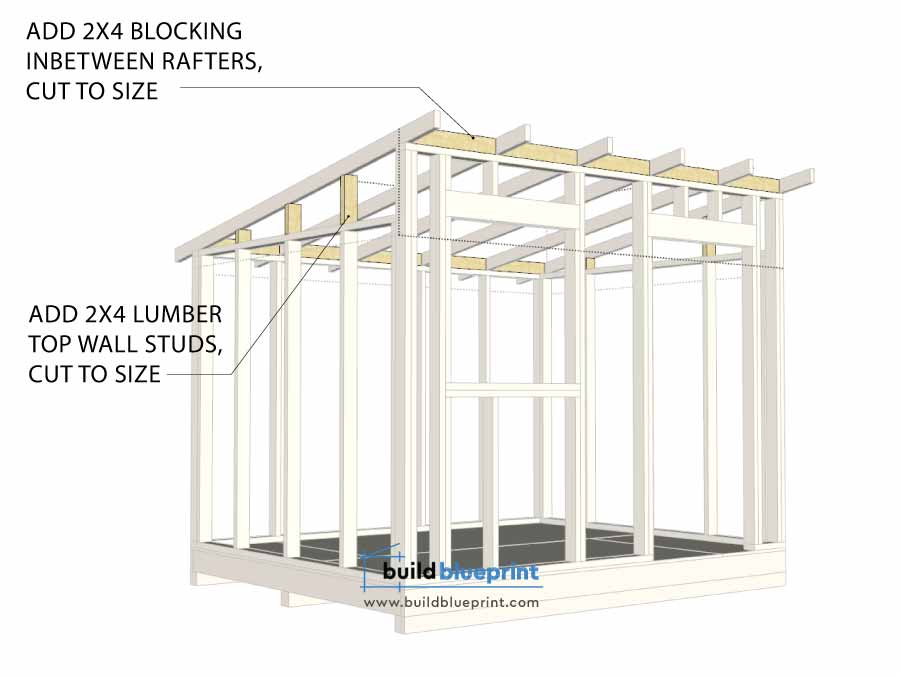
The next step is to add blockings and top studs to stabilize the roof structure. Measure and cut out 10 2×4 blocks length approximately 1′-10 1/2″, place between each rafters and secure with 3 1/2″ nails from the bottom.
Now, measure and cut out 2×4 lumbers to be used as top wall studs. These studs will align directly with the wall frame studs.
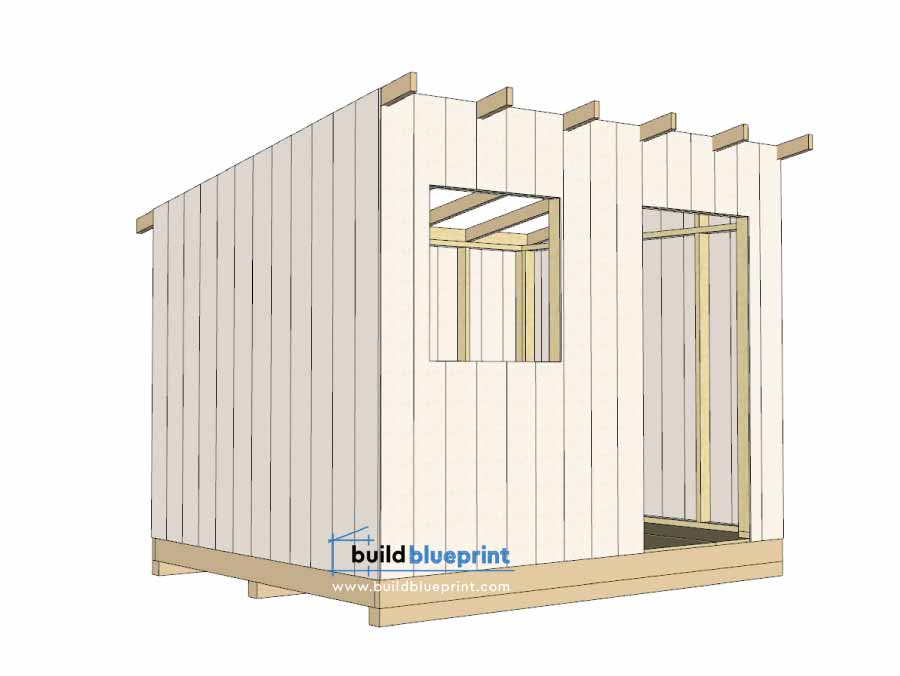
Next up is installing the shed sidings, this is easier to do before we add the rest of the roof structures.
Measure and cut 10 T1-11 plywood siding panels to size. These shed panels interlock, so plan them out accordingly.
For the front wall siding, measure and cut out the door and window openings before installing. The door opening is 36″ x 77″, and the optional window opening is 2′-11 1/4″ x 2′-11 3/8″. The top notches to fit the rafters are about 1 1/2″ x 3 1/2″.
Adding purlins – measure and cut seven 2×4 lumbers to 9′ 8″ in length. Place the purlins 24″ O.C. on top of the rafters, and nail them down with 3 1/2″ nails. Make sure the two 9 3/4″ O.C. purlins sit directly on top of the wall frames, to close any gaps between the wall and roof.
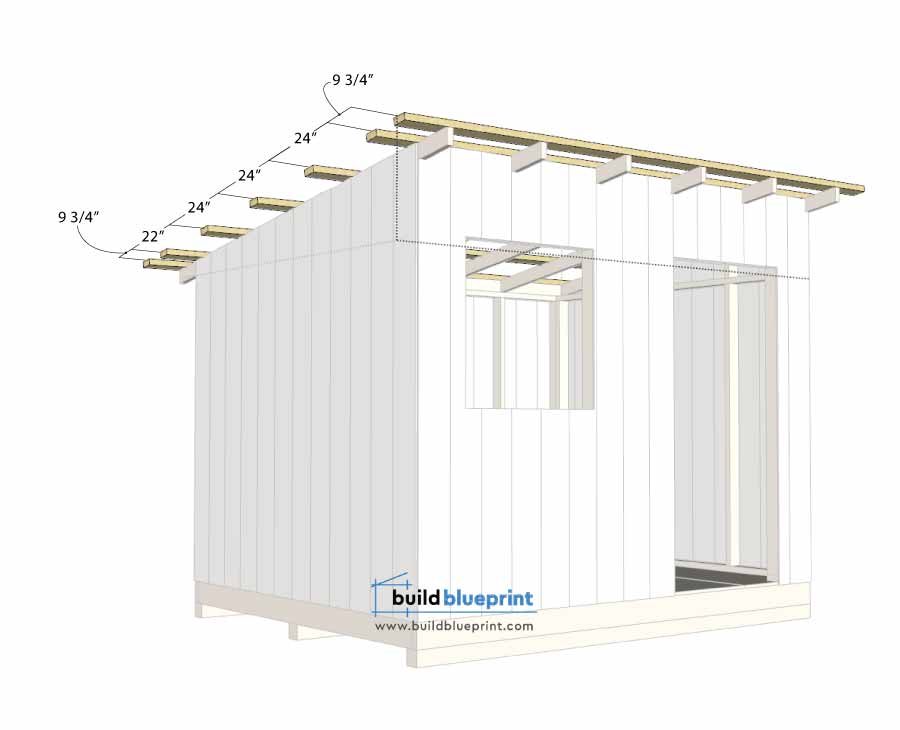
Measure and cut 2×4 lumbers to size, ad them in-between the purlins as blockings.
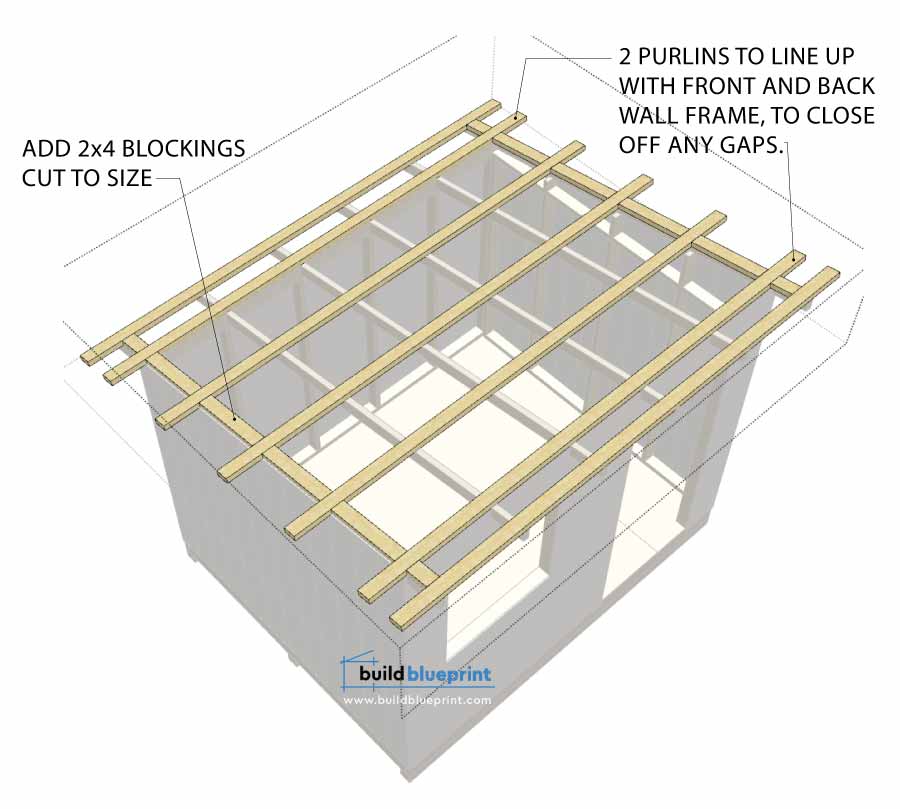
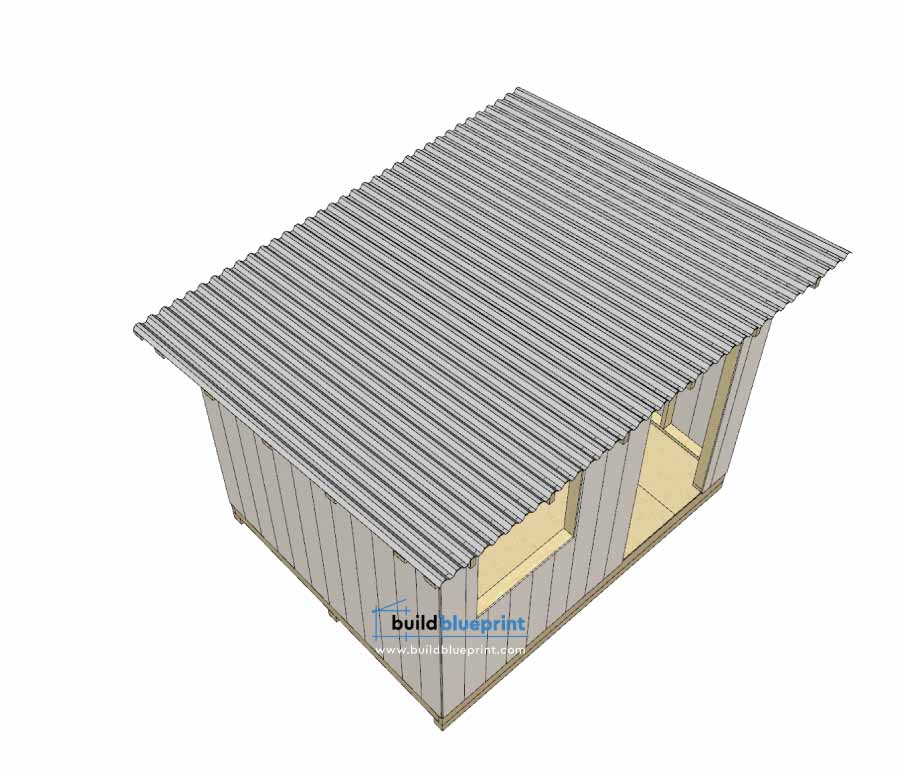
Finally, measure and cut the corrugated metal roofing panels with an angle grinder (approximately 100SF). These panels are usually 36″ in width, so overlap them to avoid gaps or water leakage. Pre-drill 3/16″ holes every 8″, and insert 2″ screws into the purlins to secure the roofing panels.
Step 4 – Trims, Door, and Window
Measure and cut four 1×4 lumbers to 7′-11 3/4″, and four 1×4 lumbers to 6′-4 3/4″. Align and secure these trims with 2″ nails.
As for the door trim – use a 43″ long 2×6 as header trim, and two 6′-5 3/4″ long 2×4’s as frame trims.
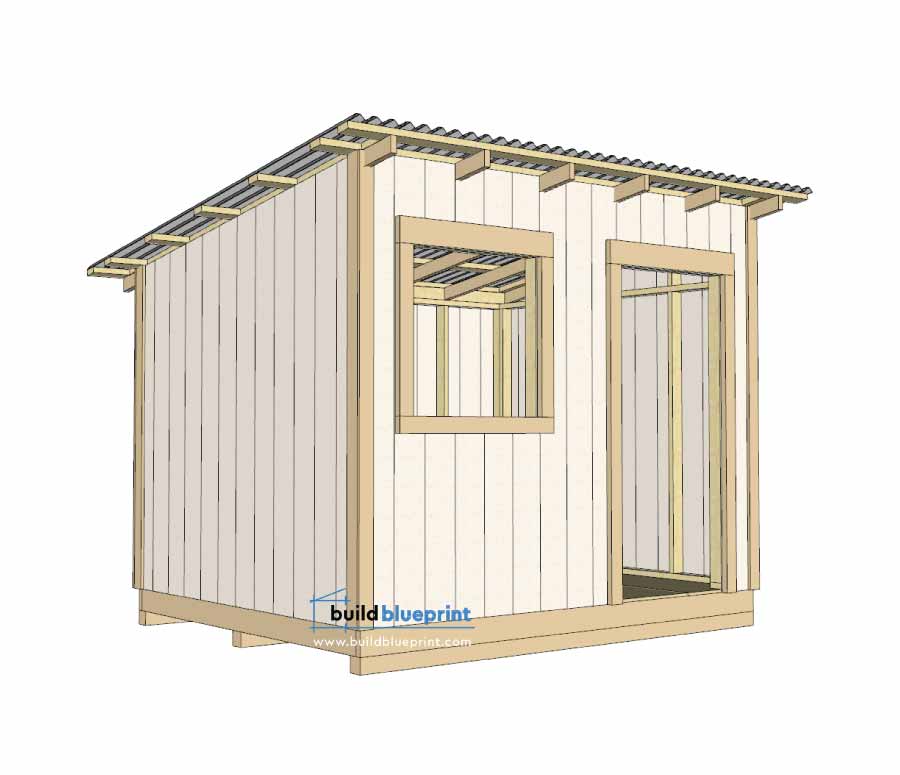
Add in the shed door and optional window. Refer to detailed Door and Window plans here:
Shed Single Door Plan
Shed Window Plan
Step 5 – Paint
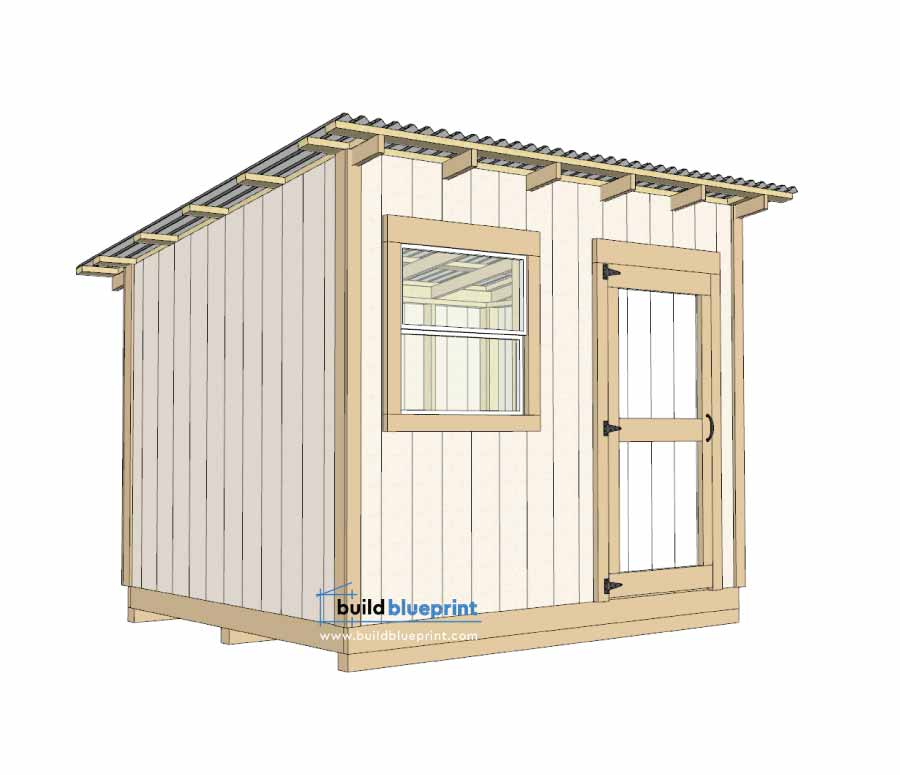
Your 8×10 lean-to shed is complete! Go ahead and get creative, paint the masterpiece you’ve just created.
First, wipe off any dirt or dust off the T1-11 siding surface. Prime the siding with a heavy acrylic primer, a single thorough coat will do the job. It’s best to use a small brush to fill in the grooves and corners first, and then use a larger roller to cover up the flat areas. Let it sit and dry. Then apply two coats of exterior grade acrylic paint, allow enough time between coats to completely dry.
