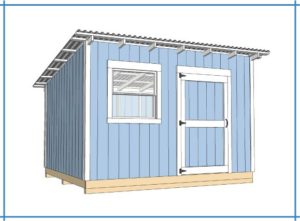
An unanchored shed is a liability the first time a serious storm rolls through. Sheds on skids or concrete blocks are not attached to the ground by default — they simply sit on top of the foundation under their own weight. In a strong enough wind event, that’s not enough. Sheds have been known to shift several feet, tip over, or in extreme cases become airborne, causing damage to the structure, whatever is inside it, and anything nearby it lands on.
Anchoring is one of the most skipped steps in DIY shed building, mostly because it happens at the very end of a long project when builders are eager to call the job finished. It’s also one of the cheapest and fastest steps in the entire build — most anchor kits cost under $100 and take an hour or two to install. This guide covers when anchoring is required, which method to use for your specific foundation type, and how to install each one correctly.
If you haven’t yet decided on a foundation type, see our shed foundation options guide first — your foundation choice determines which anchoring method applies to your build.
Do You Need to Anchor Your Shed?
In most US jurisdictions, anchoring is a code requirement for sheds on non-permanent foundations — gravel pads, skids, and concrete deck blocks — regardless of whether the shed itself requires a building permit. Wind uplift resistance is treated as a safety issue separate from the general permitting process, and many counties reference it directly in their accessory structure requirements.
Anchoring matters more in some situations than others, but it’s worth doing on every shed build regardless of region:
- Hurricane and coastal zones: Anchoring is not optional here. Wind loads in these areas are high enough that an unanchored shed is a genuine hazard, and most local codes mandate specific anchor ratings for accessory structures.
- Tornado Alley and severe storm regions: High wind events are frequent enough that anchoring should be treated as mandatory, even where it isn’t explicitly required by code.
- Open, exposed sites: A shed sitting in an open field or on top of a hill catches significantly more wind than one tucked against a house or a wind-blocking fence line. Site exposure matters as much as regional climate.
- Larger, lighter sheds: A large shed with a lightweight roof (like a shed with just a plywood roof deck and no heavier finish) has more surface area for wind to catch relative to its weight, making it more prone to uplift than a smaller or heavier structure.
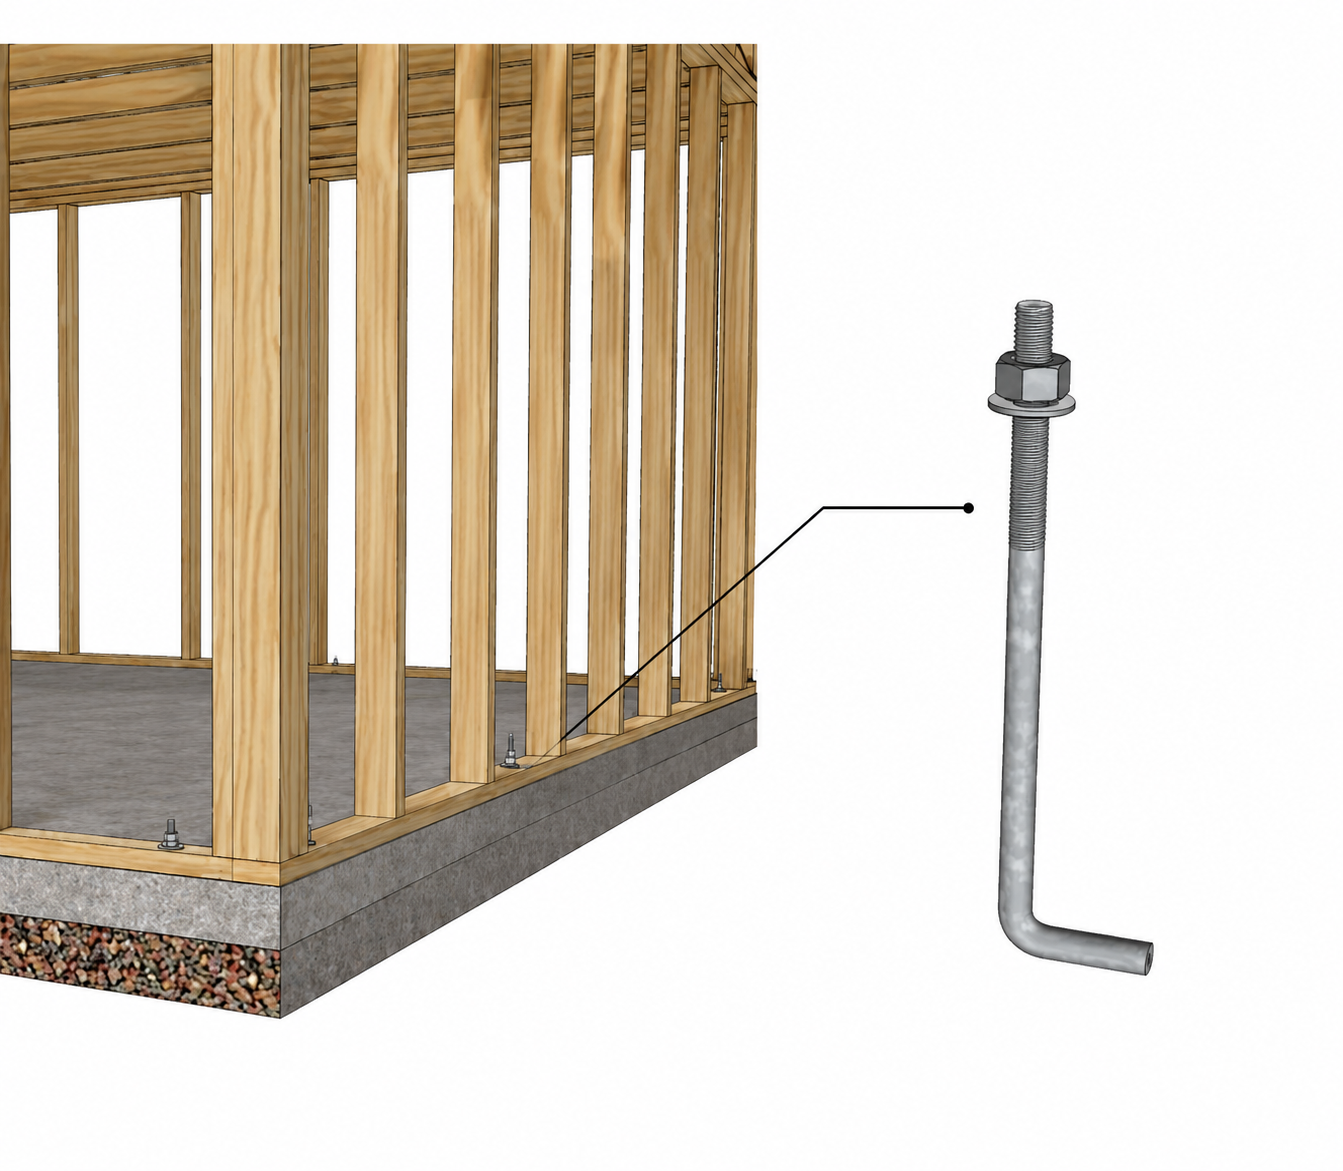
- Sheds on skids or concrete blocks specifically: Since neither foundation type physically attaches the shed to the ground, both require a separate anchoring system. A shed on a poured concrete slab, by contrast, is typically bolted directly to the slab with anchor bolts embedded in the concrete — a different (and generally more secure) connection method covered briefly at the end of this guide.
Check your county’s specific requirements before building — some jurisdictions specify a minimum number of anchors per shed size, or a minimum wind rating the anchoring system must meet. See our permit guide for how to find your county’s specific building department and ask.
Understanding Wind Uplift on a Shed
Wind doesn’t just push against a shed — it also creates lift, similar to how air moving over an airplane wing generates lift. As wind flows over and around a shed roof, it creates a pressure difference that pulls upward on the structure. This uplift force is strongest at the roof edges and corners, which is why anchor points are typically concentrated near the corners of the floor frame rather than spread evenly along the walls.
The heavier and lower-profile a shed is, the less it’s affected by uplift. A tall, lightweight shed with a large roof overhang catches more wind and generates more uplift force than a low, compact, heavier structure. This is worth keeping in mind if you’re designing a shed for a particularly windy site — a simpler roofline with a smaller overhang reduces uplift risk somewhat, though anchoring is still the primary defense regardless of design.
Anchoring Method 1: Ground Anchor Straps (Auger Anchors)
Ground anchor straps — sometimes called auger anchors or earth anchors — are the most common anchoring method for sheds on gravel pads or skids. They consist of a helical steel auger that screws into the ground like a large corkscrew, paired with a galvanized steel strap that connects the buried auger to the shed’s floor frame.
What you’ll need
- Auger ground anchors (typically 30–48 inches long, depending on soil type and local wind requirements)
- Galvanized anchor straps or cable kits designed to pair with your specific auger anchors
- A steel rod or auger driver handle (often included with anchor kits) to twist the auger into the ground
- A drill with a socket adapter, if using a power auger driver attachment
- Lag screws or bolts to attach the strap to the shed’s floor frame
A complete kit — 4 to 6 auger anchors with straps — typically costs $50–$120 depending on anchor length and strap quality. This is one of the least expensive steps in the entire shed build relative to the protection it provides.
Installation steps
- Determine anchor positions. Place one anchor near each corner of the shed floor frame, and add additional anchors along longer walls if your shed exceeds about 10 feet on any side, or if your local code specifies a minimum anchor count for your shed size. Most shed anchor kits include enough anchors for a standard 4-corner installation; larger sheds may need a second kit.
- Position each anchor 6–12 inches out from the shed’s floor frame edge, angled slightly toward the shed rather than straight down. This angle improves the anchor’s holding power against the upward and outward pull generated by wind uplift.
- Twist the auger into the ground using the driver handle, working it in a clockwise direction until the full length of the auger is buried and the eye or loop at the top sits at or just below grade. In firm soil, this typically takes a few minutes of steady turning per anchor. In rocky or very hard soil, a power drill with a socket adapter designed for auger installation makes the job considerably faster.
- Attach the strap to the anchor’s eye or loop according to the manufacturer’s hardware — this is usually a simple bolt or clevis pin connection.
- Run the strap up to the shed’s floor frame and secure it to the rim joist or floor frame with lag screws sized to the strap manufacturer’s specifications. Pull the strap taut before final tightening — there should be no slack in the connection between the anchor and the floor frame.
- Repeat at each anchor position, then do a final visual check that all straps are taut and securely fastened at both ends.
Soil considerations
Auger anchors perform differently depending on soil type. In firm clay or well-compacted soil, a standard 30–36 inch auger anchor provides solid holding power. In loose, sandy, or very soft soil, you may need longer anchors (42–48 inches) or additional anchors to achieve the same holding strength, since the auger’s threads have less surrounding material to grip. If you’re unsure about your soil’s holding capacity, err toward the longer anchor option — the cost difference is minor compared to the protection gained.
Anchoring Method 2: Concrete Deadman Anchors
A concrete deadman anchor is a buried concrete block or poured concrete mass connected to the shed’s floor frame by a cable or heavy strap. Unlike an auger anchor, which relies on soil friction along its threads, a deadman anchor relies on the sheer mass and burial depth of the concrete to resist being pulled out of the ground. This method is more labor-intensive to install but provides very strong holding power, particularly in loose or sandy soil where auger anchors underperform.
What you’ll need
- Precast concrete blocks (40–80 lbs each) or materials to pour your own concrete deadman blocks
- Galvanized cable or heavy-duty strap rated for outdoor use
- Cable clamps or a strap tensioning hardware kit
- A shovel for digging the burial trench
Installation steps
- Dig a trench at an angle extending away from each corner of the shed, roughly 18–24 inches deep at the buried end, sloping up toward the surface near the shed’s floor frame.
- Attach the cable or strap to the concrete block before burying it — threading cable through a precast block with a designated attachment point, or embedding a cable loop directly into wet concrete if you’re pouring your own blocks.
- Place the block at the bottom of the trench and backfill thoroughly, compacting the soil in layers as you fill to maximize the soil’s grip on the buried mass.
- Run the cable or strap up to the shed’s floor frame at the angle the trench was dug, and secure it to the rim joist with appropriate hardware, tensioning the cable or strap so there’s no slack.
- Repeat at each corner, or at whatever anchor spacing your local code and shed size require.
Deadman anchors are more permanent than auger anchors — removing them later (if you relocate the shed) requires digging up the buried block rather than simply unscrewing an auger. Keep this in mind if you think you might move the shed in the future; auger anchors are the more practical choice for anyone who wants the option to relocate later.
Anchoring Method 3: Tie-Downs for Sheds on Concrete Deck Blocks
Sheds built on concrete deck block foundations need a slightly different anchoring approach, since the floor frame beams rest in block notches rather than sitting on continuous skids. The most common method is a combination of galvanized tie-down straps connecting the floor frame to the deck blocks themselves, paired with the blocks being anchored to the ground beneath them.
- Attach a galvanized strap or bracket from the shed’s floor frame beam down to each concrete deck block, using fasteners rated for outdoor exposure.
- Anchor the deck blocks to the ground using shorter auger anchors driven into the soil immediately adjacent to each block, connected to the block with a strap or cable.
- Verify every connection is tight — from the shed frame to the block, and from the block to the ground anchor — since a weak link anywhere in this chain reduces the effectiveness of the whole system.
If you built your foundation using our concrete deck block foundation guide, this tie-down method pairs directly with that foundation type and uses the same block layout already established during foundation installation.
How Many Anchors Does a Shed Need?
As a general guideline — always check your local code for specific requirements — most residential sheds are anchored with a minimum of four anchor points, one at or near each corner of the floor frame. Larger sheds benefit from additional anchors along longer wall sections:
| Shed Size | Typical Minimum Anchors |
|---|---|
| Up to 8×10 | 4 (one per corner) |
| 10×12 to 12×16 | 6 (four corners plus two mid-wall) |
| 16×20 and larger | 8 or more, spaced per local code |
In high-wind or coastal regions, local code may specify a higher anchor count or a minimum-rated wind load for the anchoring system regardless of shed size. Always check with your local building department — this is a genuine safety requirement, not just a suggestion, in many of these areas.
Anchoring Sheds on a Poured Concrete Slab
If your shed sits on a poured concrete slab rather than skids or deck blocks, anchoring works differently. Rather than external ground anchors, the shed’s wall framing is typically bolted directly to the slab using anchor bolts embedded in the concrete during the pour, or expansion bolts drilled into the cured slab afterward.
Embedded anchor bolts (set into the wet concrete before it cures) provide the strongest connection and are the preferred method if you’re pouring a new slab specifically for the shed. Expansion bolts drilled into an already-cured slab are a solid alternative if the slab was poured before the anchoring plan was finalized, or if you’re building on an existing slab. Either way, anchor bolts should be placed along the bottom plate of every wall, spaced according to standard framing code — typically every 4 to 6 feet, with an anchor bolt within 12 inches of each end of every bottom plate section.
Because a slab foundation is itself a permanent, heavy mass, sheds on slabs generally have significantly better wind resistance built in from the foundation alone, even before considering the anchor bolt connection. See our foundation options guide for a full comparison of slab foundations against the other options covered in this guide.
Common Mistakes to Avoid
Skipping anchoring because the shed “feels heavy enough.” A fully built shed can feel solid and immovable while you’re standing next to it, but wind loads during a genuine storm event are far higher than the forces you can apply by hand. Weight alone is rarely sufficient protection against serious wind uplift — anchoring is what actually holds a shed down.
Installing anchors too close to the shed. Anchors placed directly under the floor frame edge, rather than angled slightly outward, have reduced holding power against the combination of upward and outward force generated by wind uplift. Angle anchors slightly away from the shed as described above.
Leaving slack in the strap or cable connection. An anchor system with slack in the line doesn’t engage until the shed has already started to move, at which point the sudden jolt when the slack runs out can damage the connection point or the floor frame itself. Every strap and cable should be taut with no slack from installation.
Using anchors that are too short for the soil type. In loose or sandy soil, a short auger anchor may not achieve adequate holding power. When in doubt, use a longer anchor or switch to a concrete deadman system, which relies on mass rather than soil friction and performs more consistently across different soil types.
Forgetting to anchor sheds on concrete deck blocks. It’s easy to assume that a shed on solid concrete blocks doesn’t need additional anchoring, but the blocks themselves are not attached to the ground any more than skids are — they simply provide a stable, level bearing surface. A shed on deck blocks needs the same ground anchoring as one on skids, connected through the tie-down method described above.
Using non-galvanized hardware. Standard steel hardware will rust quickly when installed at ground level and exposed to soil moisture. Always use galvanized or stainless steel straps, cables, and fasteners for any anchoring hardware that will be in contact with soil or exposed to the elements long-term.
Frequently Asked Questions
Do I need to anchor my shed?
In most US jurisdictions, yes — anchoring is a code requirement for sheds on non-permanent foundations like gravel pads, skids, or concrete deck blocks, regardless of whether the shed’s size otherwise requires a building permit. Even where it isn’t explicitly required by local code, anchoring is strongly recommended in any region that experiences meaningful wind events, since an unanchored shed is a genuine safety hazard in a serious storm.
What is the best way to anchor a shed?
For most residential sheds on gravel pads or skids, galvanized ground anchor straps (auger anchors) are the most practical and cost-effective method — they install quickly, cost $50–$120 for a complete kit, and provide solid holding power in most soil types. In loose or sandy soil, concrete deadman anchors provide stronger holding power at the cost of more labor to install. Sheds on concrete deck blocks need tie-down straps connecting the floor frame to the blocks, which are then anchored to the ground separately.
How deep do shed anchors need to go?
Standard auger ground anchors typically range from 30 to 48 inches long, with the full length driven into the soil until the eye or loop at the top sits at or just below grade. Deeper anchors (toward the 48-inch end) provide better holding power and are recommended in loose or sandy soil, or in regions with higher wind load requirements. Concrete deadman anchors are typically buried 18 to 24 inches deep.
Can I anchor a shed myself?
Yes. Ground anchor strap installation is a straightforward DIY task that requires no specialized skills — twisting an auger into the ground and attaching a strap to the floor frame is well within reach for a first-time builder, and a complete anchoring job for a standard shed typically takes one to two hours. Concrete deadman anchors require more physical labor (digging and backfilling a trench) but are still a manageable DIY task.
How much does it cost to anchor a shed?
A complete ground anchor strap kit for a standard 4 to 6-point installation typically costs $50–$120, making it one of the least expensive steps in the entire shed build. Concrete deadman anchor materials cost roughly the same range, though the labor time to dig and backfill trenches is higher. For a full breakdown of what a complete shed build costs including foundation and anchoring, see our shed cost guide, or use our shed cost calculator to estimate your full project budget.
Do sheds on concrete slabs need to be anchored?
Yes, though the method is different. Sheds on poured concrete slabs are typically anchored using anchor bolts embedded in the concrete during the pour, or expansion bolts drilled into the cured slab, with the shed’s bottom wall plates bolted directly to the slab. This provides a very strong connection, and combined with the mass of the slab itself, gives slab-foundation sheds excellent wind resistance overall.
Ready to Finish Your Build?
Anchoring is typically one of the last steps in a shed build, done once the floor frame is complete and before or shortly after the walls go up. Once your shed is anchored, you’re set for the long haul regardless of what the weather brings.