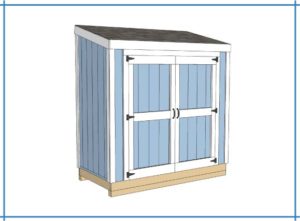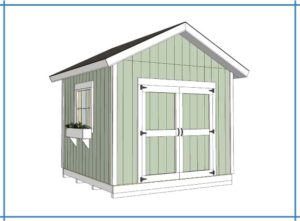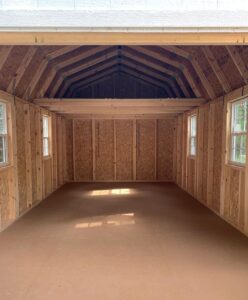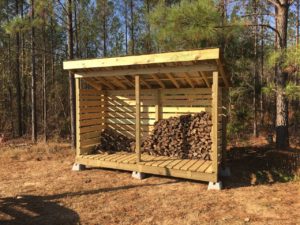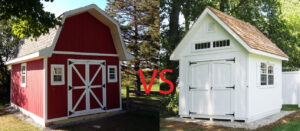
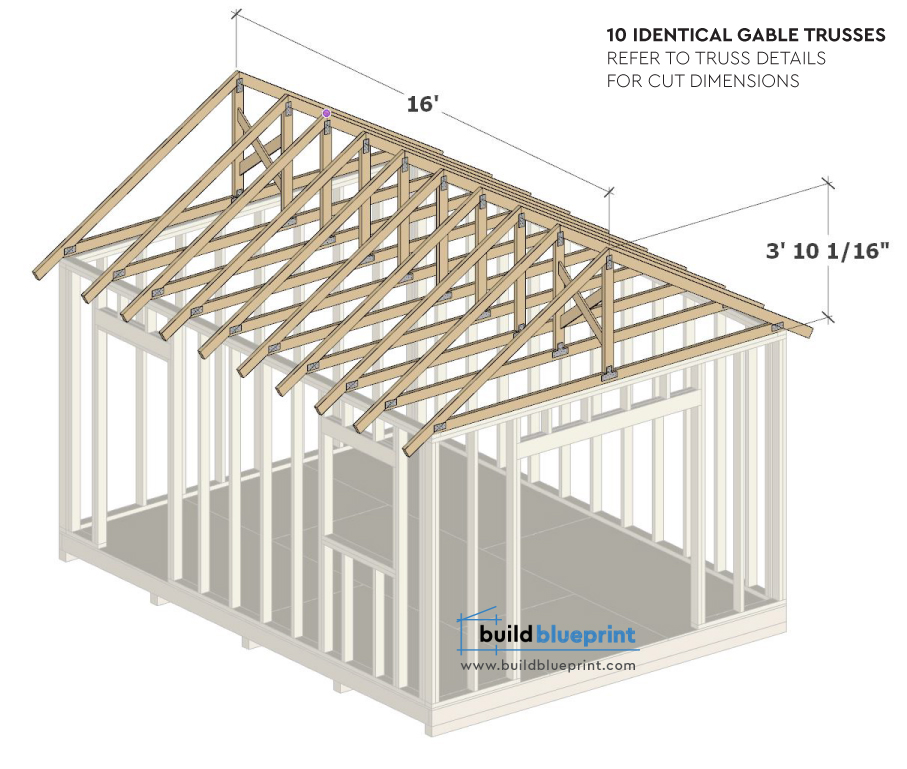
The gable roof is the most common roof style on DIY sheds — two flat roof planes meeting at a center ridge, with a triangular wall section (the gable end) at each end of the building. It’s popular because it’s straightforward to frame, sheds water and snow effectively, and doesn’t require the more complex angle cuts of a hip roof or the truss engineering of a gambrel roof.
That said, gable roof framing is usually the point in a shed build where first-time builders feel the most uncertain, mainly because of the rafter geometry involved. This guide breaks the process down into plain steps: calculating rafter length, cutting the bird’s mouth notch, setting the ridge board, and framing the gable end walls. None of it requires trigonometry if you follow the layout method below.
Before you start roof framing, your walls should be raised, plumb, square, and permanently fastened at the corners. If you haven’t finished that stage, see our wall framing guide first.
What You’ll Need
Materials
- 2×4 or 2×6 rafter lumber: Size depends on your roof span and your plan’s specification — wider spans need deeper rafters.
- 2×6 or 2×8 ridge board: Typically one size deeper than your rafters to provide full bearing at the ridge cut.
- 1×4 or 2×4 gable end studs: For framing the triangular gable end walls.
- Rafter ties or hurricane clips (optional but recommended): Metal connectors that reinforce the rafter-to-wall connection against wind uplift.
- 16d nails or 3″ construction screws
Tools
- Circular saw
- Speed square (essential for marking rafter angle cuts accurately)
- Framing square
- Tape measure
- 4-foot level
- Chalk line
- Ladder or scaffolding
Understanding Gable Roof Framing Terms
- Ridge board: The horizontal board running the length of the roof at its peak, where the top ends of the rafters from both sides meet.
- Rafter: The sloped structural board running from the top wall plate up to the ridge board, one on each side of the roof at regular intervals.
- Rise: The vertical height a roof gains over a horizontal distance, expressed as part of the roof pitch (e.g., a “6:12” pitch rises 6 inches for every 12 inches of horizontal run).
- Run: The horizontal distance a rafter covers, typically measured as half the total building width (since rafters run from the outer wall to the center ridge).
- Bird’s mouth: A notch cut into the underside of a rafter where it crosses the top wall plate, allowing the rafter to sit flush and level on top of the wall while maintaining full bearing contact.
- Overhang (tail): The portion of the rafter that extends beyond the wall line, providing roof eaves that direct water away from the walls.
- Gable end: The triangular wall section at each end of a gable roof, filling the space between the top of the straight wall and the sloped roof line.
Step 1: Determine Your Roof Pitch
Roof pitch is expressed as a ratio of rise to run — most commonly written as “X:12,” meaning the roof rises X inches for every 12 inches of horizontal run. Common shed roof pitches range from 3:12 (a relatively flat, low-profile roof) to 6:12 or 8:12 (a steeper roof that sheds snow more effectively and provides more interior headroom near the ridge).
Your specific shed plan will specify a pitch — follow it rather than choosing your own, since pitch affects rafter length calculations, ridge board height, and how much roofing material you’ll need. If you’re designing without a plan, a 4:12 pitch is a reasonable general-purpose choice for a standard storage shed: steep enough to shed water and snow effectively, shallow enough to keep rafter lengths and overall structure height manageable.
Step 2: Calculate Rafter Length
Rafter length calculation sounds intimidating but comes down to a straightforward formula once you understand the pieces involved.
Step A: Determine your run. Run is half your building’s width (measured to the outside of the wall framing), since each rafter travels from the outer wall to the center ridge. For a 10-foot-wide shed, each rafter’s run is 5 feet (60 inches).
Step B: Calculate the rafter length using the pitch. For a given pitch expressed as rise/12, the rafter length per foot of run follows a standard multiplier. Rather than working through the trigonometry by hand, most builders use a rafter length table (widely available in any framing reference, and often printed directly on the body of a framing square) or a construction calculator app, which converts pitch and run directly into rafter length. As a practical reference, here are total rafter lengths for a few common pitch and span combinations:
| Building Width | Run (per side) | 4:12 Pitch Rafter Length | 6:12 Pitch Rafter Length |
|---|---|---|---|
| 8 ft | 4 ft | ~4′ 2″ | ~4′ 6″ |
| 10 ft | 5 ft | ~5′ 3″ | ~5′ 7″ |
| 12 ft | 6 ft | ~6′ 3″ | ~6′ 9″ |
| 16 ft | 8 ft | ~8′ 5″ | ~9′ 0″ |
These figures represent the theoretical rafter length along the roof slope, measured from the ridge centerline to the outer wall edge — not yet accounting for the overhang tail, which gets added afterward. Always verify against your specific plan’s rafter dimensions rather than relying solely on a general table, since your plan accounts for your building’s exact width and any design-specific adjustments.
Step C: Add your overhang length. Add the length of your desired roof overhang (commonly 6 to 12 inches on a standard shed) to your calculated rafter length, adjusted for the roof angle. Most plans specify this total length directly so you don’t have to calculate the angled overhang addition yourself.
Step 3: Cut a Rafter Template
Rather than measuring and marking every rafter individually, cut one rafter carefully as a template, test-fit it in position, and then use it to trace identical cuts onto every remaining rafter. This ensures consistency and saves significant time.
- Mark the ridge cut at one end of your rafter stock, using a speed square set to your roof’s pitch angle to mark an accurate angled line. This cut allows the rafter to sit flush against the ridge board.
- Measure along the rafter from the ridge cut to mark the bird’s mouth location, based on your plan’s dimensions.
- Mark the bird’s mouth notch using your speed square to draw both the level cut (which will rest on top of the wall plate) and the plumb cut (which sits against the outer face of the wall plate) intersecting at the correct depth — typically notched to leave at least 3.5 inches of rafter depth remaining above the notch for a standard 2×6 rafter, though always follow your specific plan’s dimensions.
- Mark the tail cut at the end of the overhang, typically cut plumb (vertical) to match the angle of the building’s end walls, though some builders prefer a level cut on the tail for a different visual style — either works structurally as long as it’s consistent across all rafters.
- Cut the template rafter and test-fit it in position on the actual wall frame before cutting the rest. This is the single most valuable step in the whole rafter-cutting process — catching an error on one test rafter is vastly preferable to discovering it after cutting a full set.
- Once the template fits correctly, trace it onto your remaining rafter stock and cut the full set using the same three cuts (ridge, bird’s mouth, tail) in the same positions.
Step 4: Install the Ridge Board
The ridge board needs to be temporarily supported at the correct height before you start setting rafters against it — it isn’t self-supporting until rafters are attached on both sides.
- Calculate ridge board height by adding the rise (based on your pitch and run) to the height of your top wall plate. Your plan will specify this dimension directly.
- Build temporary support posts — typically a 2×4 stud braced vertically at each gable end, cut to the calculated ridge height, to hold the ridge board in place while you attach the first rafters.
- Set the ridge board on top of the temporary supports, checking that it’s level along its length and positioned at the correct height and centered over the building’s width.
- Attach the first pair of rafters — one on each side of the ridge, at one end of the building — nailing through the rafter’s ridge cut into the ridge board, and toe-nailing the rafter’s bird’s mouth into the top wall plate. Once this first pair is securely attached on both sides, the ridge board is self-supporting at that point and the temporary support post can often be removed or adjusted as you work down the length of the roof.
Step 5: Set the Remaining Rafters
With the ridge board secured at one end, install the remaining rafter pairs at the spacing specified in your plan — typically 16 or 24 inches on center, matching or complementing your wall stud spacing.
- Mark rafter positions on the ridge board and both top wall plates, using the same on-center spacing as your walls unless your plan specifies otherwise.
- Set each rafter pair in position, nailing the ridge cut to the ridge board and toe-nailing the bird’s mouth to the top wall plate. Work in pairs — one rafter on each side of the ridge — at each marked position, rather than installing every rafter on one side first, since paired rafters help keep the ridge board straight and properly supported as you go.
- Check the ridge board for straightness periodically as you add rafter pairs, sighting down its length to catch any bow or deviation early, when it’s easy to correct.
- Add rafter ties or collar ties if your plan specifies them — horizontal boards connecting opposing rafters partway up their length, which resist the tendency of rafters to spread apart and push the top wall plates outward under roof load.
Step 6: Frame the Gable Ends
The gable ends are the triangular wall sections at each end of the building, filling the space between the top of the straight wall and the sloped underside of the end rafters.
- Determine the angle of the gable end studs — it matches your roof pitch, since the studs need to follow the same slope as the end rafters above them.
- Cut gable studs to varying lengths, each one reaching from the top wall plate up to the underside of the end rafter at that specific point along the triangle — the studs get progressively shorter as you move from the wall corners toward the peak.
- Space gable studs to match your regular wall stud layout (typically 16″ on center) for a consistent structural pattern and easier siding installation later.
- Cut the top end of each gable stud at the roof pitch angle using your speed square, so it sits flush against the underside of the rafter.
- Install a gable vent if your plan includes one — a framed opening near the peak of the gable end that allows passive airflow through the attic space, which helps regulate temperature and moisture inside the shed.
Step 7: Install Roof Sheathing
Once all rafters and gable end framing are complete, the roof structure is ready for sheathing — typically ½-inch plywood or OSB panels installed across the rafters, providing the base for your roofing underlayment and shingles or metal panels.
Roof sheathing installation, underlayment, and shingle or metal panel application are covered in detail in our separate roofing guides, since they follow directly from the framing stage covered here but involve their own distinct set of steps and considerations.
Common Mistakes to Avoid
Cutting all rafters before test-fitting the template. Always cut one rafter first, test-fit it against the actual wall frame, and confirm the bird’s mouth, ridge cut, and overhang all land correctly before cutting the full set. An error caught on the template rafter costs you one board; the same error discovered after cutting a dozen rafters costs you a dozen boards.
Undersizing the bird’s mouth notch depth. A bird’s mouth notch that’s cut too deep removes too much structural material from the rafter at its most heavily loaded point — right where it bears on the wall. Follow your plan’s specified notch depth exactly rather than eyeballing it.
Not supporting the ridge board adequately during installation. The ridge board has no independent support until rafters are attached on both sides at multiple points along its length. Skipping temporary support posts, or removing them too early, risks the ridge board shifting or dropping before enough rafters are in place to hold it steady.
Ignoring rafter spread. Without collar ties or rafter ties where your plan specifies them, the outward thrust of a loaded roof can gradually push the top wall plates apart over time, especially on wider spans or steeper pitches. Follow your plan’s tie specifications even though the effect isn’t visible immediately after construction.
Inconsistent gable stud angle cuts. Every gable stud’s top cut needs to match the same roof pitch angle for the studs to sit flush against the rafter above. Set your speed square once to the correct angle and use it consistently for every stud, rather than re-marking the angle by eye for each one.
Frequently Asked Questions
What is the best roof pitch for a shed?
A 4:12 pitch is a common general-purpose choice for DIY sheds — steep enough to shed water and snow effectively while keeping rafter lengths and overall building height manageable. Steeper pitches (6:12 or 8:12) shed snow more aggressively and provide more headroom near the ridge, useful if you want interior loft space, but require longer rafters and more roofing material. Always follow your specific plan’s pitch specification rather than choosing independently, since it affects every subsequent measurement in the roof structure.
How do you calculate rafter length for a shed?
Rafter length is calculated from your roof’s run (half the building width) and pitch (rise per 12 inches of run), using standard rafter length tables or a construction calculator, then adding your desired overhang length. Most shed plans provide the exact rafter length directly, which is the most reliable approach for a first-time builder rather than calculating it independently.
What is a bird’s mouth cut on a rafter?
A bird’s mouth is a notch cut into the underside of a rafter where it crosses the top wall plate, consisting of a level cut (resting on the plate) and a plumb cut (against the plate’s outer face). It allows the rafter to sit securely and level on top of the wall while maintaining full structural bearing contact at that connection point.
How far apart should roof rafters be?
16 inches on center is the standard rafter spacing for most DIY shed roofs, matching typical wall stud spacing and standard sheathing panel dimensions. Some lighter-duty or smaller shed designs specify 24 inches on center to reduce material cost, though 16″ on center is the more structurally conservative and widely used standard.
Do I need collar ties on a shed roof?
Collar ties or rafter ties resist the outward thrust that a loaded roof exerts on the top wall plates, and are recommended especially on wider spans or steeper roof pitches. Follow your specific plan’s guidance — many smaller shed designs with modest spans don’t require them, while wider or steeper-pitched roofs typically do.
Can I frame a gable roof by myself?
The individual steps — marking, cutting, and attaching rafters — are manageable solo, but installing the ridge board and the first few rafter pairs is significantly easier with a second person, since the ridge board needs to be held in position while the first rafters are attached on both sides. Once several rafter pairs are in place and the ridge is secure, the remaining rafters can generally be installed solo.
Ready for the Next Step?
Once your gable roof frame is complete and sheathed, the next stage is roofing — underlayment, shingles or metal panels, and trim. Our roofing guides pick up exactly where this one leaves off.