Get the complete Cornhole Board plan – Instant PDF download 8.5″ x 11″
PDF includes the cut list, additional diagrams and dimensions, complete step-by-step DIY instructions.
Buy Complete PDF Plan
Cornhole Board DIY Plans & Instructions
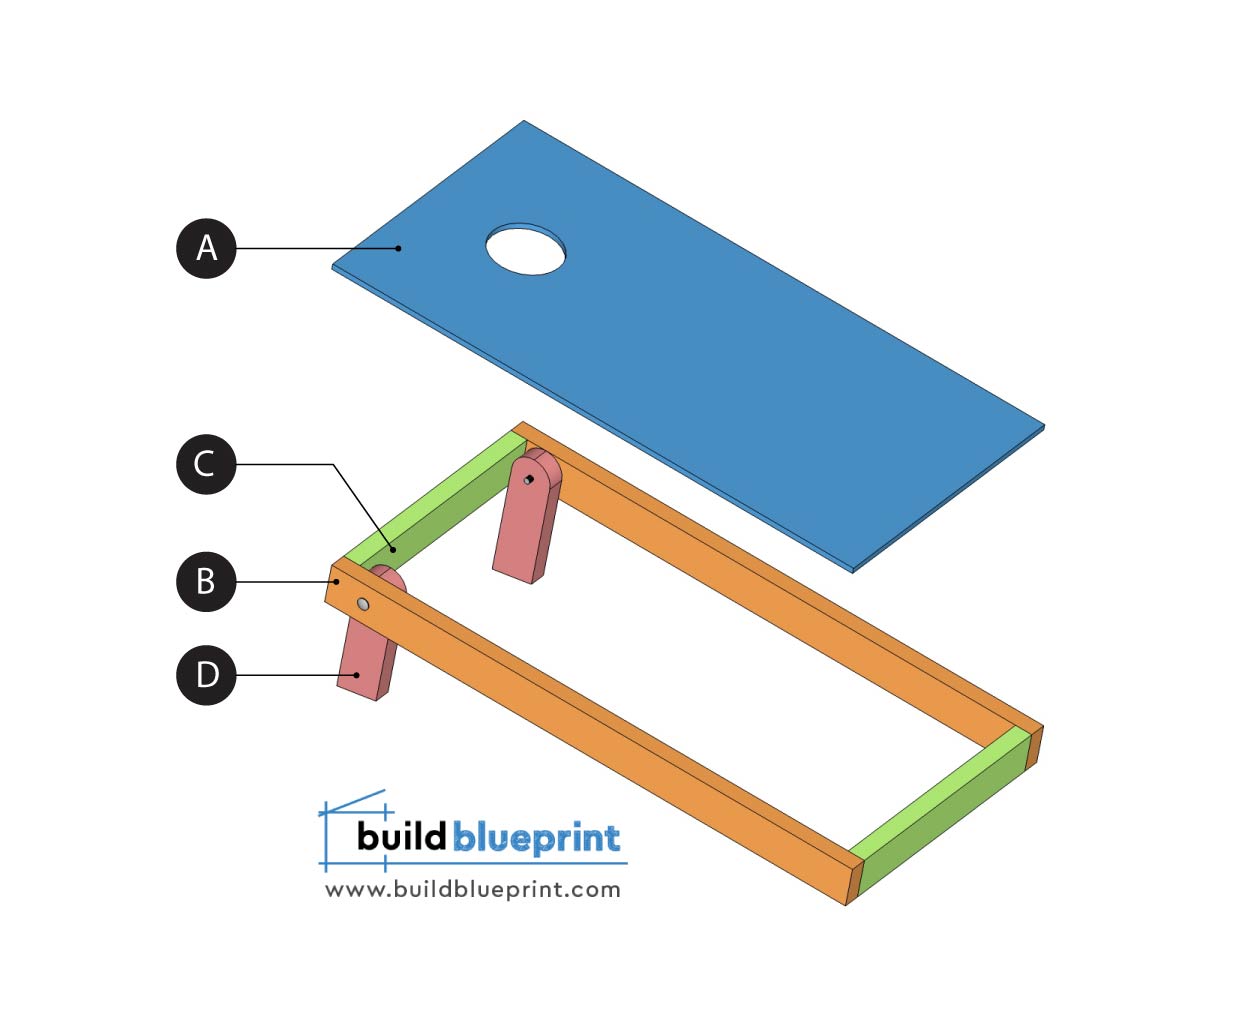
Material and Cut List
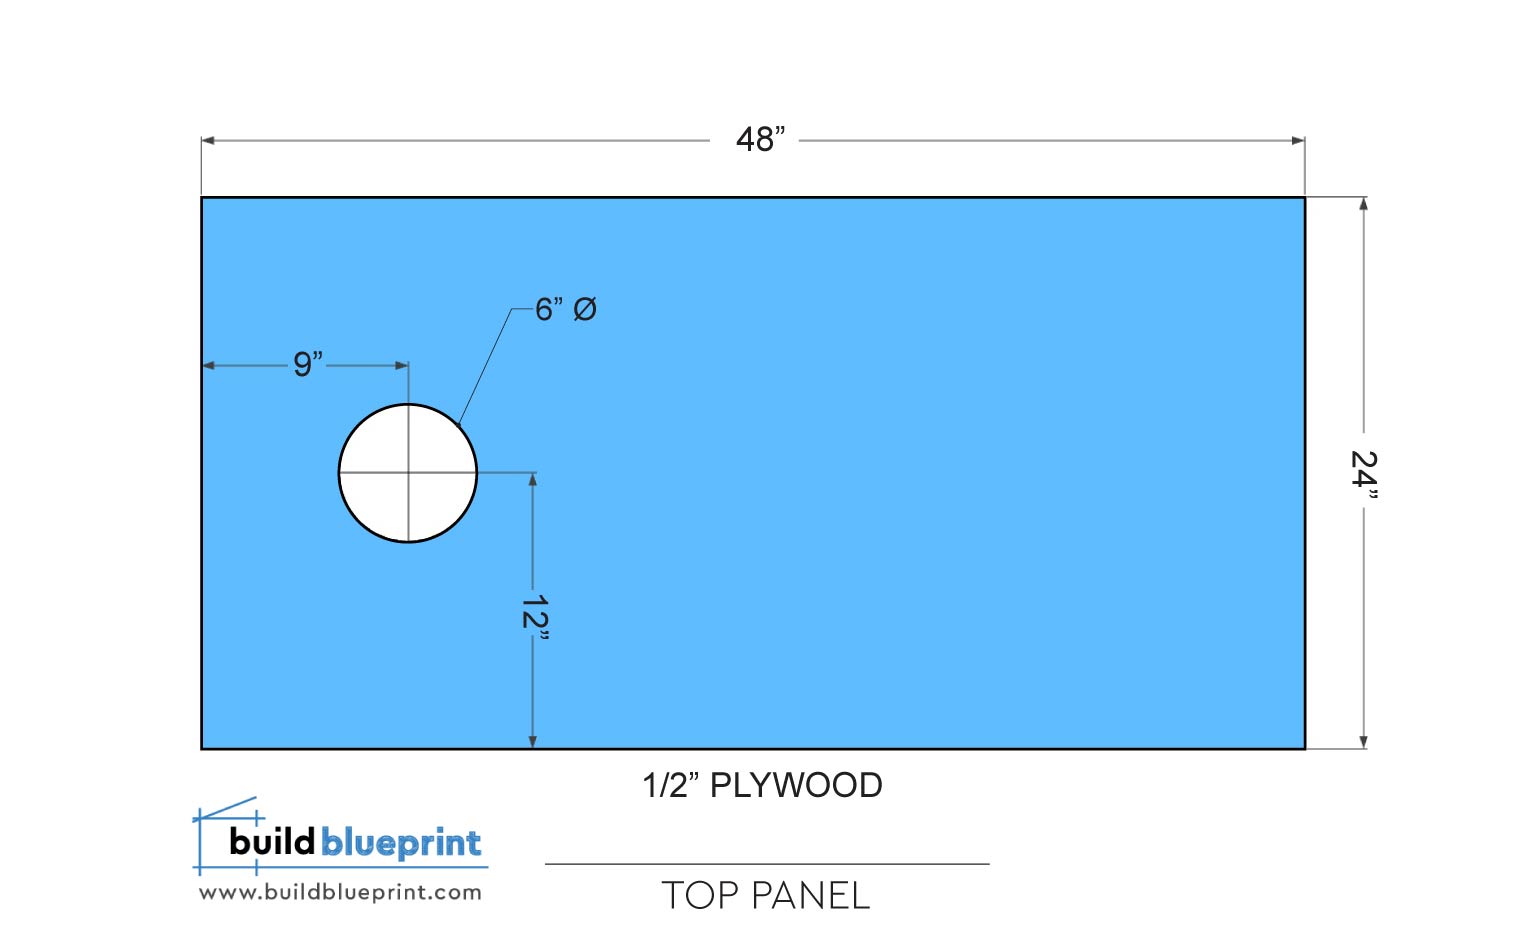
(A) 1 – 1/2″ Plywood: 48″ x 24″
(B) 2 – 2×4 Lumber: 48″
(C) 2 – 2×4 Lumber: 21″
(D) 2 – 2×4 Lumber: 11 1/2″
HARDWARE
– 1 5/8″ Wood Screws
– 2 1/2″ Wood Screws
– 3/8″ Carriage Bolts
PROJECT TOOLS
– Tape Measure
– 6″ Hole Saw or Band Saw
– Cordless Drill
– Miter Saw / Circular Saw
– 3/8″ Wood Bit
– Screwdriver
– Sandpaper or Sand Block
– Refer to the woodworking tool guide for more information
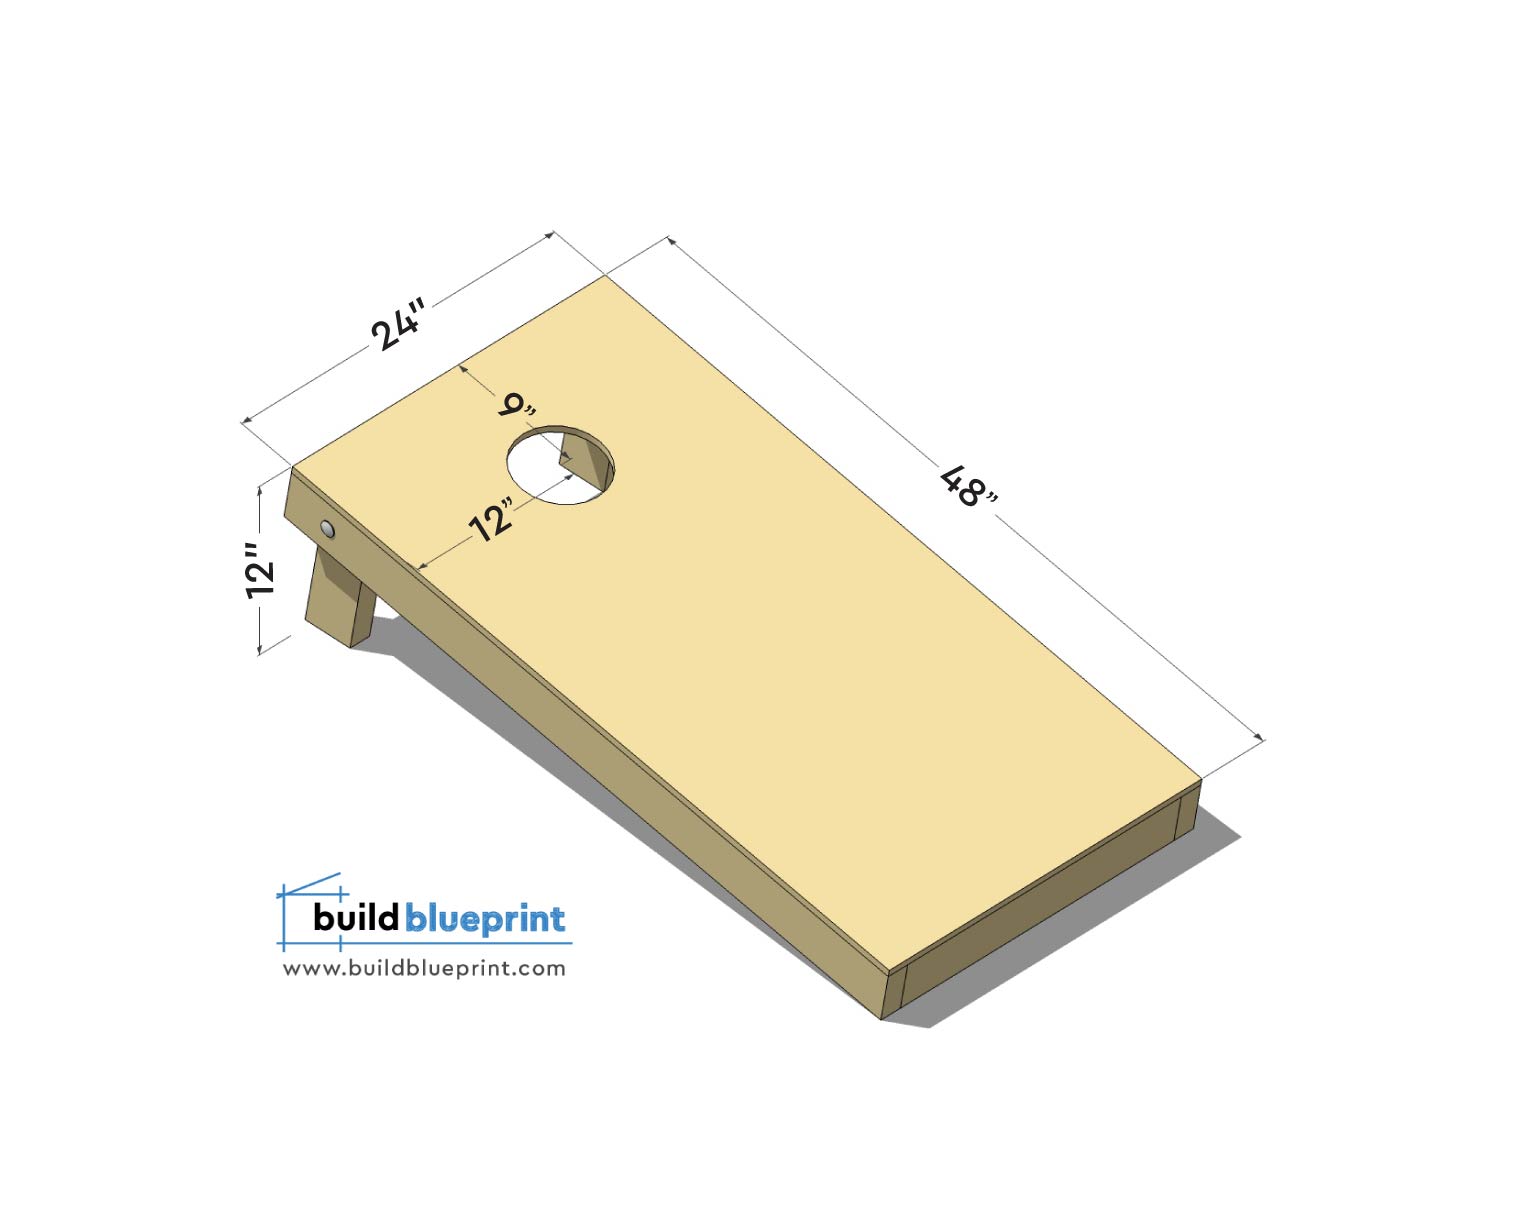
Step 1
First, cut the 1/2” plywood panel into 48” x 24”, you can use any type of 1/2” plywood material. Measure and mark the hole location, the center point is 9” from long side and 12” from short side. Then, use a 6” hole saw to cut the hole, make sure the plywood is elevated from the surface.
Step 2
Next, we will build the body frame from 2×4’s. Cut out 2 sets of 48” and 21” 2×4’s, assemble per layout illustrated below. Use 2 1/2” wood screws to secure the frame together.
Place the 1/2” plywood panel directly on top of the completed frame, then use 1 5/8” wood screws to secure the panel in place.

Step 3
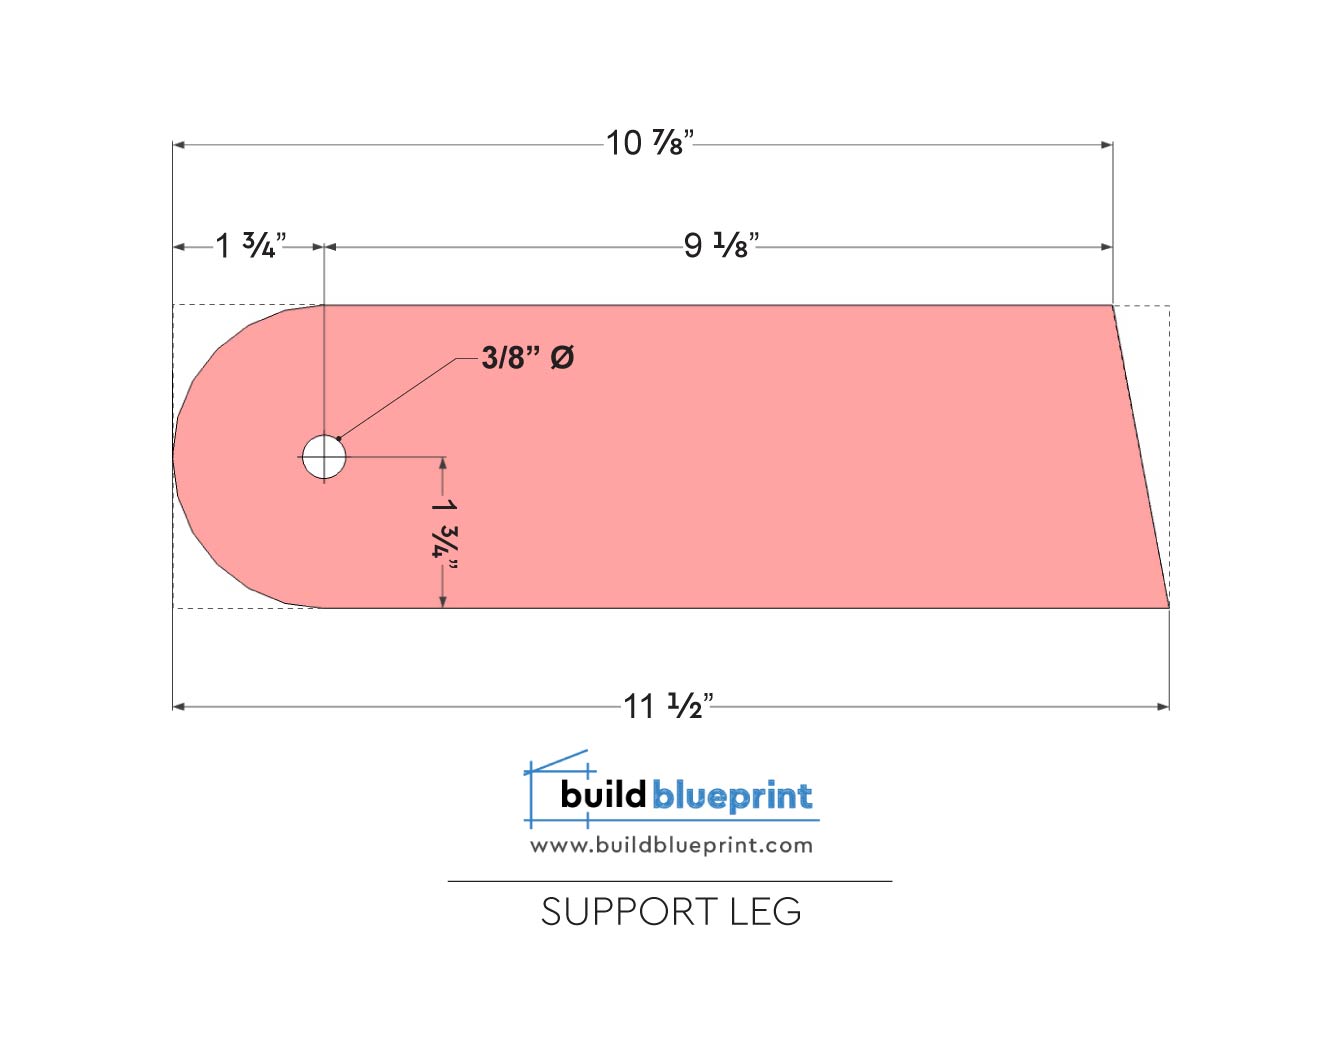
The support legs are made out of 11 1/2” 2×4’s. Measure 10 7/8” on the top side, then cut diagonally from bottom corner as illustrated below.
Next, measure 1 3/4” from short and long edge of the 2×4, drill a 3/8” diameter hole with a drill bit. Finally, cut a semi circle with 1 3/4” radius, you can use a compass or a roll of masking tape as guide. Afterwards, use a sand block to smooth out the surface.
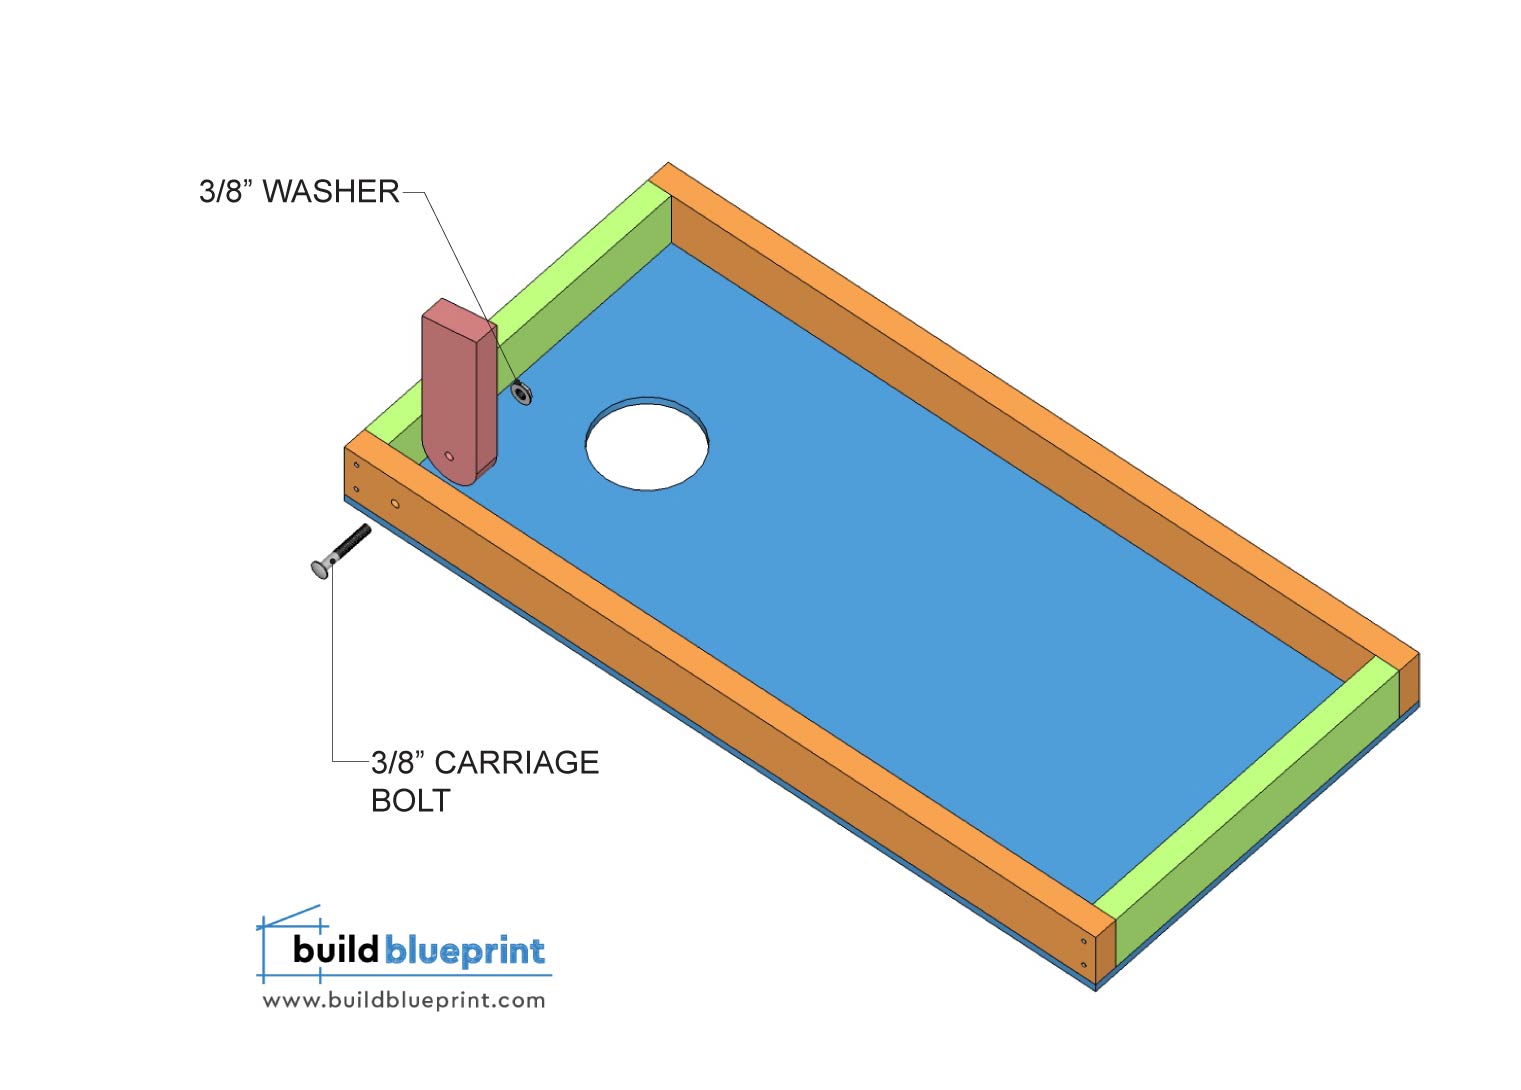
Step 4
Next, line up the holes and insert a 3/8” carriage bolt and secure on the other side with a 3/8” washer. The longer side of the leg should be facing top of the corn hole board. You should be able to rotate the leg freely.
Step 5
The overall board height should measure 12” vertically off the ground. Repeat the steps to build the second corn hole board.
When you’re done building both regulation cornhole boards, it is highly recommended to have them painted with your own design, or at least stained to extend their longevity. If you intend to use these boards exclusively outdoors, you should definitely consider applying a polyurethane protective finish on top to fight off any moisture that could damage the wood. My personal favorite is the Minwax Polyurethane Finish, which works great for both indoor and outdoor furniture.
If you’re this serious about your cornhole boards, then you’d probably also want to play with regulation bean bags, my personal favorite set of bags are the GoSports Regulation Bean Bags. These bags are regulation weight and size, and also weather resistant for outdoor use. Ideal for both recreational and professional cornhole players!