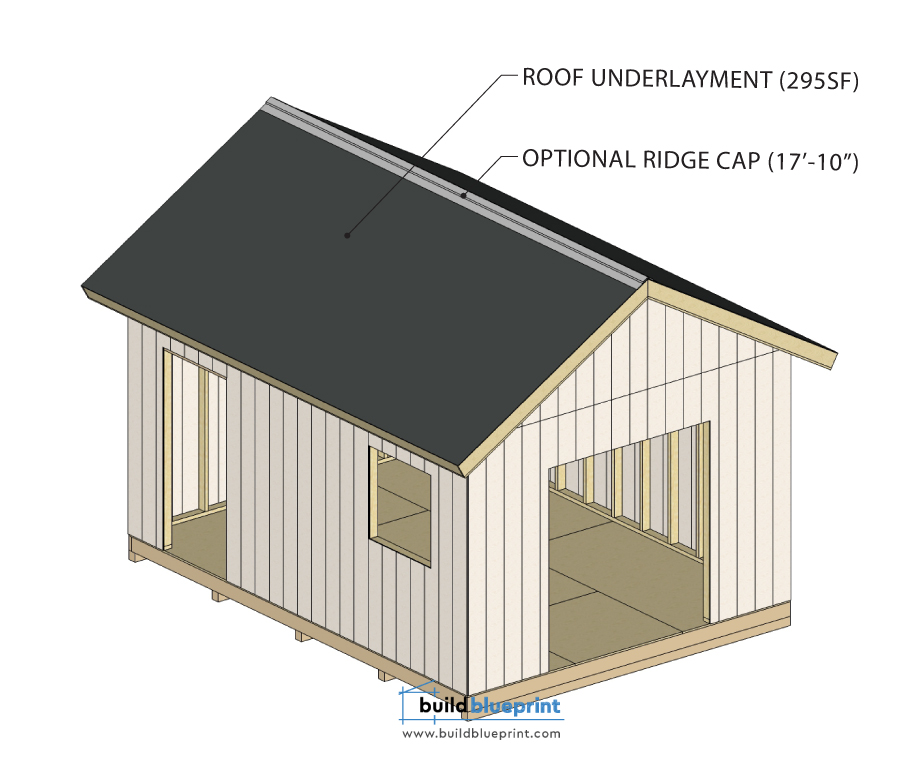
Roof underlayment is the water-resistant layer installed directly over your sheathing, before shingles or metal panels go on. It’s easy to think of as a minor intermediate step, but underlayment is what protects your sheathing and rafters if shingles are ever lifted by wind, damaged by falling debris, or simply age past their effective lifespan before you get around to replacing them. It’s cheap, it’s fast to install, and skipping it or installing it poorly is one of the more common ways a shed roof develops hidden rot years before the shingles themselves show any visible wear.
This guide covers choosing between felt and synthetic underlayment, the correct overlap sequence for shedding water effectively, and how to handle the specific details at ridges, edges, and valleys. It picks up right after your roof sheathing is complete and before you install shingles or metal roofing.
What You’ll Need
Materials
- Roof underlayment: Either asphalt-saturated felt (15lb or 30lb) or synthetic underlayment — covered in detail below.
- Roofing nails or cap nails: Cap nails (with a small plastic washer under the head) are strongly preferred over standard roofing nails, since they resist tearing through the underlayment material in wind.
- Drip edge: Metal flashing installed along the eaves and rakes before or in coordination with the underlayment, depending on your specific installation sequence.
- Roofing sealant or tape: For sealing fastener penetrations and any tears or overlaps that need extra security.
Tools
- Utility knife
- Hammer or a cap-nail stapler/hammer tacker (specifically designed for underlayment installation)
- Chalk line
- Tape measure
- Ladder or roof scaffolding
Felt vs. Synthetic Underlayment
The two main underlayment options — asphalt-saturated felt and synthetic underlayment — both provide adequate water resistance when installed correctly, but they differ enough in handling and performance that the choice is worth understanding before you buy.
Asphalt-Saturated Felt (15lb and 30lb)
Felt underlayment has been the traditional standard for decades and remains a widely used, cost-effective option. The number (15lb or 30lb) refers to the historical weight per roofing square, with 30lb being the thicker, more durable, and more tear-resistant option of the two. For a shed roof, 30lb felt is generally the better choice over 15lb — the added durability is worth the modest cost difference, particularly since a shed roof may not get walked on as carefully or maintained as attentively as a house roof over its lifetime.
Felt is less expensive than synthetic underlayment, but it’s also heavier to handle, more prone to tearing in wind during installation, and more likely to wrinkle if it gets wet before shingles are installed over it. It also has less UV resistance than synthetic options, meaning it degrades faster if shingle installation is significantly delayed after underlayment goes on.
Synthetic Underlayment
Synthetic underlayment is a newer, increasingly popular option made from woven or non-woven polymer material rather than asphalt-saturated paper. It’s lighter, stronger, more tear-resistant, and handles UV and moisture exposure significantly better than felt if there’s any delay between underlayment installation and shingling.
Synthetic underlayment costs more per roll than felt, but often covers more square footage per roll (since it’s lighter and typically packaged in longer lengths), which partially offsets the higher per-unit price. For a DIY shed builder who may not complete the roofing in a single continuous work session, synthetic’s better weather resistance during the gap between underlayment and shingle installation is a genuine practical advantage.
Which Should You Choose?
For most DIY shed builds, either option performs well if installed correctly. Choose 30lb felt if you’re prioritizing lower material cost and plan to complete underlayment and shingle installation within the same day or two. Choose synthetic underlayment if you want better tear resistance during installation, expect any delay between underlayment and shingling, or simply prefer working with a lighter, easier-to-handle material. Our shed cost calculator can help you compare the total project cost difference between the two options.
Step 1: Install Drip Edge at the Eaves
Drip edge is a metal flashing strip installed along the roof’s edges that directs water away from the fascia and into the gutter (if present) rather than allowing it to wick back under the roofing materials at the edge.
The standard sequence is: install drip edge along the eaves (the horizontal bottom edges of the roof) before the underlayment goes on, so the underlayment overlaps on top of the eave drip edge. Then install underlayment. Then install drip edge along the rakes (the sloped side edges of a gable roof) on top of the underlayment. This sequence — drip edge under underlayment at the eaves, but drip edge over underlayment at the rakes — is standard residential roofing practice and directs water correctly at both types of edges.
Nail the eave drip edge along its top flange into the roof sheathing at 12-inch intervals, before rolling out your first course of underlayment.
Step 2: Install the First Course of Underlayment
Underlayment installation always proceeds from the bottom of the roof (the eave) upward toward the ridge, in horizontal courses, with each subsequent course overlapping the one below it — this ensures that water running down the roof surface always flows over an overlap rather than into one.
- Position the first roll along the eave edge, overlapping the drip edge you installed in Step 1 by at least a few inches.
- Unroll the underlayment horizontally across the full width of the roof plane, keeping it straight and wrinkle-free as you go. A helper makes this step considerably easier on a wider roof.
- Fasten the underlayment using cap nails or a hammer tacker, spaced according to the manufacturer’s specification — typically every 12 inches along the edges and in a grid pattern across the field, with more fasteners used in higher-wind regions.
- Trim excess material at the rake edges using a utility knife, leaving a small overhang (an inch or so) that will later be covered by the rake drip edge.
Step 3: Continue Courses Up the Roof With Proper Overlap
Each subsequent course overlaps the course below it, working up the roof toward the ridge.
- Horizontal overlap (between courses): Overlap each course by at least 2 inches over the course below it for felt, or per the manufacturer’s specification for synthetic underlayment (often similar, though some synthetic products specify slightly different overlaps — check the product’s printed guidelines, which are usually marked directly on the material as an overlap guideline line).
- Vertical overlap (between rolls in the same course): Where one roll ends and the next begins along the same horizontal course, overlap by at least 6 inches for felt, or per the synthetic manufacturer’s specification.
- Stagger vertical overlaps between courses, similar to staggering joints in roof sheathing, so that vertical seams from one course don’t align directly with vertical seams in the course above or below.
Continue this process, course by course, until you reach the ridge.
Step 4: Handle the Ridge
At the ridge, underlayment from both sides of the roof needs to meet and overlap correctly to prevent water intrusion at the peak — one of the most exposed points on the roof to wind-driven rain.
- Run the underlayment from each side up and over the ridge, with one side’s underlayment overlapping the other by at least 6 inches (or per your product’s specification) directly at the ridge line.
- Fasten securely along the ridge overlap, since this area experiences more wind exposure than the flat field of the roof.
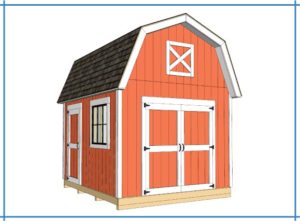
On a gambrel roof, apply the same ridge treatment at the top peak, and also pay close attention to the break point where the steep and shallow slopes meet on each side — this transition line should be treated with the same care as a ridge, with adequate overlap carrying underlayment across the angle change without any gap.
Step 5: Install Rake Drip Edge
Once underlayment installation is complete across the full roof, install drip edge along the rake (sloped side) edges, on top of the underlayment — the reverse order from the eave edges, where drip edge went on first.
Nail the rake drip edge through the underlayment into the sheathing and rafter framing at 12-inch intervals, overlapping sections of drip edge by a few inches where multiple pieces are needed to cover a longer rake edge.
Special Considerations for Different Roof Styles
Gable Roofs
A standard gable roof has straightforward eave and rake edges with a single ridge line — the underlayment process described above applies directly with no additional complications.
Lean-To Roofs
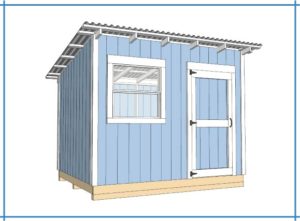
A lean-to roof has no ridge to manage, since it’s a single sloped plane. Where a lean-to attaches to an existing structure, pay particular attention to the high-side connection at the ledger board — underlayment (and later, flashing) needs to tie into the existing structure’s weather barrier correctly to prevent water intrusion at that connection point, which is one of the more vulnerable spots on an attached lean-to design.
Gambrel Roofs
A gambrel roof has two ridge-like transitions to manage on each side — the break point between the steep and shallow slopes, and the true ridge at the very top. Both need the same careful overlap treatment described in Step 4, since both represent a change in roof angle where water flow direction shifts and extra protection is warranted.
Common Mistakes to Avoid
Installing courses from the top down instead of the bottom up. Underlayment must always be installed starting at the eave and working up toward the ridge, so each course overlaps the one below it. Installing in the reverse order creates overlaps that direct water into the seam rather than over it — effectively guaranteeing leaks.
Insufficient overlap between courses or rolls. Skimping on overlap distance to stretch material further is a common shortcut that compromises the entire point of underlayment. Follow the minimum overlap specifications (typically 2 inches horizontal, 6 inches vertical for felt) exactly.
Using standard nails instead of cap nails. Standard roofing nails can pull through underlayment material in wind, especially felt, which tears more easily than synthetic products. Cap nails, with their small plastic washer, distribute the holding force over a larger area and resist pull-through significantly better.
Installing drip edge in the wrong sequence. Eave drip edge goes on before underlayment; rake drip edge goes on after underlayment. Reversing this sequence at either edge can direct water behind the drip edge flashing rather than over it.
Leaving underlayment exposed to weather for extended periods. While synthetic underlayment in particular is designed to handle some UV exposure, no underlayment product is meant to serve as a permanent roofing surface. Complete shingle or metal panel installation as soon as reasonably possible after underlayment goes on, rather than leaving it exposed for weeks.
Not stapling or nailing frequently enough in windy conditions. Underlayment that’s under-fastened can lift and tear in wind before shingles go on top to hold it down permanently. In windier conditions or if there will be any delay before shingling, use a tighter fastening pattern than the minimum specification to keep the material secure in the interim.
Frequently Asked Questions
Do I need underlayment under metal roofing on a shed?
Yes. Underlayment is recommended under metal roofing just as it is under asphalt shingles, since it provides a secondary water barrier if the metal panels are ever damaged, and it also helps prevent condensation from directly contacting the underside of metal panels, which can occur due to temperature differences between the metal and the roof interior. Some synthetic underlayment products are specifically formulated with additional heat resistance for use under metal roofing — check the product specification if you’re planning metal panels.
Is synthetic underlayment better than felt for a shed roof?
Synthetic underlayment offers better tear resistance, UV resistance, and moisture handling than traditional felt, making it a good choice if there may be any delay between underlayment and shingle installation, or if you simply prefer a lighter, easier-to-handle material. Felt remains a cost-effective, well-proven option for builders who plan to complete underlayment and shingling within the same work session and want to minimize material cost.
How much overlap do you need for roof underlayment?
Standard overlap is at least 2 inches horizontally between courses and at least 6 inches vertically where rolls meet within the same course, though always check your specific product’s printed specification, since some synthetic underlayment products specify slightly different overlap distances marked directly on the material.
Do you install drip edge before or after underlayment?
Both, at different edges. Drip edge goes on before underlayment along the eaves (bottom edges), so the underlayment overlaps on top of it there. Drip edge goes on after underlayment along the rakes (sloped side edges), sitting on top of the underlayment at those edges. This sequence directs water correctly at both edge types.
What weight felt should I use for a shed roof?
30lb felt is generally the better choice over 15lb for a shed roof, offering meaningfully better tear resistance and durability for a modest additional cost. 15lb felt is lighter and cheaper but more prone to tearing during installation and offers a thinner overall moisture barrier.
Can I leave underlayment exposed without shingles for a while?
Most underlayment products can tolerate some UV exposure before shingle installation, but the tolerance varies significantly by product — synthetic underlayment generally handles longer exposure periods better than felt. Check your specific product’s UV exposure rating (often listed in days, commonly ranging from 30 to 180+ days depending on the product), and plan to complete shingle or metal roofing installation within that window regardless of which underlayment type you choose.
Ready for the Next Step?
With underlayment installed and drip edge in place at both eaves and rakes, your roof is fully weatherproofed against short-term exposure and ready for shingles or metal panels.